Applying vinyl to wrap a vehicle is the “fun” part of the job, but requires no less attention to detail – probably even more – than the planning and preparing we discussed last month.
APPLICATION TECHNIQUES
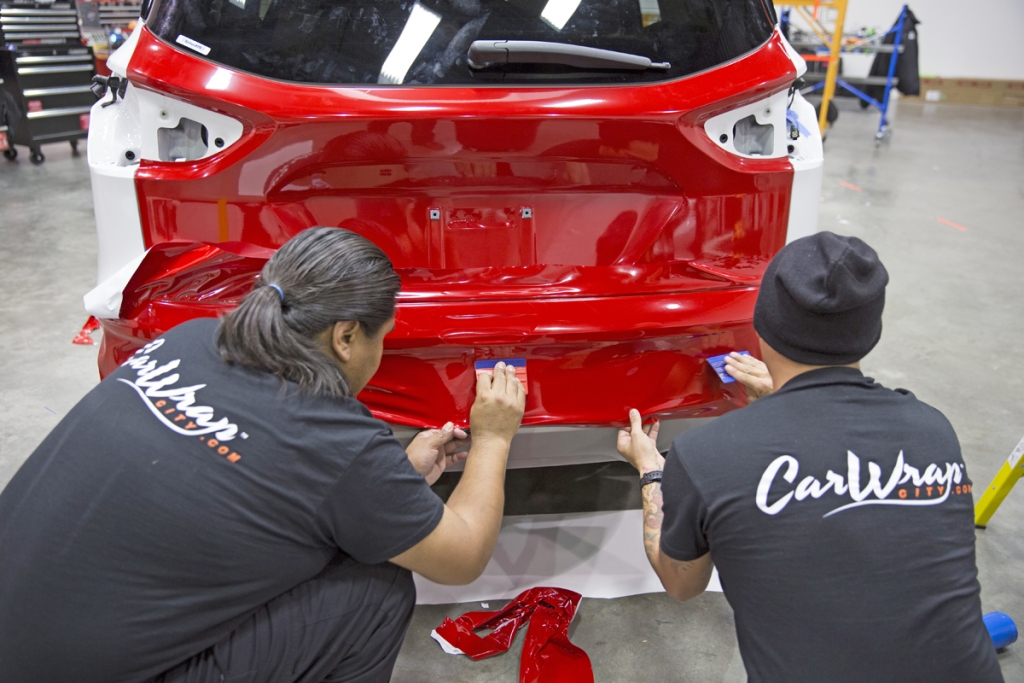
Craig Campbell, graphics products market manager for ORAFOL and author of the book Vehicle Wrapping (available from Amazon.com), suggests starting with the panel for the rear portion of the driver’s side of the vehicle. Take your printed and laminated vinyl and peel back the release liner from the top, all the way across and down 3-4 in. Position and reposition the graphic by tacking it down until level, then press against the middle of the vinyl while pulling down from the bottom with the other hand. While still pressing against the graphic, pull the liner down another 4-6 in. Now use a squeegee, starting in the middle of the graphic and on a flat portion of the vehicle, to smooth the vinyl down in place, moving outward. Use consistent pressure and motion to avoid forcing excess vinyl to the edges. Once the entire graphic is in place, turn the squeegee over and move back all the way across the graphic, maintaining the same level pressure. Once this “baseline” as Craig calls it, is established, all of the other panels can be installed.
When your graphic spans the seam of a vehicle, lift the vinyl with its release liner peeled back a few inches and then squeegee it into the recessed area. Make sure to use enough pressure, maybe using your finger instead of the squeegee, to ensure the vinyl is fully applied all the way into the seam, and that no part stretches across it. Also, Craig writes, be sure to reestablish a level baseline once you have completed the seam, as some of the vinyl may otherwise become unevenly distributed.
TRIMMING
Once a panel is completely applied, use a utility knife to trim away the excess vinyl at the top edges along the body-line of the vehicle. At the bottom of the panel, wrap the vinyl inside the wheel well, then apply the panel for the lower portion of the vehicle. Trim this graphic 3-4 in. past the start of the wheel well so it will tuck under and wrap around completely. Use a squeegee to apply the vinyl until no more paint is visible. Then, as Craig writes, make four or five small vertical “relief cuts” along the wheel well that will allow the vinyl to “relax,” making it easier to wrap inside the well.
“For me, trimming is the most tedious and difficult part of doing a wrap,” said Molly Waters, senior technical specialist, Avery Dennison Graphics Solutions. “Take your time and think twice before trimming away excess vinyl or making relief cuts so you avoid any miscuts. A slight miscut can cause the paint from the vehicle to be visible and possibly ruin all of your hard work.”
POST HEATING
With the panels installed, the next step, post heating, calls for a heat gun or propane torch. Keeping the tip of the heat source 4-5 in. from the vinyl, heat all of the areas where it was stretched by more than 10%, as well as the vinyl at the edges. Con-tinue to heat the vinyl until you see it relax, which should only take a few seconds. It’s crucial to keep the heat moving back and forth over an 8-10 in. section at all times. Leaving the heat on one area for even slightly too long will burn the vinyl, forcing you to replace the entire panel. With the material now warmed, work the portions into the wheel well with gloved hands and down along the edges with a rivet brush.
Advertisement
Repeat these techniques until all the panels are installed, trimmed and heated. Once you’ve mastered the process, snap some pics of your best projects and enter them in our Vehicle Graphics Contest. The details and entry form are on signweb.com and the deadline is July 14, so get wrapping and snapping!


 Tip Sheet3 days ago
 Business Management2 weeks ago
 Women in Signs2 weeks ago
 Real Deal4 days ago
 Editor's Note1 week ago
 Benchmarks16 hours ago
 Line Time2 weeks ago
 Product Buying + Technology1 week ago