Metal Fabrication
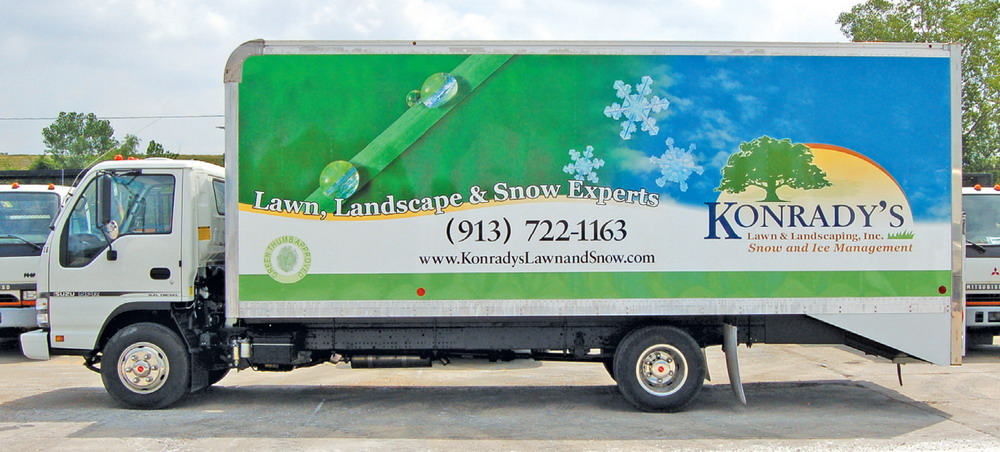
Box Truck Boogie
Even the simplest vehicle wraps present challenges.
Published
14 years agoon
Rob Ivers owns Rob Ivers Inc. (Raymore, MO), a vehicle-graphics and installation company. He’s installed vinyl since 1978 and taught vinyl-graphics installation since 1993. For more information, visit www.robivers.com
Compared with other types of vehicle wraps, box trucks are the easiest. They’re smaller than trailers, flatter than cars, and complex shapes and obstructions don’t hamper graphic design or installation. Unless the box has a side door, or has been customized, you’ll find the sides mostly free of obstacles. Not many clients want perforated window film or roof graphics for box trucks, which simplifies production. And, flat-surface installations require less effort than complex curves.
The trucks themselves are ideal for many businesses; they’re large enough for equipment or deliveries, small enough for city streets, and, when wrapped, provide a powerful advertising punch. These factors create good value for the client, and make box-truck wraps an easy sell.
Tricks of the trade
For a fleeting moment, I had myself almost convinced that box-truck graphic installations were easy. But, they do present some unique challenges. Box trucks’ rear, roll-up doors provide most of them — and a good topic for this month’s column. Rear roll-up doors are generally the dirtiest part of any truck, so, let’s start with cleaning.
I’m a stickler for efficiency, and these doors required some analysis. The filthier a vehicle is, the wetter it must be for cleaning. However, when a truck or trailer with rivets and seams gets soaking wet, moisture accumulates behind those rivets and seams. When this happens, vinyl doesn’t stick. The main surface can be dried with towels, but waiting for rivets and seams to dry requires at least 24 hours or using a propane torch to dry each and every rivet and seam. Of course, waiting 24 hours is impractical in most cases.
AdvertisementA weed burner (read: flame thrower) is a large propane torch and many veteran installers’ tool of choice for large-scale-graphic removals. Seemingly, a weed burner would make drying all the rivets and seams a fairly quick task. Unfortunately, not so. I’m pretty good with a weed burner, and I’ve tried using one on box trucks several times. But, the results never changed; I couldn’t dry all of the rivets and seams. You can’t tell if they’re dry until after you’ve installed the vinyl. By then, it’s too late; moisture ruins the job and requires graphics replacement. Trust me, I’ve been there and done that.
Instead, dry the rivets with a handheld, propane torch, Better yet, use two handheld torches – one for each hand. The good news is you only have to dry the rivets that will receive vinyl. The bad news? On a full wrap, that’s all of them.
Why did I move from roll-up doors to weed burners? I’m making a point: Don’t get the vehicle any wetter than necessary to get it clean. If the box truck is already soaking wet, because it’s been outside in pouring rain, you have to wait or use a torch to heat rivets and seams. But, if it’s not soaking wet and only a little dirty, don’t slop your cleaning liquids around and create more work for yourself. Use a rag that’s wet enough to clean well, but not dripping wet.
Clean as a whistle
I hope you find these three, roll-up-door cleaning tricks useful. If a roll-up back door has become extremely filthy, instead of starting with soapy water and making more mud, use a stiff pushbroom to knock off as much dirt as you can. It’s amazing how well this works.
AdvertisementIf you’re lucky, you may be able to clean the door without getting it soaking wet. Worst case, you’ll still have to get the door soaking wet to get it clean, but you’ll have 80% less dirt to remove. If you decide the door needs soaking to get clean, that still doesn’t mean you need to get the sides that wet. If the truck is in a garage already, and you can’t, or don’t want to, pull the truck outside, but still need to clean with soap and water, don’t get the entire truck and work area wet with a pressure washer. Instead, fill a 1- or 2-gallon bucket with soapy scrubbing water and confine the wet, soapy mess to a smaller area.
To rinse off the soap with the least amount of water and mess, fill a 1-gallon bucket with clean water, and push the bucket opening flat against the top of the door. Virtually no water will spill out. Then slide it side to side across the top of the door, and let just a little water out at a time. Keep going back and forth and moving lower until all the soap is gone. Use a floor squeegee to push the water into a drain or under the truck to keep your work area safe.
Finish cleaning the door with solvents to remove tar and grease, and complete the final rinse with 70% isopropyl rubbing alcohol. When you have to get something as wet to clean it as I just described, rinse it liberally with alcohol. It will help speed the drying and evaporation process.
Finally, open the door slowly until the top two panels separate by approximately 1 in. Ask one person to hold the door still, while another dries between panels two and three. The panels hold abundant liquid; make sure they’re completely dry. Then, raise the door up a little more, and dry between panels two and three. Repeat the process for all panels. Leave it completely open for a while; you may wish to follow up later to make sure it’s thoroughly dry.
I learned my lessons the hard way nearly 30 years ago. There weren’t full wraps back then, but I once bought a new set of roll-up-door graphics to replace the ones that were coming loose on every door-panel edge. I failed to dry these panel seams only once. I paid for more sets of rear graphics, roughly one for each new employee who learned as I did — even though they’d been warned. There’s something about paying for replacement graphics that really makes a lasting impression.
Advertisement
Roll-up remedies
Roll-up rear doors come in two flavors, wood and metal. Metal doors are much better and last longer. Their top- and bottom-panel edges are beveled slightly. The graphics will wear better if you make a double trim across panel joints and remove a small strip. This prevents the graphic edges from touching and rubbing as the door opens and closes. I often use a rivet brush for pressure and a little heat to help seal the edges, which works well.
Wood doors also present problems. They’re painted very thinly, and the paint flakes off sooner than you’d expect. Then, the rivets rust quickly because the paint doesn’t protect them well. When you heat vinyl to seal it over the rivets, be careful. The amount of heat that works well on aluminum sides or metal doors scorches painted wood. To avoid burning, you may have to settle for slightly loose rivets.
Trimming vinyl off wood doors also differs from metal. Set as right angles, the panel joints have no bevels. If you attempt a double cut, you’ll shave off wood on both sides. Instead, make a single cut between the two panels. I often use a rivet brush for pressure, and a little heat to help seal those edges. Rivet brushes and heat don’t help much on wood doors, but I’ll sleep better once vinyl starts to fall off because I’ll know I gave it my best shot.
At my shop, I proved a one-year warranty on graphics applied to metal, box-truck doors. If it lasts through one cycle of all four seasons and their elements, I know I’ve done my job. For wood-door graphics, I’ll say tongue-in-cheek that my warranty covers 30 seconds or 30 ft. travelled, whatever comes first.
Try to persuade the client to leave the bottom panel blank. Trims are tough to perform on these areas, but, more importantly, because these panels take a lot of abuse and damage, they aren’t good for graphics. I suggest producing rear, roll-up-door graphics on two horizontal panels, which eliminates the need to overlap vinyl. It will also speed up the application. I put a roll of masking tape under the cables on each side to prop them out of my way. If they’re loose enough, I’ve seen installers hook them around the grab handles. If they weren’t loose before, they will be after that.
Bolt-cover basics
Finally, let’s address bolt covers, which resemble huge, white rivets. Not all box trucks have them; some have regular rivets, and some have none (my personal favorite). I discussed regular rivets in great detail in one of my first columns (see ST, February 2009, page 24).
Fiberglass trucks often feature six to 10 of these giant bolt covers per side. If you allow enough room and use enough vinyl, they’re usually not too difficult. I draw a circle around them with a Stabilo® pencil before I remove the liner. I apply the vinyl normally — smooth and taut with no bubbles or wrinkles. When I get close to them, I leave an area roughly 6 in. sq. around them unsqueegeed.
After I’ve applied the graphics, I make several needle holes around the button to allow air to escape. I round the square’s corners with my squeegee and slowly work the circle of vinyl in closer. I apply heat, move the squeegee in closer and repeat until tight. Quickly, before the film’s “memory” causes lifting, trim around the circular edge where the button meets the trailer. Heat and squeegee a couple more times for good measure.
Buy me a cup of coffee sometime, and I’ll tell you about the guy (a self-professed installation expert) who should’ve heeded this last paragraph before he wrinkled the faces of every celebrity featured in the “Got Milk?” campaign, which decorated several of my client’s “easy” box trucks. This snafu cost me more than $10,000 because said expert wouldn’t stand behind his incredibly poor work. Look on the bright side; you may have just saved yourself (or me) another $10,000.
SPONSORED VIDEO
Introducing the Sign Industry Podcast
The Sign Industry Podcast is a platform for every sign person out there — from the old-timers who bent neon and hand-lettered boats to those venturing into new technologies — we want to get their stories out for everyone to hear. Come join us and listen to stories, learn tricks or techniques, and get insights of what’s to come. We are the world’s second oldest profession. The folks who started the world’s oldest profession needed a sign.
You may like


Advertisement
Subscribe

Magazine
Get the most important news
and business ideas from Signsofthetimes Magazine.
Advertisement
Most Popular
-

 Tip Sheet1 week ago
Always Brand Yourself and Wear Fewer Hats — Two of April’s Sign Tips
-

 Photo Gallery3 days ago
30 Snapshots of the 2024 ISA Sign Expo
-

 Ask Signs of the Times5 days ago
Why Are Signs from Canva so Overloaded and Similar?
-

 Real Deal2 weeks ago
A Woman Sign Company Owner Confronts a Sexist Wholesaler
-

 Benchmarks1 week ago
6 Sports Venue Signs Deserving a Standing Ovation
-

 Photo Gallery3 hours ago
21 Larry Albright Plasma Globes, Crackle Tubes and More
-

 Women in Signs2 weeks ago
2024 Women in Signs: Megan Bradley
-

 Women in Signs1 week ago
2024 Women in Signs: Ashley Borell