Francis Lestingi operates Signs of Gold (Williamsville, NY) with his son, Stephen.
The final piece of our “trilogy” about installing post-mounted signs is, of course, the finial. Having illus-
trated how we prepare, detail and install posts (see ST, May 2012, page 24, and May 2013, page 24), we’re ready to explain these signature accents.
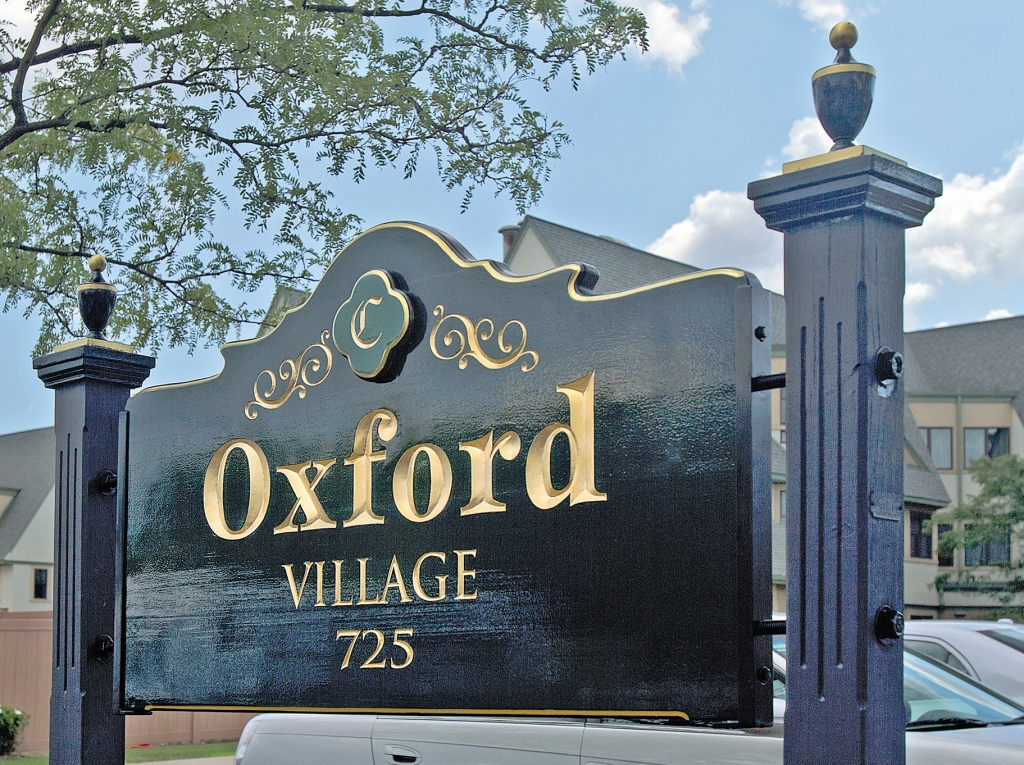
Although I’ve handcarved, molded and cast finials for special occasions, the finial we customarily use is the stately urn, made of Spanish cedar and lathed in New England. We believe this finial provides a dignified, imposing complement to our detailed posts and elegant, handcarved and gilded substrates. Your local, home-improvement store might have finials, but, invariably, they’ll be low-quality pine not suitable for exterior use. When prepared properly, cedar finials prove very durable in all exterior conditions.
In addition to the finial, we also use a cedar “cap” to cover the top of the post and complement it. Before coating and decorating the finial caps, we must soften all sharp edges. A sharp, 90º edge won’t hold paint for very long, so we first ease the edges with 60-grit sandpaper. We follow this initial, aggressive grit with a milder, 120-grit abrasive. The softening of right-angle edges pertains to any substrate: wood, HDU or plastic.
To attach the finial to the cap, we first determine the cap’s top center by drawing intersecting diagonals and drilling a hole to accommodate a ¼ x 3-in. lag screw. After we’ve inserted the lag screw into the hole, we apply yellow carpenter’s glue to the finial’s base and tighten it into place with a wrench or pliers.
Ready for decoration
After we’ve bonded the finial and cap, we start the coating process. This involves three primer coats, smoothed by 220-grit sandpaper after the first coat. The inside bottom of the cap isn’t primed or painted; during installation, silicone will adhere to the cap and post’s bare wood. To aid the coating phase, I create a bed for the finial with pegboard and bolts.
Advertisement
The finial piece “floats” on the bolts, and the bed provides a very convenient means to move and store the unit during the coatings. We follow the primer coats with two coats of bulletin-color, high-gloss black enamel, with a roughing between coats using a synthetic-steel-wool pad.
When the coatings are complete, we begin the decorating phase – gilding. I was once asked by a customer to gild an entire finial, which I foolishly did. Never again! That was a perfect example of the Shakespearian warning about “gilding the lily.” Any gilding should be done to embellish tastefully and aesthetically, not garishly.
Kaolin is key
Before applying the size (the goldleaf adhesive), we dust the finial and the upper portion of the cap with pure kaolin USP. This allows us to use size in its pure, unadulterated state by eliminating the common practice of adding paint or other pigment or foreign material. Kaolin particles are 0.0002mm in diameter, which is 1,500 times smaller than a talc particle. These infinitesimal particles dissolve in the size and allow us to see where it’s applied. It looks as though one is applying gloss black against the grey-dusted area.
In addition to keeping the size uncontaminated, and providing visibility while sizing, kaolin prevents goldleaf from adhering in unwanted spots. Simply put, kaolin prevents “shiners.” We always use slow size; it cures for 24 hours or longer because it produces a more brilliant, longer-lasting luster. For the ball on the finial, we use loose-leaf gold; for the two striped areas, we cut patent leaf to size using a paper-cutting board.
On the cap stripe, we burnish the surface with a power-tool bit sheathed with velvet-wrapped cotton balls, which is called engine turning. Because the finials’ balls and stripes are curved surfaces, light will reflect widely off the gold highlights. On flat surfaces, such as the cap stripe, engine turning captures and reflects light and causes the flat-gold surface to dazzle.
When the gilding is complete, we remove the kaolin with blue shop towels and prep-application fluid. Finally, we polished the decorated finials with liquid wax. After transporting them to the installation site on a cafeteria tray, we use silicone adhesive to attach them to the posts as a final finial touch for all to admire.
Advertisement
EQUIPMENT AND MATERIALS
Adhesives: Titebond III® carpenter’s glue, available at home-improvement stores; Bondaflex adhesive silicone, available from Chemical Concepts (Huntingdon Valley, PA), (800) 220-1966 or www.chemical-concepts.com
Brushes: White and red sable lettering quills, available at sign- and art-supply shops
Coatings: WOW!® liquid polish, from AutoTech Mfg. LLC (Grants Pass, OR), (800) 545-8624 or www.autotechmfg.com; T.J. Ronan bulletin colors, available at sign-supply stores; Rapid Prep Application Fluid®, available at sign-supply companies; Jay Cooke’s water-based sign primer, available from sign-supply shops
Finials/Caps: Post finials, from Boston Turning Works (Watertown, MA), (617) 924-4747 or www.bostonturningworks.com; post caps, from Nantucket Post Cap (Randolph, VT), (888) 758-7678 or www.nantucketpostcap.com
Gilding: Goldleaf and slow size, from Sepp Leaf (NYC), (212) 683-2840 or www.seppleaf.com; kaolin whiting, from New Directions Aromatics (Cheektowaga, NY), (800) 236-7817 or www.newdirectionsaromatics.com
Hardware: Lag screws; sandpaper; Makita drill and bit; and lag bolts, nuts and pegboard, from home-improvement stores


 Photo Gallery1 week ago
 Ask Signs of the Times1 week ago
 Paula Fargo6 days ago
 Real Deal3 days ago
 Benchmarks2 weeks ago
 Photo Gallery6 days ago
 Women in Signs1 week ago
 Women in Signs1 week ago


