Since I started Media 1 (29 years ago!), I’ve seen firsthand the sign industry’s explosive growth. Back in 1984, if you didn’t know how to drag a lettering quill loaded with 1Shot® lettering enamel across a hand-rolled, 4 x 8-ft., MDO board, you weren’t in the sign business! A toolbox full of brushes, numerous cans of sealed-over lettering enamel, an overhead projector and an Electro-Pounce™ pattern-making system were a signpainter’s trademark equipment. That’s pretty much all you needed to be in the sign business – well, that and a whole lot of artistic ability!
My, my, how things have changed!
Now, perhaps because I’m so entrenched in this particular field, I think signmakers have benefited from far-reaching technological advances more than most industries. Whether it’s automated, channel-letter benders; flatbed printers; or full-color, LED displays, equipment abounds to make a signmaker’s work much more efficient than our predecessors’ labor a generation ago.
Of course, don’t discount self-adhesive vinyl’s original impact, as well as plotters and drag-knife cutters to cut shapes from rolls of various widths. I vividly remember, in 1985, watching in amazement the first time I witnessed a Gerber IV-B 15-in., sprocket-fed vinyl plotter quickly cut perfectly sized and spaced letters in multiple colors. Of course, the user had to physically open the unit and plug in a new font module to change the typeface, but it sure beat handlettering!
After the material was cut and weeded, all you had to do was apply masking tape over the letters and squeegee them onto the surface, and they stuck! Not only did this new tool save time, but the perfection of the finished product exceeded any brush lettering I could do by hand. The coinciding introductions of self-adhesive vinyl and cutting equipment were central to our industry’s technical revolution.
Fast forward 25 years. Inkjet printing has, in large part, replaced vinyl cutting; printing equipment and related supplies can cost hundreds of thousands of dollars, but their output is nothing short of miraculous. Read on, and I’ll discuss the equipment and tools that help us run our successful vehicle-wrap business.
Advertisement
Concept creation
Several years ago, Media 1, which had already been wrapping vehicles for more than a decade, opened its Wrap This! division. With more than 60 rolling out the door every month, vehicle wraps are our specialty. But, wraps extend much further than cruising applications. Wraps are expanding into just about every corner of advertising space: walls, architectural features, furniture, boats, even airplanes!
This array of potential applications presents design and installation challenges that require specific tools to achieve a flawless end product. Let’s review some of the equipment you need to begin offering wraps to your customers.
Obviously, your designs will begin on a computer; it needs to be powerful. We currently use a battery of HP Pavilion Elite 450t computers, which are equipped with Intel Dual i7 3GB processors, 8GB of RAM and an ATI Radeon HD 4850 video card. Above all, you need a system equipped to handle large image files.
After computers, software programs are the next logical topic. We currently complete the vast majority of our wrap designs with CorelDraw® X6 and Adobe® PhotoShop® and Illustrator® CS5. Asking graphic designers which they prefer could create heated debate, but both have their good points. Adobe Illustrator works well with vector art – which is how clients usually submit art – and a lot of designers view it as more user-friendly, but many Corel users say it’s better for creating certain types of visual effects. But, in many cases, it simply boils down to designer familiarity.
Outstanding output
Once the client signs off on the artwork, the files are sent to the printers. We run two HP L25500 latex-ink printers. According to HP, the printers are rated for 5,000-8,000 sq. ft. of digital prints per month. But, much to HP’s amazement, we’ve been printing 20,000-25,000 sq. ft. per month, combined, on our machines for the past two years. When printing, we use Onyx Graphics’ Production House 10 RIP program, which translates the artwork to files that can be read by large-format printers.
Depending on your printer(s), your inks will require different drying times. Water-based latex inks dry instantly via an onboard heating element as they exit the machines, so they’re immediately ready for lamination. Conversely, prints completed on full- or eco-solvent-ink printers require significant drying time (up to 24 hours, with full solvents taking longer) before lamination. The inks need time to outgas. If a solvent-ink print is laminated before this outgassing has finished, some of those solvents will be trapped beneath the overlaminate film, and may react chemically with the film’s adhesive.
Advertisement
We’re a 3M™-certified shop, so we wrap exclusively with their products: the 180C, 480C and 1080C repositionable materials. We always cover our prints with 3M’s Scotchcal™ 8518 glossy-finish overlaminate. To topcoat our prints, we use GBC Arctic Titan 64-in.-wide, cold laminators. They apply pressure through a series of hard-rubber rollers to mechanically adhere the self-adhesive, clear media to the printed vinyl’s surface. Technically, you don’t have to laminate prints. They will normally last for several years outside without the additional UV protection afforded by the clear laminate.
However, we don’t even offer that option to our clients. After all, our shop is in Florida, and UV protection here is as important for your wraps as it is for your skin. And, regardless of how well the prints will last in exterior environments, the unprotected print is vulnerable to not only UV exposure, but gasoline spills, car-wash chemicals and abrasions, and numerous other environmental hazards also pose threats to your newly wrapped vehicle. Always laminate your prints. This will add to the wrap’s bottom line, but you’re selling your customers the peace of mind of knowing their new wraps are protected under a blanket of clear film. It’s the only way to present your product to your client.
Hands on
Now that the prints are laminated and edges are trimmed, it’s on to installation. A wide variety of hand tools is involved. For most standard jobs, we use 3M Gold, Teflon®-coated, nylon squeegees. They’re not very expensive, and they’re durable.
More advanced installs, such as those over very curved or contoured surfaces, will require a 3M Roller L hand roller to conform the wrap to body lines. For very deep contours, we use a 3M V-Cat beveled-edge, foam roller. To facilitate product handling, we also use Avery Dennison Graphics’ wrap gloves.
To apply heat, we use Milwaukee Tool heat guns to preheat the surface, and when heat is needed to smooth the film onto the surface. We think heat guns are preferable to torches because the heat is more precise and easier to control. But, whatever heatsource an installer prefers will work.
All that’s left is now is cutting and trimming your wrap. We were once proponents of No. 11 X-Acto® blades, but we’ve since switched our whole installation crew to Olfa knifes. Their stainless steel blades are much more controllable.
Advertisement
We’ve also started frequently using 3M’s new knifeless tape. Any time you cut on the vehicle’s body, you could cut the finish. Using knifeless tape completely eliminates risk. It’s a low-tack adhesive tape, roughly 3/8 in. wide. Embedded inside is a strip of what looks like dental floss. You apply the tape to the car where you want the cut before you install your vinyl wrap.
Once the wrap covers the tape, grab the end that extends past your wrap and fish out the floss lead. Holding it at a sharp angle, quickly pull the floss off the wrap. The floss cuts the wrap vinyl efficiently and cleanly. A knife doesn’t touch your client’s vehicle, and you’ve made a perfect cut. This process works extremely well for multiple-color applications too. Combine these tools with a 3M air-release tool, and you’ve got all the tools necessary to install a wrap.
Obviously, plenty of manufacturers make the products discussed. Research and experiment with different tools to discover what works best for you. If you’re new to the wrap market, get professional 3M Certification or UASG training. This is possibly the most important tool of this trade. We can’t stress enough how improper prep work and shoddy installation technique ruins the reputation of our industry. Make sure you’re confident in your abilities before selling wraps to customers.
And, above all, have fun!
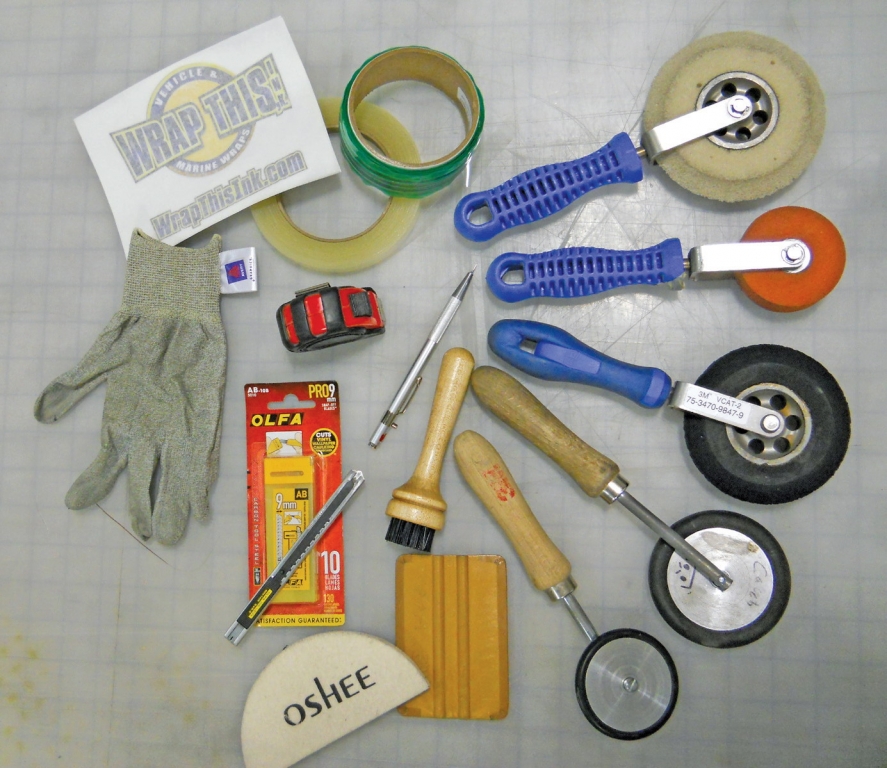
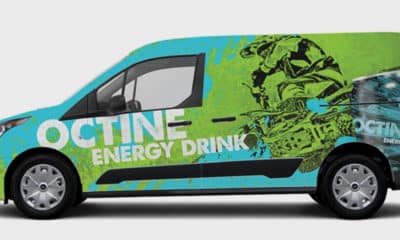


 Photo Gallery1 week ago
 Ask Signs of the Times2 weeks ago
 Paula Fargo7 days ago
 Real Deal4 days ago
 Benchmarks2 weeks ago
 Photo Gallery7 days ago
 Women in Signs2 weeks ago
 Women in Signs1 week ago