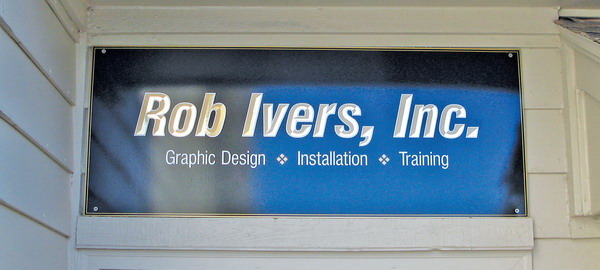
Rob Ivers owns Rob Ivers Inc. (Raymore, MO), a vehicle graphics and installation company. He’s installed vinyl since 1978 and taught vinyl-graphic installation since 1993. For more information, visit www.robivers.com
Last month, Rob discussed how he designed and produced the vinyl graphics for his shop’s new sign. This month, he addresses his application techniques.
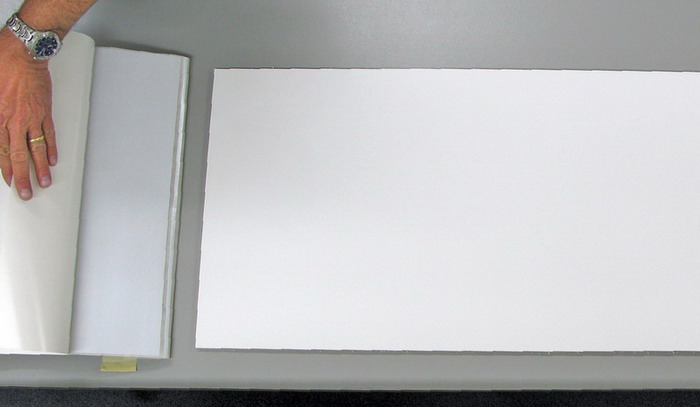
After having cut, weeded and masked the graphics I was ready to install them on my shop’s new sign. I chose Dibond, an aluminum-composite panel; I like its smooth surface and outdoor durability. I thoroughly cleaned the panel’s surface with 70% isopropyl rubbing alcohol, which removed any contaminants. I lined up the silver, metallic vinyl, which I cut slightly oversized to ensure complete coverage.
A steady hand
Advertisement
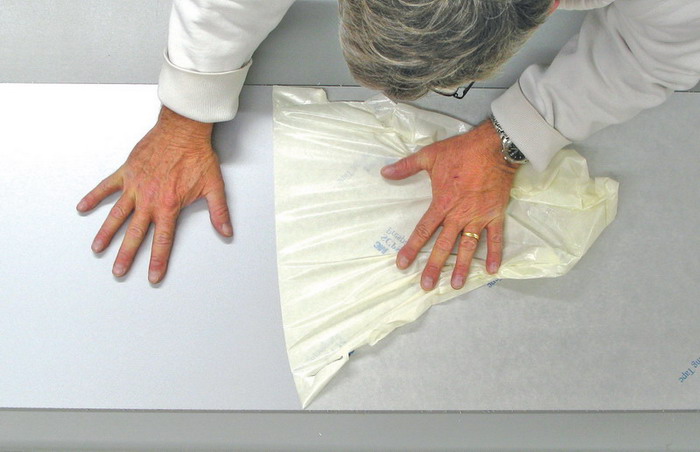
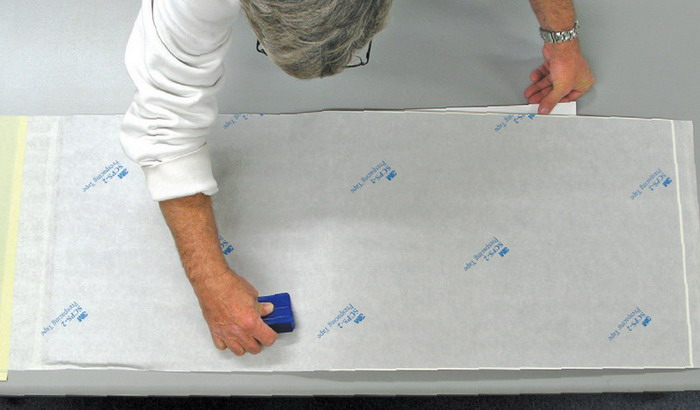
I anchored the vinyl in place using 2-in.-wide masking tape to create a side hinge. The hinge held the vinyl in place while I lifted it up to begin removing the liner adjacent to the hinge. Then, I lowered the vinyl back into position and let the liner hold it off the surface while I squeegeed. After I’d applied it, I trimmed away the excess and carefully removed the premask at a 180° angle to prevent the vinyl from lifting.
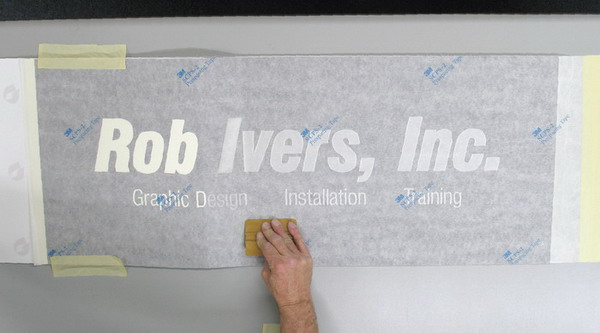
I repeated the process for the other colors, using the outer edges of each piece as my placement guides. I reverse-weeded the black, which allowed the silver to show through. I made the reverse-weeded area slightly larger than the primary gold text, which produced a silver outline between the black and gold. I applied the metallic, gold film by centering it in the opening. Next, I applied the mirror gold, which created a 3-D, chiseled effect. To complete the process, I selected a thin, two-line, gold border. I could’ve cut and applied it with the other gold text, but it would have used more than twice as much vinyl.
On a roll
Early in my career, I applied roll striping to cars and trucks. To be honest, I wanted to introduce the concept of roll striping to those unfamiliar with it. Roll striping is available from many suppliers in numerous colors and widths. The cost is very affordable, especially compared to making stripes yourself with a vinyl cutter. Try it; I think you’ll find it surprisingly easy. Narrower stripes use a clear premask instead of paper. Don’t forget to peel it off! Leaving it on quickly causes dramatic failures outdoors.
I thought gold pinstripes would make a great addition to the border. For these types of straight lines, peel a little liner and tack it at one end. Leave some excess hanging over the edge. Remove enough liner to reach the other corner; pull it taut; line it up; and tack it down. Then, apply pressure with your thumb or fingers to adhere the stripe. In most cases, it’s better to work with long sections. If you tack small areas as you go, it’s much harder to keep it straight.
Advertisement
After I’d affixed all four sides, I trimmed the corners and removed the clear liner. You can really enjoy creating fancy corners near where you trim to dress the job up even more. Try having one stripe cross over the other to create a stepped-corner look, or cut some parallel lines in the stripes to take out sections for a stutter-fade look. With practice, you can also learn to create rounded corners and follow cars’ body lines.
For my sign, I kept it simple. I used the top stripe’s edge as a guide to trim the underneath stripes. Then, I lifted up the top stripe, peeled off the excess I’d just trimmed from the bottom stripe, and removed the clear liner. Next, I reapplied the top stripe, trimmed it and removed that liner as well. This isn’t too difficult, but it’s an important technique to add to your repertoire.


 Big Survey1 week ago
 Photo Gallery1 week ago
 News1 week ago
 Heidi Tillmanns2 days ago
 Editor's Note5 days ago
 News7 days ago
 News4 days ago
 Paula Fargo1 week ago