Rarely does one have the opportunity to fashion a silk purse out of a sow’s ear, as the old saying goes. But, we do just that every time we complete a post-mounted installation. In our last step-by-step article, we described our techniques for installing post-mounted signage. Here, we detail our procedures for making attractive, detailed, fluted posts out of lumberyard, rough-hewn, 6 x 6 x 10 pressure-treated, Southern-yellow-pine posts.
We – I work with my son, Stephen – start at the lumber yard, where we select the best “sow’s ears” (i.e., posts) we can find. We reject outright posts that are twisted or warped. We seek true posts with as few checks as possible. A check is a slit or crack in the wood; they’re so named because, at one time, checkmarks were placed near splits to mark them.
Back at the shop, we’re ready to perform our silk-purse transformation. We start by filling all checks, splits, fissures and knots with black caulk. We use caulk that matches the stain we use (we’ll discuss the stain later). We use a putty knife to spread the caulk so it penetrates deep into the crevices. After the caulk cures briefly, we use a heavy-duty belt sander to remove excess caulk and smooth out the surface. We start with 60-grit belts, and end with 120.
Now, we’re ready to start post detailing, which involves fluting, chamfering and rounding them over. We accomplish this with a handheld plunge router. To ensure precise detailing, we apply a series of careful measurements on the clean, sanded post face. Using a V-shaped bit, we produce three fluting lines. The central flute starts 4 in. from the top of the post, and is cut the same length as the panel’s width. Thus, the posts for a 4 x 8 panel will have a 4-ft.-long, central flute. The lines on either side of the central flute will be an inch shorter at each end.
Next, using a chamfering bit, we rout a chamfered edge on all four sides of the post, equal in length
to the central flute line. For double-sided signs, we produce identical fluting on the other side of the post. The final detailing step is to “round-over” all the edges of the posts that have not been chamfered. Besides adding to the posts’ aesthetics, the rounding-over of the sharp, 90? edges facilitates more comfortable handling of the posts during installation.
We attach our sign panel to the posts with handcrafted, aluminum-channel brackets that have threaded rods, which pass completely through the 6 x 6 posts. In our last milling step, we drill a pair of holes through each post. With the aid of a perpendicular drilling jig, which we clamp to the pre-measured post, we use a 1-in.-thick auger bit to do this.
Advertisement
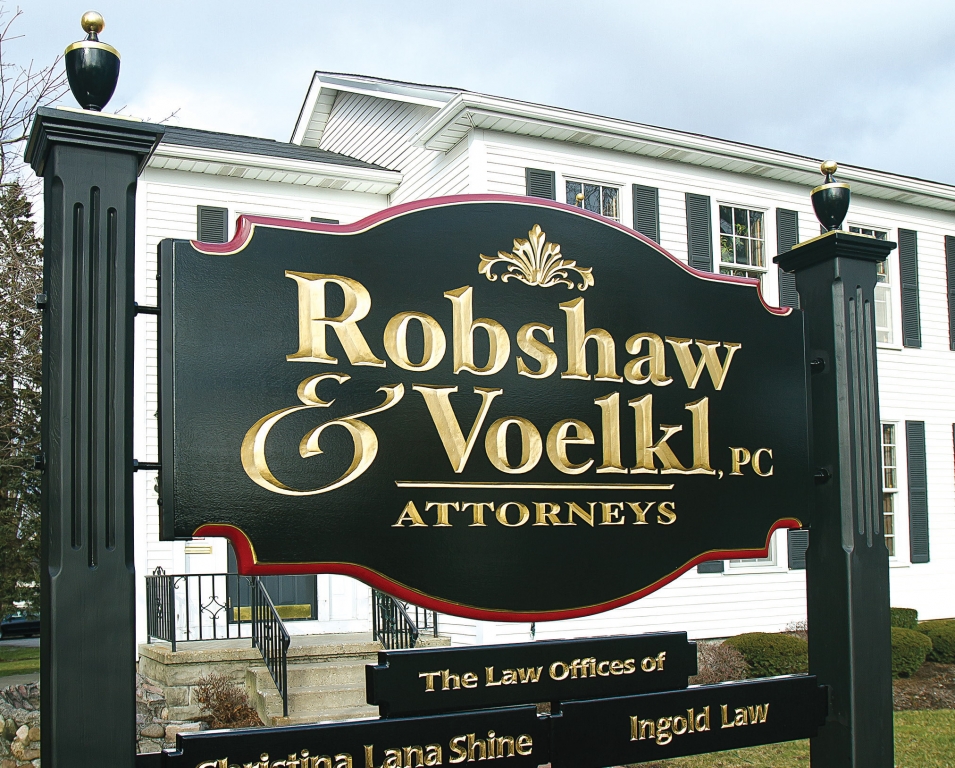
For the final transformation step, we coat the treated posts with a solid-black stain. We don’t prime or paint the posts because treated lumber won’t accept these coatings. This actually simplifies our process and creates a handsome, matte-black finish on the posts. We always use flat-black stain on our posts and never add color, and certainly not gilding.
Our goal is fabricating posts that fittingly frame the sign panel with quiet, non-distracting dignity, and thus direct attention to the gleaming, gilded substrate. Of course, we always top our posts with painted, modestly gilded finials and caps, but we’ll save such details for a future article.
Equipment and Materials
Caulk: DAP black caulk, available at home-improvement stores.
Coating: Solid-color, water-based black stain, lag screws and brushes, available at home-improvement stores.
Posts: Southern yellow pine, treated 6 x 6 x 10 posts, available from lumberyards and home-improvement stores.
Tools: Centering ruler, square, belt sander, router with gate, V-bit, chamfering bit, round-over bit, perpendicular drill jig and auger drill, available from home-improvement and hardware stores.
More About Francis
After an academic career as a physics, chemistry, math and theology instructor, Francis returned to his love of the lettering arts and started Signs of Gold Inc. with his son, Stephen, in 1994. Today he serves on the Board of Trustees of the Society of Gilders. Each year, he joins the group in their pro bono project restoring Hurricane Katrina-affected historic churches in New Orleans. Lestingi has earned first-, second-, and third-place awards in ST’s Sign Contest, and nine first-place awards from the United States Sign Council sign-design competition. Lestingi has also designed three calligraphic fonts, Pierre, Calileo and Verdi, which are available through www.LetterheadFonts.com, and two other digital typefaces, FranHand and Stefano, which are offered on www.MyFonts.com. For more information about his shop, visit www.signsofgold.com.


 News3 days ago
 Russell Toynes6 days ago
 Monument Signs5 days ago
 Real Deal6 days ago
 Video4 days ago
 Photo Gallery5 days ago
 Benchmarks2 days ago
 Signs of the Times2 weeks ago