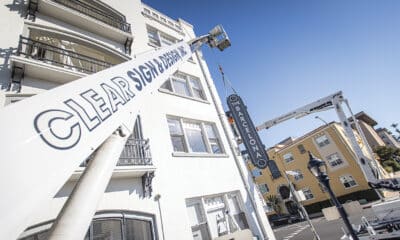
Theresa Jackson operates Orchard View Color (Escondido, CA) and has more than 20 years’ experience in prepress, graphic design, color management and photography. Email her at [email protected]
Have you seen the photo of a Starbuck’s® wrapped van that’s making the Internet rounds? Once open, the side-slider door covers the second through fifth letters of Starbucks, which changes the message to a disparaging one. If the image is real and not Photoshopped, I’m sure the designer feels awful. Clearly, there is much to consider when designing a vehicle wrap.
Where to start
Purchase a professionally created vehicle template and confirm its accuracy by measuring the actual vehicle. If needed, vector-based templates can easily be adjusted to fit your vehicle. Also, take same-view reference photos of the vehicle.
Understanding templates
Think of the vehicle as a box with flat panels — four sides and a top. Each panel, box, gets an independent design as a separate document.
Templates are provided at a 1/20 scale factor. Scale the template 500% for 1/4 scale.
Copy each view from the template; paste it into a new document and scale up. Be sure to constrain the height and width. A completed wrap design will have four to six layouts — driver side, passenger side, back view, front bumper, hood and top — depending on how much coverage the design specifies.
Window perf
Before starting, determine if your client wants printed, perforated-vinyl window covering. “Perf” has a different — slightly ghosted — outside appearance. Pre-warn your customer.
Design tips
Big, bold, clean designs are best seen and read at speed, but some buyers want details for parking-lot views. Know your customers preference before you start the design.
Various vehicle panels, especially the bottom rocker, may not be level with the ground. Other body contours may not square to side trim and windows. Such situations make it difficult to realize the correct horizontal placement for your graphics, so explore alternatives — an angle above the rear wheel well, for example.
Large letters — 8-in. high or more — will retain legibility if chunks are missing, for example, text that integrates vehicle door handles. Small letters become lost as they cross over window seams or doorjambs.
Advertisement
Designing in 2D while thinking in 3D
For critical graphics, provide at least 2 in. of breathing room in all directions, and add at least 6 in. of extra graphics on all sides of the template.
Determine where the side graphics will meet the front and back graphics. Also, because wrap installers prefer to seam graphics between the quarter panel and the bumper, which often aligns to the vehicle’s front and rear, I suggest your side graphics partially wrap around such corners. Ensure that your design accommodates the extra length.
Avoid patterned designs or linear graphics where the sides meet at the front, back and hood. This adds unnecessary complexity for yourself as well as the installer.
Working with images
Combine all bitmap graphics in a new Photoshop® document. The Photoshop document height and width matches the Illustrator layout document size (1/4 scale of the vehicle dimensions), and the resolution should be between 150 and 300 ppi.
150 ppi may seem low, but in most cases it RIPs and prints great, especially if the design elements don’t include photographs. The key is to keep the vector graphics as a vector, but use Photoshop for background vignettes, patterns, textures, drop shadows and glows. (If the design includes photographs, you may want to increase the resolution.)
Keep all text and logos in Illustrator®.
Copy and paste the ¼-scale template into your newly created Photoshop document. Make sure it pastes in at 100% by having the Move tool selected and checking the transform measurements in the Options bar. Rename the template layer FPO, e.g., “for position only”.
Design on layers below the FPO layer. Save a working layered PSD file. Save the completed design as a flattened TIFF file. Turn off visibility for the FPO layer before saving. Choose LZW Compression; it numerically condenses solid color areas and will reduce your file size without compromising print quality.
Link the TIFF file to the Illustrator layout. Place vector graphics on a layer above. Make sure the Illustrator and Photoshop documents are created in the same color space with the same ICC profiles. This action is critical for matching colors between applications.
Finalizing the design
Provide installers with composite proofs of the design placed into the template illustration.
Create output files by setting the template layers to non printing. The final print file should be a large rectangle that includes bleed on all sides.
Some printers prefer PDF files, and some prefer the Illustrator layouts with linked TIFF files. If sending Illustrator layouts, deselect the Create PDF Compatible File check box when saving, to reduce the file size.


 Women in Signs2 weeks ago
 Business Management2 weeks ago
 Jameson Parker2 weeks ago
 Women in Signs1 week ago
 Women in Signs6 days ago
 Buzz Session5 days ago
 Benchmarks2 weeks ago
 Ask Signs of the Times1 week ago