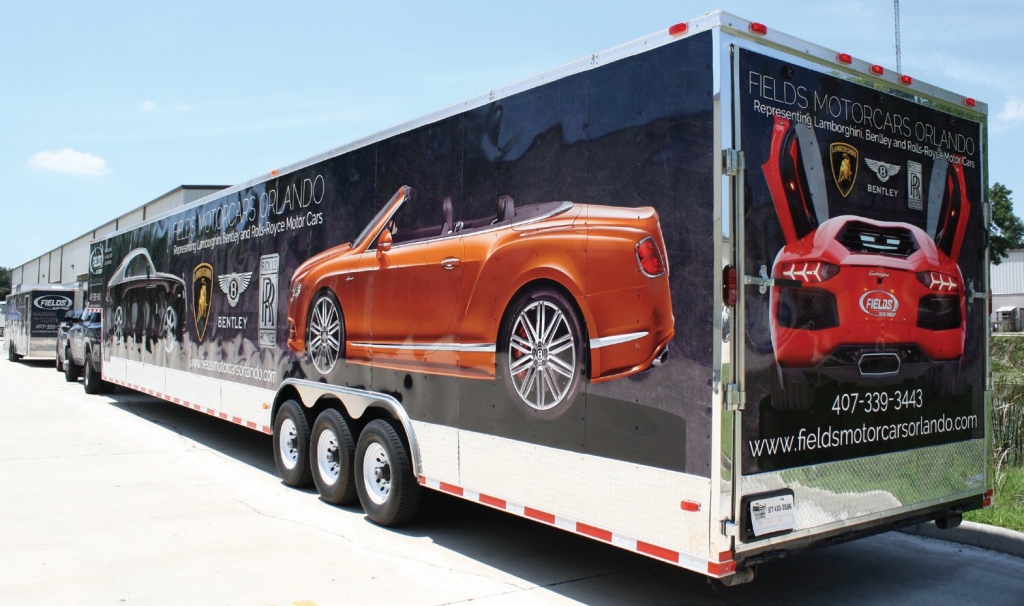
This month, we’re delving into surface preparation for vehicle-wrap installs. Wrap providers must remember how important proper prep and quality finish work is for vinyl and vehicle-wrap installations.
If you warrant your products, these should be two of the most important processes. The growing number of wrap products designed for “easy application” makes proper procedure even more essential.
Modern films are thinner, so it’s harder to conceal flaws. Also, their channels are especially prone to holding moisture, which can cause failure if a vehicle’s surface isn’t properly cleaned and prepped.
The ratio 40-40-20 summarizes my approach to a successful installation. Read on to catch my drift. I estimate 40% of your finished product’s quality depends on proper surface preparation. For example, different substrates require different cleaners and products to get them vinyl-ready. Your installers must be aware of a surface’s condition prior to installation. For vehicle-wrap installations, Wrap This Ink! follows three simple steps:
Step 1: Baby bath
Make sure vehicles are thoroughly washed. Many vehicle-cleaning products exist, but you can’t beat dish soap, a bucket, a soft-bristle brush and lots of water. We like to use ¼ cup of dish soap per five-gallon bucket of water; just dip and wash. If you work in hot areas like Florida, where water evaporates as it leaves the hose, clean the vehicle in sections so the soap doesn’t dry before rinsing. Thoroughly wash the vehicle with clean water; make sure all soap residue is gone. Water rings or spots indicate the vehicle needs more H2O.
Let the vehicle dry before you apply films. Use products like 3M Envision 480, which contains patented air channels that aid application. Otherwise, water can get stuck underneath and be difficult to remove, and later cause lifting and bubbling.
Advertisement
Even if you’re only installing cut vinyl or a partial wrap, wash the entire vehicle to avoid any debris or contaminants. You’ll make a better impression on your client when they pick up a detailed vehicle.
Step 2: Bikini wax
Residue can create your first warranty issue – or worse, a fleet-graphic disaster. Wax, tire-shining compounds, brake fluid and fuel particles are just a few things that can ruin a perfectly good wrap. Make sure the vehicle is free of contaminants that may remain after washing.
Products such as Rapid Prep and a box of clean rags can remove wax and grease from standard OEM paint. Some of these products might leave a haze, so go back over the area with a dry, clean rag. If the dry rag has dirt or grease on it, repeat step two.
Step 3: BYOB
The surface can never be too clean, even after washing and removing wax. Break out the alcohol – isopropyl, that is! We prefer to use a 100%-alcohol solution, which you can usually find at an automotive-paint or body-shop supplier.
Using clean rags, again wipe all areas of the vehicle. Open the doors and clean the inside edges where wrap-panel seams appear. Wipe around all rubber seals; they hold oily contaminants. Body lines or moldings present other hard-to-clean areas. You can wrap an application squeegee with a clean rag to reach these areas; edge peel will occur if they’re not cleaned properly. Clean the panel right before installation – sweat is a common contaminant that can create unwanted problems for even the best installer.
Always spray the alcohol on the rag, not the vehicle. When sprayed on the vehicle, alcohol tends to smear instead of remove dirt. Keep a clean rag in your hand at all times!
Advertisement
Laying on of hands
The second 40% reflects how a good installer must pay attention to detail. I’ve seen the vehicle- and boat-graphic market explode over the last 15 years. With machine prices dropping as technology increases, and new products with which a four-year-old could practically install wraps, almost every signshop now offers vehicle graphics.
That said, proper training and knowing your products are musts. Most clients are now familiar with wraps and know how they’re supposed to look. Bad cuts, seam inconsistencies, tenting, bubbles and crooked alignment are just a few red flags customers now recognize. Most installers understand the basics of applying vinyl to vehicles, but acceptable finish work requires practice and training. Our shop is 3M and UASG Certified, and we’ve created our own training stations that simulate such challenging objects such as PT Cruiser bumpers.
This allows even advanced installers to practice their skills and find new ways to finish difficult areas. This also allows them to test materials’ stretchability, conformability and heat resistance during application. Breathe twice, cut once! Finish cuts are one of the hardest things to master, especially if you like energy drinks or coffee and are prone to jitters. Shaky hands can destroy all your installation efforts.
The last thing you want in today’s fast-paced shops is bad cuts that require panel replacements. Learn what blades are best for which cuts — Olfa knives are made for longer, straighter cuts, such as door jambs. In contrast, No. 11 X-Acto® blades perform better in tighter areas, such as keyholes. If, during application, you must cut vinyl on the vehicle, I recommend you use knifeless tape. Cutting the vehicle’s surface causes major damage that won’t be seen until the vinyl has been removed. However, you’ll still likely be held liable for any repairs.
Installers who use new tools execute better finish work. Key implements include the 3M Roller L and V-Cat handheld roller, which allow your hand to float and roll across body lines, which ensures proper installation. If all air isn’t released, bubbles will ruin your wrap. Typically, one poke with an air-release tool and minimal heat expel the air.
Don’t go crazy stabbing the surface; excessive holes reduce the adhesive, and can also allow moisture to get in between surfaces and create a warranty claim.
Advertisement
When you’re finished with the wrap, clean off handprints, smudges and other blemishes. A quick spray of wax and tire-shining compound will also set you apart from your competition.


 Tip Sheet2 weeks ago
 Photo Gallery3 days ago
 Ask Signs of the Times5 days ago
 Real Deal2 weeks ago
 Paula Fargo22 hours ago
 Benchmarks1 week ago
 Photo Gallery22 hours ago
 Women in Signs2 weeks ago