Metal Fabrication
A Pharmacy’s Sign Prescription
John Byrd gives a Georgia apothecary a makeover.
Published
15 years agoon
John Byrd is proprietor of John Byrd Design (Ball Ground, GA).
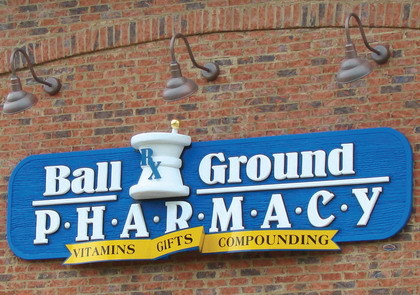
After more than 15 years of serving the community, the Ball Ground (GA) Pharmacy was moving into a brand new location and needed a new sign package. After having solicited proposals from several area sign companies, the store’s management selected my bid because they preferred my idea.
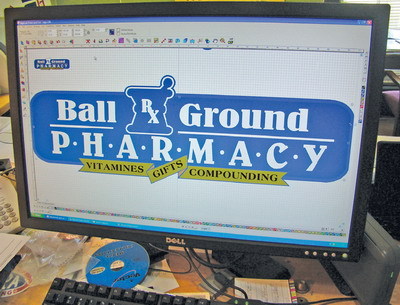
The building’s new architecture reflects early 20th Century architecture, so my design fits that style. I created the original design using Corel Corp. CorelDraw™ and, to build a full-size, workable file, I transferred it to CADlink Technology Corp. Signlab 7.1. I presented this design to the client with pricing options, which covered fabrication options that ranged from flat to fully dimensional. Fortunately, they chose 3-D fabrication that features a 2-ft.-tall mortar and pestle and fabricated scroll work. I knew I would have a fun week building this sign.
Tips and tricks
Because the store’s grand re-opening was quickly approaching, I put this job on the fast track. Because I don’t own a CNC router, I built this sign as I always have — by hand — with knowledge, tricks and techniques developed through 30 years of commercial signmaking (and, sometimes, scratching my head and asking, “What if…?” to ponder solutions).
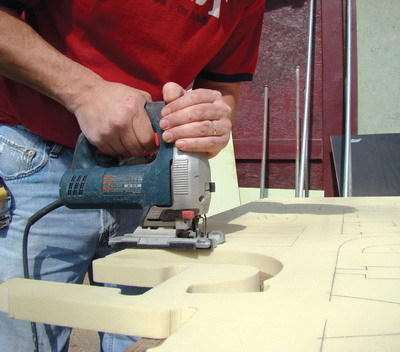
AdvertisementUsing my old, but reliable, Gerber Scientific Products IV-B plotter with a Cadlink card, I developed pounce patterns (yes, I still use them). I pounced the pattern onto 15-lb. Duna HDU board and traced it with a #2 pencil before cutting it with my bench-top Delta bandsaw and handheld Bosch jigsaw.
To fabricate the mortar and pestle, I first glued together two stacks of HDU half-circles, which looked like a wedding cake, with Gorilla Glue. After the adhesive cured overnight, I formed the angled shape with my Ryobi belt sander. I rounded the top, bottom and center pieces with my handheld router and ½-in.-diameter, round-over bit.
To remove the HDU residue, I blasted the panel with water from the hose – don’t waste your time with the air compressor; I think the static electricity that forms makes bursts of air less effective — and then glued together the final assembly. To form the pestle, I used a 4-in. x 4-ft., post finial I’d saved. I chucked it into my drill press and sanded the cuts until I’d fashioned the end of a pestle.
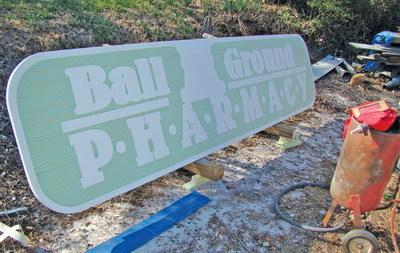
The main sign panel was fabricated from two sheets of 1-in.-thick Duna board I had on hand. My pipe clamps weren’t long enough, so I improvised by placing multiple pipe clamps together. To support the panel, I backed it with Nudo Products Inc. 3mm-thick Poly-Metal material.
AdvertisementNext, I applied the Anchor sandblast resist and sandblasted the graphics with my Sandy-Jet 100-lb. air-compression pot at 80 psi with a 3/16-in. nozzle and silica sand. The process required approximately an hour. I like being able to create custom textures with a sandblaster. To me, it’s like using a big, angry airbrush.
Letter perfect
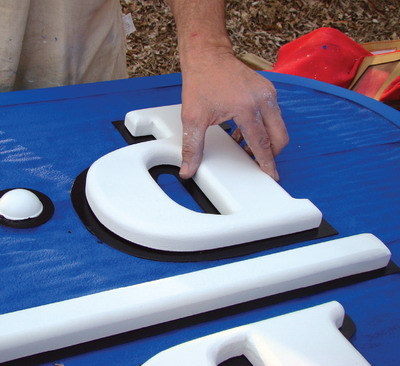
Next, I focused on producing the cut-out letters. Using another piece of HDU, I pounced and traced the letters onto the board and formed them with my jigsaw. Using my Makita plunge router, I rounded the letters with a ¼-in., round-over bit. Because my font contained thin strokes, I avoided using the round-over bit and finished the thinnest strokes by hand with 120-grit sandpaper.
After another cleansing blast from the hose, the parts were ready for coating. I used Behr flat, acrylic-latex paint to create the main panel’s background. To decorate the raised area that would outline the letters, I used 1Shot® lettering enamel. I painted the outline areas with small, 3-in.-wide Shur-Line rollers. If you paint dimensional signs, you need to get hip to these small wonders.
I coated the letters, mortar and pestle with white Glidden semi-gloss acrylic latex. Using Dow Corning Corp. silicone, I mounted the letters to the main panel. To create the dots between the letters, I installed aluminum caps like those used to top chain-link fenceposts.
AdvertisementThe “Rx” shield cut-out comprises blue, pin-mounted, pre-finished 3mm Poly-Metal material. To decorate the shield, I used Oracal USA 851 cast vinyl, which I cut with my Ioline Corp.Super 88 plotter. Then, I used a fine-tooth jigsaw blade to cut more Poly-Metal to form into the scrolls for the sign’s base.
To create an extra touch for the pestle knob, I used Wehrung and Billmeier 23k goldleaf. To prep for gilding, I applied a equal mix of Lefranc Charbonnel slow size and imitation-gold 1Shot. I let the size cure overnight before gilding in the morning.
Vive le cleat
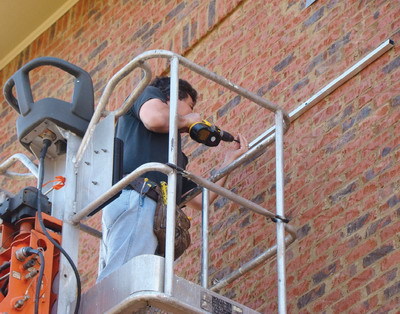
For the sign’s installation, I fabricated a 1-in.-diameter framework with aluminum square tubing and fastened it to the sign’s backside like a French cleat. French cleats stiffen the entire sign structure and provide an appealing “floating” effect for the sign after it’s hung.
Using Tapcon® concrete screws, I mounted corresponding aluminum tubing to the brick wall where I would install the sign. Using a rented, trailer-mounted bucket lift, I hung the sign by securing it with more Tapcon screws. To ease installation – and because I was concerned they would be prone to damage — I fabricated a cleat and mounted it behind the mortar and pestle. Then, I hung the sign from its top edge and attached the scroll with screws. After a few minor touch-ups, I completed the job for a satisfied customer and happily deposited a well earned paycheck.
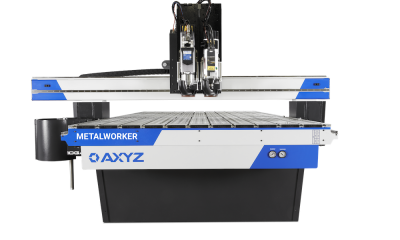
Modern CNC-routing technology constantly becomes more affordable, and large, flatbed routers’ efficiency makes them very attractive to many signshops. However, fabricating high-end 3-D signs doesn’t necessarily require thousands of dollars of investment in equipment and software. As was the case before these routers’ introduction, experience, skill and good power tools capably produce quality signage.
Plan carefully, take your time, use common sense and be creative! Isn’t that why you make signs? Now, go make something wonderful!
Equipment and Materials
Adhesives: Gorilla Glue, from the Gorilla Glue Corp. (Cincinnati), (800) 966-3458 or www.gorillaglue.com; silicone, from Dow Chemical, available at home-improvement, hardware and building-supply stores
Brushes: Two-in.-wide foam rollers, from Shur-Line Inc. (Huntersville, NC), (877) 849-7546 or www.shur-line.com; and sash brushes, available at home-improvement or art-supply stores
Coatings: 1Shot® lettering enamel, from Spraylat Corp. (Gary, IN), (219) 949-1684 or www.1shot.com; Behr and Glidden acrylic-latex paint, available at hardware and home-improvement stores
Gilding: Goldleaf, from Wehrung & Billmeier (Lake Zurich, IL), (773) 442-1544 or www.wbgoldleaf.com; 1Shot imitation gold, from Spraylat; Lefranc Charbonnel slow size, from Lefranc & Bourgeois (Cedex, France), (33) 0243-838315 or www.lefranc-bourgeois.com
Plotters: Gerber IV-B vinyl cutter, from Gerber Scientific Products (South Windsor, CT); (800) 222-7446 (no longer made); Super 88 plotter, from Ioline Corp. (Woodinville, WA), (425) 398-8282 or www.ioline.com
Sandblasting: ALC Sandy Jet 100-lb. air compressor, available from SH Industries (Cleveland), (800) 253-9726 or www.shindustries.com; Anchor Continental sandblast mask, available from Dick Blick Art Materials (Galesburg, IL), (800) 828-4548; www.dickblick.com; and silica sand, available from industrial-equipment stores.
Software: CorelDRAW, from Corel Corp. (Ottawa, ON, Canada), www.corel.com; Signlab 7.1, from CADlink (Clinton, MA), (800) 545-9581 or www.cadlink.com
Substrates: Duna 15-lb. HDU, available from Aluma-Panel (Cumming, GA), (800) 258-3003 or www.alumapanel.com; Poly-Metal 3mm aluminum panels, from Nudo Products (Springfield, IL), (800) 826-4132 or www.nudo.com
Tools: Makita plunge router, Delta bandsaw, Bosch jigsaw, Ryobi belt sander, sandpaper, Tapcon® concrete screws and aluminum tubing, available at hardware, home-improvement and building-supply stores.
Vinyl: Oracal 851 premium cast vinyl, from Oracal USA (Black Creek, GA), (888) 672-2251 or www.oracal.com
More about John
An artist, designer and signmaker, John Byrd works in his studio in “Mayberry-like” Ball Ground, GA. Before he received a driver’s license, he made calligraphic designs and caricatures professionally. He said, “I don’t remember a time when I wasn’t drawing or creating. The variety of projects a commercial signshop produces always keeps things fresh for me. There’s always the promise of an interesting project on the horizon.”
Byrd also produced automotive airbrushing and pinstriping at car shows before apprenticing at several sign shops. In the pre-computer era, Byrd handlettered hundreds of signs and witnessed firsthand the craft’s technological changes.
“I wouldn’t want to go back to hand lettering ‘No Parking’ and ‘For Sale’ signs, but I wouldn‘t trade the experience for all the money in the world,” he said. “I’ve always felt I was born 20 years too late. By age 30, I was already being called a dinosaur. However, I still don’t think there has been a more exciting time to be in the sign business. The wonderful design and fabrication tools now available help us complete more creative projects. It is a wonderful time to be a ‘professional imaginer‘.”


SPONSORED VIDEO
Introducing the Sign Industry Podcast
The Sign Industry Podcast is a platform for every sign person out there — from the old-timers who bent neon and hand-lettered boats to those venturing into new technologies — we want to get their stories out for everyone to hear. Come join us and listen to stories, learn tricks or techniques, and get insights of what’s to come. We are the world’s second oldest profession. The folks who started the world’s oldest profession needed a sign.
You may like


Advertisement
Subscribe

Magazine
Get the most important news
and business ideas from Signsofthetimes Magazine.
Advertisement
Most Popular
-

 Photo Gallery4 days ago
30 Snapshots of the 2024 ISA Sign Expo
-

 Tip Sheet2 weeks ago
Always Brand Yourself and Wear Fewer Hats — Two of April’s Sign Tips
-

 Ask Signs of the Times6 days ago
Why Are Signs from Canva so Overloaded and Similar?
-

 Paula Fargo2 days ago
5 Reasons to Sell a Sign Company Plus 6 Options
-

 Real Deal2 weeks ago
A Woman Sign Company Owner Confronts a Sexist Wholesaler
-

 Benchmarks1 week ago
6 Sports Venue Signs Deserving a Standing Ovation
-

 Photo Gallery2 days ago
21 Larry Albright Plasma Globes, Crackle Tubes and More
-

 Women in Signs2 weeks ago
2024 Women in Signs: Megan Bradley