Rob Ivers owns Rob Ivers Inc. (Raymore, MO), a vehicle-graphics and installation company. He’s taught vinyl-graphics installation since 1993.
I don’t print graphics myself; I install them – mostly wraps. As a professional graphics installer, the biggest problem I face is solvent retention, which can lead to graphic failure regardless of how well I install the print. Most graphics sent to me haven’t been perfectly cured, but they contain varying degrees of solvent retention. I return severely undercured graphics to the sender.
Several telltale signs indicate when a print contains too many solvents. First, the smell can almost knock you over. Second, some shrinkage may have occurred. Finally, when in doubt, peel back a corner of the print from the liner and look closely. If it curls or feels soft and gummy, the print will likely cause problems.
If you own a solvent inkjet printer, this article is for you. It’s in no way intended to be critical; rather, my goal is to help you solve this problem.
Solvents 101
Advertisement
Ink solvents act as carriers that deliver ink to the vinyl surface. On contact, the solvents soften the vinyl and migrate towards the adhesive, a process known as solvent migration. Solvents are supposed to escape through diffusion, not remain in the same place. Diffusion is the process whereby liquid, solid or gas particles, spurred by kinetic energy, move from areas of higher concentration to those of lower concentration.
We also refer to the diffusion process as “curing.” If allowed to cure completely, all solvents diffuse and yield a quality printed graphic that’s ready for lamination and installation. Incomplete curing retains solvents within the adhesive and vinyl.
This problem is more common than you might think. In fact, it’s probably the norm. Solvent retention is extremely detrimental to both the vinyl and adhesive. Solvents constitute 80 to 90% of a solvent ink’s composition. Compound that by the number of inks used to create a digital print. Most devices use a minimum of four ink colors (CMYK), and many use six or even eight. So, a beautiful print is produced with a little ink and lots of solvent.
The proving ground
Bryce Schaefer, a regional business manager for 3M Graphics Market Center, made a presentation at 2007’s SGIA conference entitled “Understanding the Effects of Ink on Digital Printing.” His presentation materials state,“Virtually all solvent-based inkjet inks, even so-called ‘eco’-solvent inks, contain a very high percentage of solvent (roughly 90%). High solvent levels cause the film to swell and/or become soft and gummy, [and the solvents] can migrate to the vinyl’s adhesive and cause graphic failures.”
Advertisement
Excessive ink saturation within the media may prove to be the culprit. When using self-adhesive, vinyl films, Schaefer recommends not exceeding a 270% ink-saturation level. Even 300% saturation is excessive.
A vehicle wrap isn’t a billboard, which can be printed at a relatively low resolution level, but it’s not a museum graphic that will be viewed at close range, either. So, a medium print-resolution level usually proves sufficient.
Some wrap providers market themselves as “high-definition” printers, which simply means they print at the highest resolution level they can. In my opinion, this is excessive and will create a higher solvent content that’s more likely to lead to long-term adhesion problems.
He described a solvent-migration test that 3M conducted by printing black rectangles on white vinyl. The unprinted white was laminated and used as the control sample. Technicians unrolled the prints and laid them flat on a table to allow solvents to escape. When graphics are tightly rolled (as they arrive off most printers), solvents can only escape from the outer layer.
3M’s technicians laminated the first black rectangle immediately after printing. They followed successive rectangles with incrementally more curing time. After lamination, they installed all pieces, including the control sample. The graphics were allowed to wet out for 72 hours to reach an ultimate bond.
Advertisement
As the graphics were removed, 3M measured the pull force (which measures the level of adhesion) required to remove them. The test showed, the longer the prints were allowed to cure, the greater the pull force. It took 20 days of curing for the final sample to achieve the same pull force as the unprinted control sample.
This proves that solvents adversely affect vinyl adhesion. Ironically, poorly cured graphics adhere much more aggressively during installation than the same, unprinted vinyl. How does this happen? The answer is really pretty simple. Most fabricators print on digital media with repositionable adhesives.
A repositionable adhesive won’t entirely touch the surface. Imagine viewing the adhesive under a microscope. You would see a textured surface. Only the adhesive’s higher points touch the surface initially, which makes initial tack less strong. When you squeegee with pressure, the adhesive flattens and makes full contact.
When a repositionable-adhesive vinyl absorbs excess solvents, it becomes very soft. This defeats the film’s workability and allows the adhesive to make full contact. Consequently, although the adhesive has weakened, it acts more aggressively because more of it touches the surface.
The cure
Completely curing solvents prior to a print’s lamination allows the vinyl to perform the way the manufacturer intended. Soaking vinyl in solvents and laminating it immediately makes as much sense as playing Russian roulette with six bullets in the chamber – and pulling the trigger twice.
It would be completely rude of me to scare everyone without offering a remedy. I know most of you don’t have enough table space to lay out all of your print jobs. And I really know you’re not going to let them dry for 20 days!
Here’s what I recommend: Build your own curing device. Stand the vinyl roll vertically, and loosen the vinyl on the roll so no two layers touch. Set it on something above the floor, such as a grate or a milk crate, which will let air pass through. Below it, position a fan so air will blow upward through all the layers. The gap between the layers gives the solvents a place to go, and diffusion takes over.
The solvent particles migrate from their higher concentration (in the vinyl and adhesive) into the lower concentration of the air in the gaps. The fan blows the air in the gap at a constantly lower concentration, and the solvents continue to diffuse until they’re gone. I can’t tell you exactly how long that will take, but I promise any time is much better than none. I believe 12 to 24 hours will sufficiently cure the graphics and still allow you to be profitable and meet reasonable client deadlines.
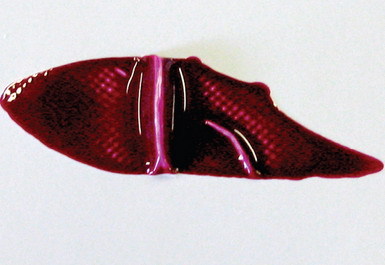
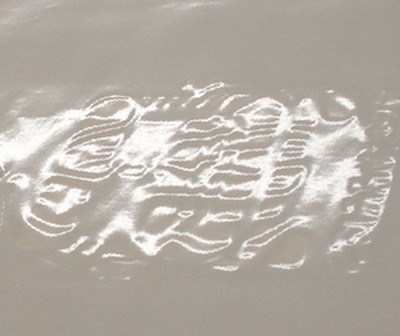
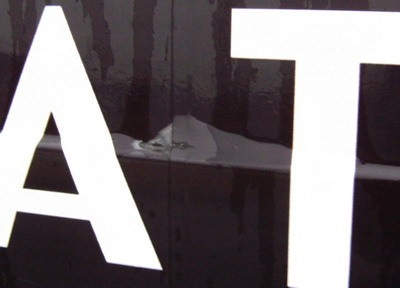
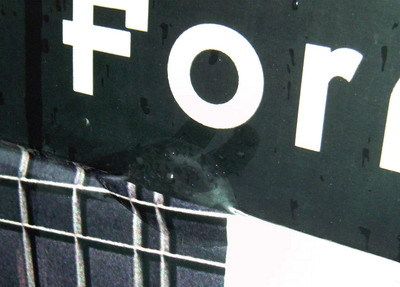


 Photo Gallery1 week ago
 Ask Signs of the Times2 weeks ago
 Paula Fargo7 days ago
 Real Deal4 days ago
 Benchmarks2 weeks ago
 Photo Gallery7 days ago
 Women in Signs2 weeks ago
 Women in Signs1 week ago