Many signshops would love to own a computerized router. The time and labor these marvels save is astounding, but their $30,000 to $50,000 price tag often keeps them off the small-to-medium signshop floor. However, there’s a product with professional features that offers a starting price under $10,000 — DigiTool, GlenTek’s CNC router.
The name GlenTek may be familiar because of the company’s Warthog family of CNC routers. The Warthog series has a reputation for production quality at a fairly affordable price. The company continues this trend with its DigiTool.
The first question you ask is, "What am I giving up at that price?" You may lose a little elbow grease because the DigiTool can arrive as a set of subassemblies you put together. (We just heard a collective groan from our readers.) Many have heard or experienced first-hand horror stories about assembling hardware — millions of parts and poor instructions, possibly written in another language.
But the DigiTool is different.
Five easy steps
Because kits have such a negative connotation, we want to convey two points before proceeding. First, we’ll describe the assembly process of the mid-priced machine so you can judge the difficulty level yourself. Second, we’ll discuss the build quality, as the company builds DigiTool from precision-milled parts.
Step 1: Build a table
The bulk of any CNC router is its table (Fig. 1). Because it performs many functions, it must be strong and true. Also, it must offer a straight and bind-free system for the y-axis and tool gantry to ride upon. It holds the material to be routed or engraved, so again, the bed must be flat and level, or routing depths will be inconsistent.
GlenTek has provided one way for its customers to save money. The $9,995 price doesn’t include a table. Plans are available for a steel table, but you must supply the materials and hardware yourself.
If this isn’t your cup of tea, you can order a bolt-together table from GlenTek for $1,495. In this case, you receive a well-designed steel table that’s pre-drilled to accept the other subassemblies. If you’ve ever assembled steel shelving, you can easily construct this table.
Step 2: Fix the rails
The most critical aspect of the installation, the rails, provide the "rack" portion of the DigiTool’s rack-and-pinion tracking system. They arrive as two rails designed to be bolted to the table’s long sides. Attaching them is straightforward but involves tapping 22 pre-drilled holes per rail. This isn’t a step to rush through. The rails must be straight and parallel.
Step 3: Install the gantry
The gantry has three major functions: It carries the tool bay (Fig. 2), which normally houses the router motor. It travels back and forth on the long axis to provide the y-directional movements, and it allows the tool bay to travel back and forth on a perpendicular set of rails to provide the x-directional movement.
The gantry comes as a completed sub-assembly. You simply mesh the pinion gears into the long rails, adjust the tension so there isn’t play, and install caps on the rail ends to prevent the gantry from running itself off the rails and onto the floor.
Step 4: Add the x-y head
Earlier, we referred to the x-y head as a tool bay, the business end of the router. It has pinion gears for the short rails (x axis) and the motor and holder for the depth cuts (z axis). It installs similarly to the gantry.
After it’s mounted, you can install the router motor. GlenTek offers optional industrial spindles, but its standard design holds the motor from a Porter Cable 3.25 HP router. Outside sources can sell you just the router motor (approximately $300), or you can visit your local home-improvement store and purchase a Porter Cable 7518 for approximately $325. It’s a great router with a lot of power, and it can handle both half- and quarter-inch shanked bits.
Step 5: Connect electronics
At this point, the hard stuff is done. Now it’s just a matter of connecting some cables (Fig. 3) to the CNC controller box. That’s it!
Toy or tool?
The next logical question is: "Do I have a hobbyist’s toy or a production tool?" This solid performer clearly leads the pack in its price range.
In the sign business, there are a few solid reasons to own a CNC router. It cuts intricate designs into such materials as wood, urethane and plastics. If you mass produce the same design, or you specialize in carved or engraved signage (or want to get into this), a CNC system may be just the solution.
Factors to consider
First, determine if the router will handle your typical substrate sizes. Routers are available with a very small to gigantic bed, but signmakers typically work with 4 x 8-ft. material sheets, maximum. You’ll most likely be interested in this size. The DigiTool’s 50 x 100-in. cutting area exceeds that requirement. In addition, the router handles media thickness up to 6 in.
Next, consider cutting speed. The DigiTool cuts at a maximum in excess of 500 in. per minute; (more than 40 ft. a minute). While it’s not the fastest router on the market, you’d have to pay double or triple the price to exceed its speed. However, there’s a caveat to the rated speed. The cutting speed relates to the type of tool in the motor (factors such as high-speed steel vs. carbon) and the material being cut. For example, the speed decreases if you cut hardwood, as opposed to foam or soft woods.
GlenTek offers a chart of suggested speeds, where the machine cuts even the hardwoods at nearly 300 in. per minute (25 ft.). This very respectable speed far exceeds many routers in DigiTool’s class.
Speed means nothing if you can’t duplicate cuts. Therefore, you should also consider the router’s accuracy. The DigiTool’s repeatability rates at approximately .002 in.; its resolution rates at .0005-in., meaning it executes tiny movements. For sign applications (and most other applications), this is more than adequate.
Controller software
The DigiTool’s external CNC controller sits between the router and a Windows


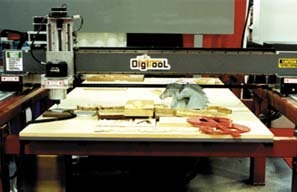
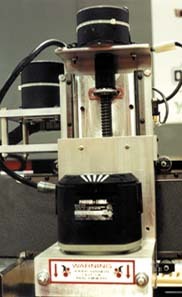
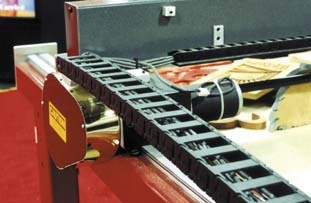
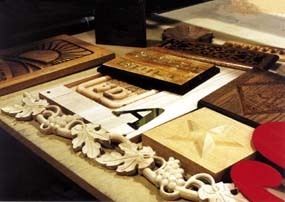
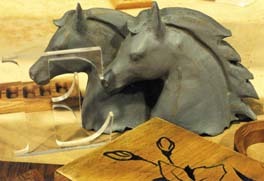


 Photo Gallery2 weeks ago
 Paula Fargo2 weeks ago
 Real Deal1 week ago
 Photo Gallery2 weeks ago
 Projects1 week ago
 Business Management1 week ago

 Dale Salamacha4 days ago