Officials who represented the historic Village of Williamsville, NY (founded in 1800) commissioned my shop to produce a commemorative sign, which celebrated converting a segment of the legendary Lehigh Valley railroad tracks to a community walking and biking path. To add to the yesteryear flavor, we incorporated some decorative, handcarved filigree scrolls into the design.
Pleased with our work, the village ordered seven, similar signs to grace various Williamsville park locations. Faced with the monumental task of carving 14 scrolls, I used a technique that would allow unlimited scrolls very quickly.
Our modus operandi required handcarving a set of high-relief scrolls; making molds of these originals let us fabricate necessary copies by casting. We chose |1917| Extira® wood-composite over HDU and wood as our carving medium for several reasons: Extira, with impregnated rot- and pest-resistant compounds, doesn’t require following an integral grain, which wood does, and won’t crumble, which HDU does occasionally. I’ll fabricate HDU appliqués with rasps, files and sandpaper when projects require less detail. Because these scrolls required intricate work, I used Extira and carving tools.
The design scheme
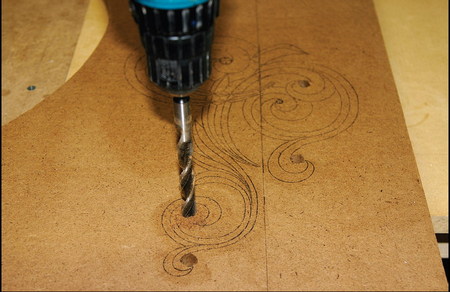
After I conceived the 3-D scroll design using Adobe Illustrator, we printed the pattern on high-quality, drafting vellum with a laser printer. Using the carbon-based laser print, I transferred the pattern to 3⁄4-in.-thick Extira® using a heat-transfer tool. A household iron offers another option, but the transfer device provides more control. I used a saber saw with a narrow scroll blade to fabricate Extira cut-outs. The project required twin, symmetrical scrolls.
Advertisement
The scroll blade negotiated most of the curvature, but when it couldn’t, I drilled a hole with an appropriate-diameter bit. After I’d cut out the scrolls, I sanded the edges and attached the scrolls to my workbench with double-sided-adhesive, carpet tape.
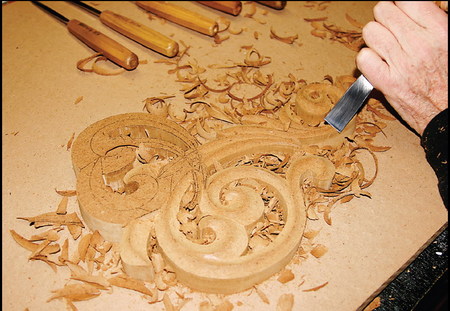
The flat scrolls were now ready for transformation into elegant, high-relief filigrees. To produce pleasing, prismatic curves, I used a curved, sweep gouge on concave curves, and a straight chisel on convex curves.
Making the mold
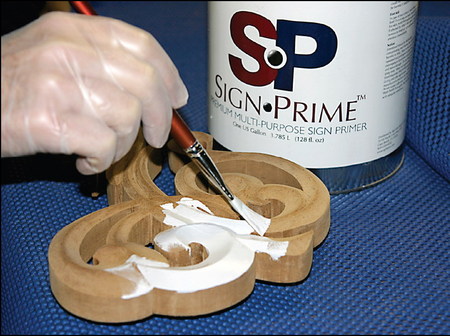
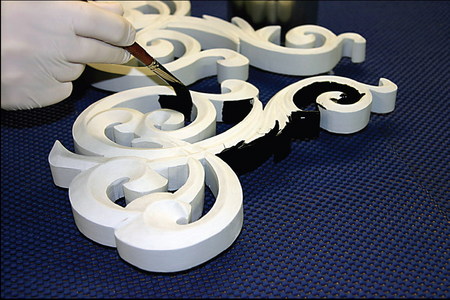
After having carved our model scrolls, we prepped them for the moldmaking process by applying two coats of SignPrime® primer and 320-grit, sandpaper applications between coats. An extremely smooth finish was vital because we wanted the castings to have similar, glossy surfaces. Before forming the molds, I topcoated the primed scrolls with two coats of high-gloss, oil-based, Ronan bulletin paint.
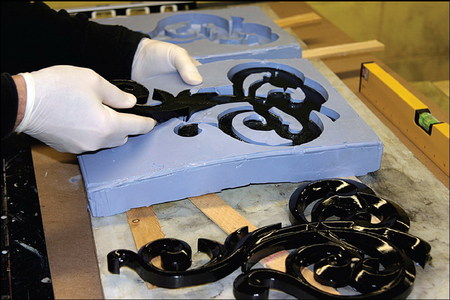
The scrolls were now ready for moldmaking (see ST, May 2003, page 40, or www.signweb.com/fabrication). To summarize the technique, I boxed the model and secured it to the base with carpet tape. Then, I poured the liquid-silicone rubber, Smooth-On’s Oomoo, onto the original. Because the rubber’s formulation doesn’t require a releasing agent, removing casts from the mold was simple. After I allowed the mold to cure overnight, I removed the model. The process yielded an exact copy, and, from this, we could produce virtually unlimited replicas.
To create castings, I poured liquid-polyurethane resin (Smooth-On’s Smooth Cast 300) and allowed 10 minutes for curing. Smooth-On now makes very intense casting dyes, called So-Strong®. This product eliminated the need to handpaint the casting.
Advertisement
After curing, I removed the cast from the mold, which was immediately ready to produce another casting. Once I completed the initial casting piece, the process progressed rapidly.
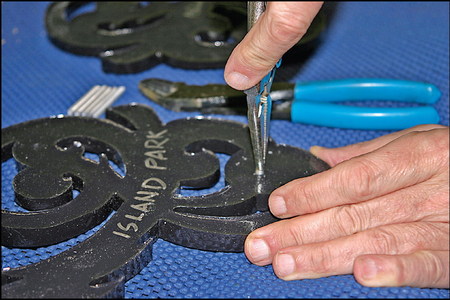
Before gilding the scrolls, I prepared them for attachment with 1⁄8-in.-diameter, threaded-aluminum studs to the back of each scroll by first drilling a pilot hole with a 5⁄32-in. bit.
I twisted each stud into the scroll with a vice-grip. This caused the studs to self-tap into the plastic, which produced a very strong bond. After I shortened the 1⁄8-in.-wide studs to ¾ in. with a snipping tool, I used the studs’ sharp edges to mark where I placed the scrolls on the substrate.
Solid gold
Using the marks as guides, I drilled 3⁄4-in.-deep holes with a 17⁄64-in. bit – in other words, a substrate hole that’s approximately twice the studs’ diameter. Later, I filled these holes with silicone and inserted the studded scrolls.
To prepare the scrolls for the sizing process, I dusted them completely with kaolin using an artist’s mop brush. The ultra-fine kaolin powder deposits a miniscule layer that makes the black scroll look gray.
Advertisement
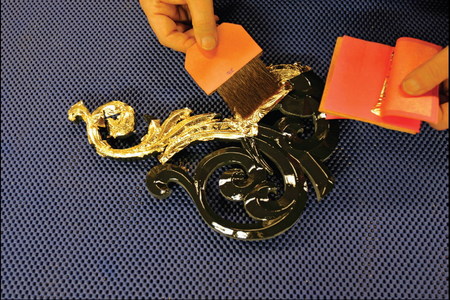
Next, I applied LeFranc Charbonnel’s slow size to prepare the surface for goldleaf. The scrolls’ surfaces were easily discernible because the size cut through the kaolin dust; its sheen resembles high-gloss, black paint. Rather than adding a dye or color indicator to the size, which could alter the size’s physical and chemical properties, the kaolin-dusting procedure aids visibility and prevents gold from adhering to unsized surfaces.
I allowed the size to cure for 48 hours, which my experience has shown provides ideal surface tack. Next, I applied 23½k, surface goldleaf with a gilder’s tip. Before adhering the scrolls to the substrate, I removed unwanted kaolin residue with a damp paper towel.
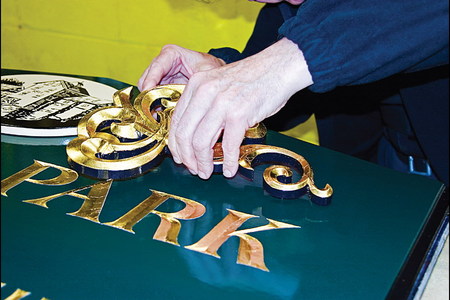
Finally, I attached the scrolls to the substrate. I applied a small, silicone bead to the pre-drilled holes and inserted the scroll’s underside into them. I didn’t gild the scrolls’ vertical sides, which created a sleek, black outline and provided a convenient place to handle the scroll while attaching it to the sign panel.
All seven of Williamsville’s park signs feature a set of elegant, graceful, yesteryear scrolls. They’re handcrafted, yet speedily produced, thanks to ancient techniques and modern technologies.
Francis Lestingi, a former physics professor, owns Signs of Gold Inc. (Williamsville, NY).


 Tip Sheet1 week ago
 Photo Gallery3 days ago
 Ask Signs of the Times5 days ago
 Real Deal2 weeks ago
 Benchmarks1 week ago
 Photo Gallery3 hours ago
 Women in Signs2 weeks ago
 Women in Signs1 week ago