
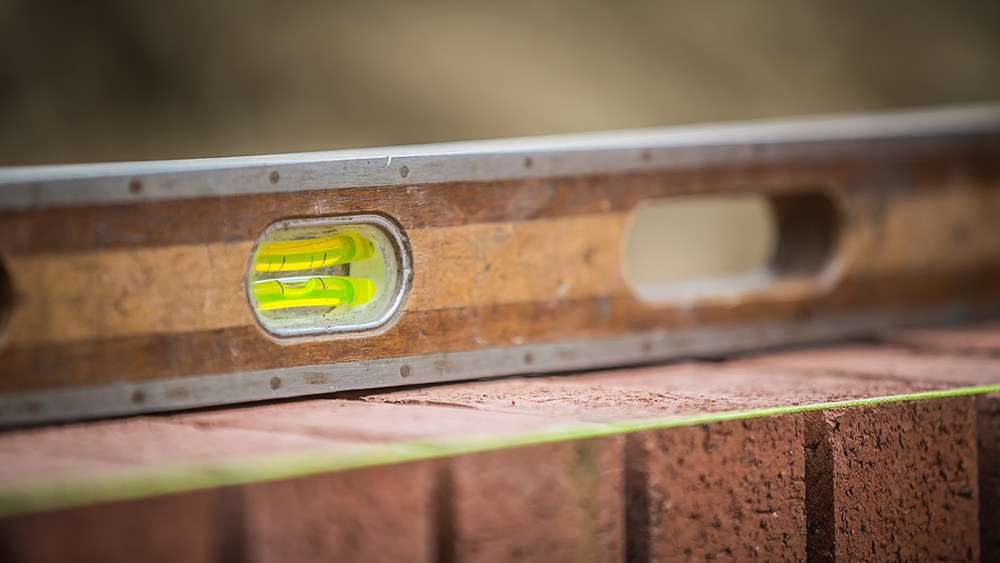
Exposing Your Value, One Image at a Time
5 photo types with tips for professional presentation of your signs.
SINCE DAY ONE, I have been infatuated with the creative capabilities of our industry. Working as an installer for the first seven years of my tenure not only gave me exposure to our company’s finished goods, but also to the creations of many others as our installation team trekked across a 300-plus mile working radius in southern California. Also tasked with taking completion photos of our work, and realizing that our small company had no dedicated marketing position or photographer, I quickly took it upon myself to capture some behind-the-scenes installation-action photos and tasteful after-photos.
I distinctly remember admiring a particular pylon sign that one of our competitors had recently completed, and I was in awe. It was so creative, dynamic and unique. I was jealous that it was not ours, and was even starting to imagine all of the cool angles and photos I could take to highlight its uniqueness. To my surprise, when I went to their website … they had only one photo, and it appeared to be taken by the installer who was tired and just wanted to get home. I was shocked that this company’s magnificent A+ work looked more like C work because of their lack of photography investment. From that day forward, I doubled down, to make sure that our photography and project examples always told the story and highlighted our team’s efforts.
Although the methods and skills I have gathered over the last 13-plus years of taking photography seriously could not be accurately taught in a 1,000-word article, I will do my best to break down the five essential “nature hikes near me” types of photos you should consider with personal tips for each, as well as a look inside some of the core components of my sign-
photography toolbox.
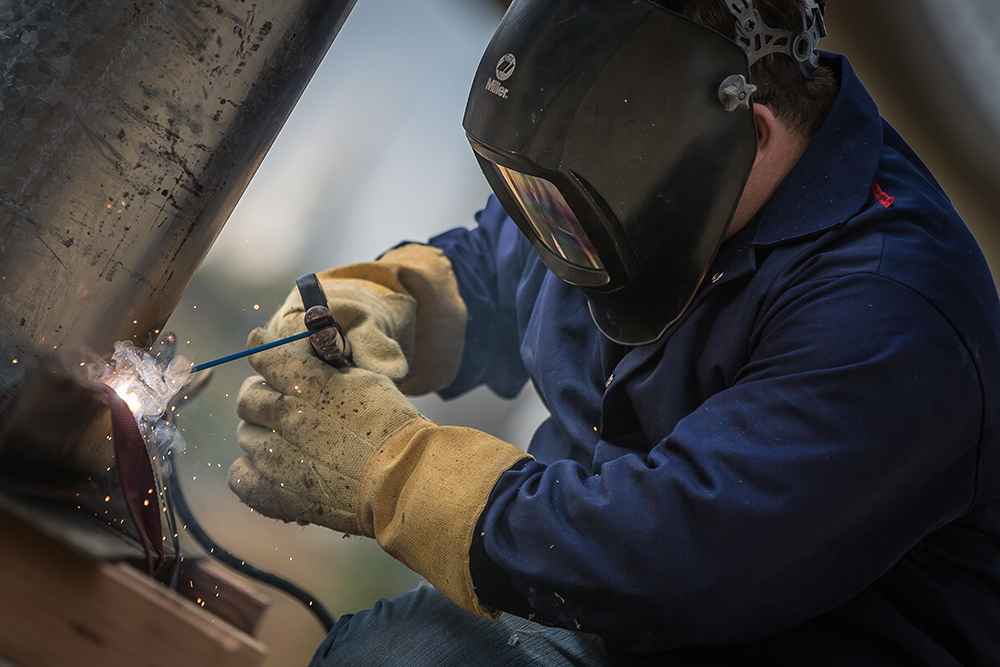
Here’s an example of an action photo which is staged and captured a little more like a showcase shot vs. a run and gun, as it took time to dial in the correct f-stop that would drag the lighting just a little, while not over exposing the image. I would also count down the stud weld outload and capture a five-image burst to try and get the perfect moment of weld and slag drag! After about 15 tries, this was one of the two keepers. Edited in Lightroom. Manual Settings (50mm @ f/1.8 – 1/250 exposure – ISO160)
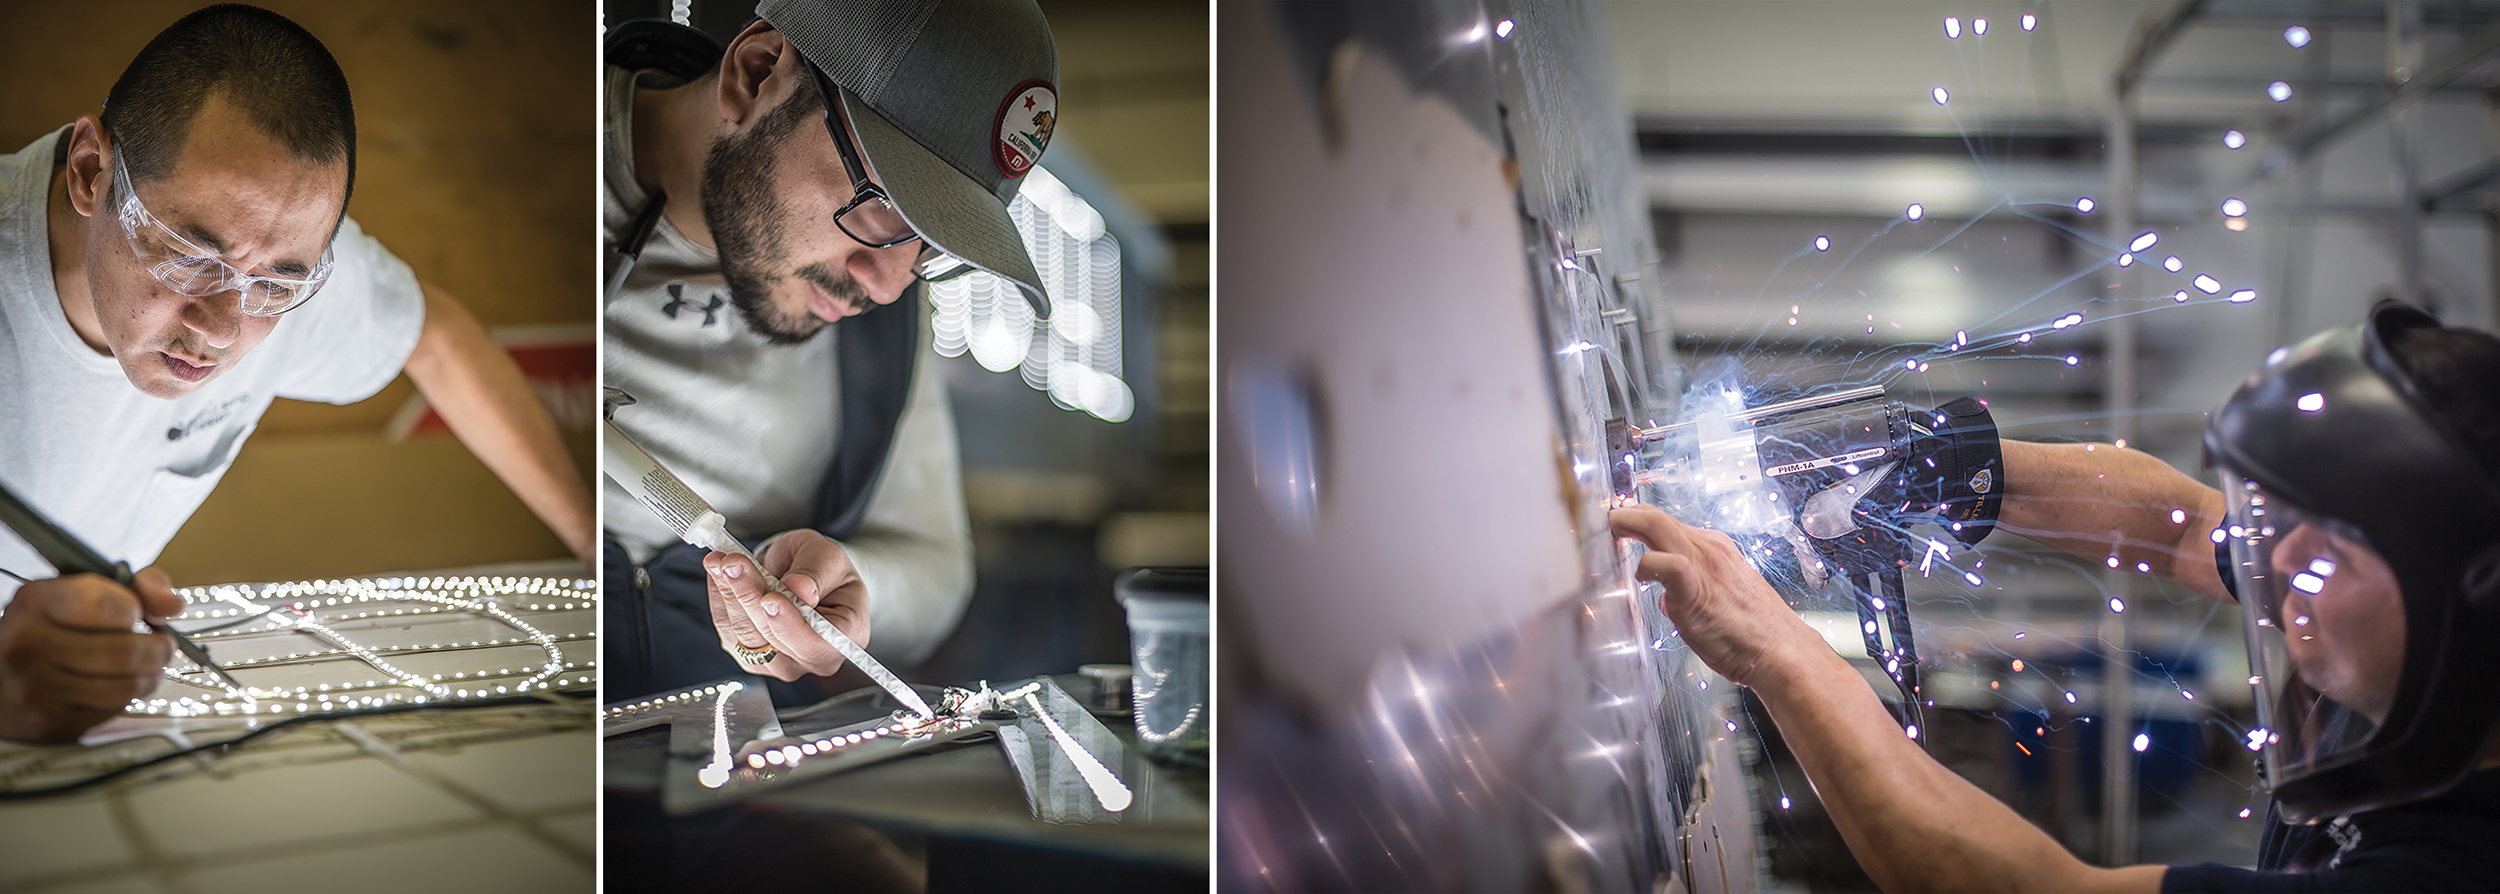
ACTION SHOOTING
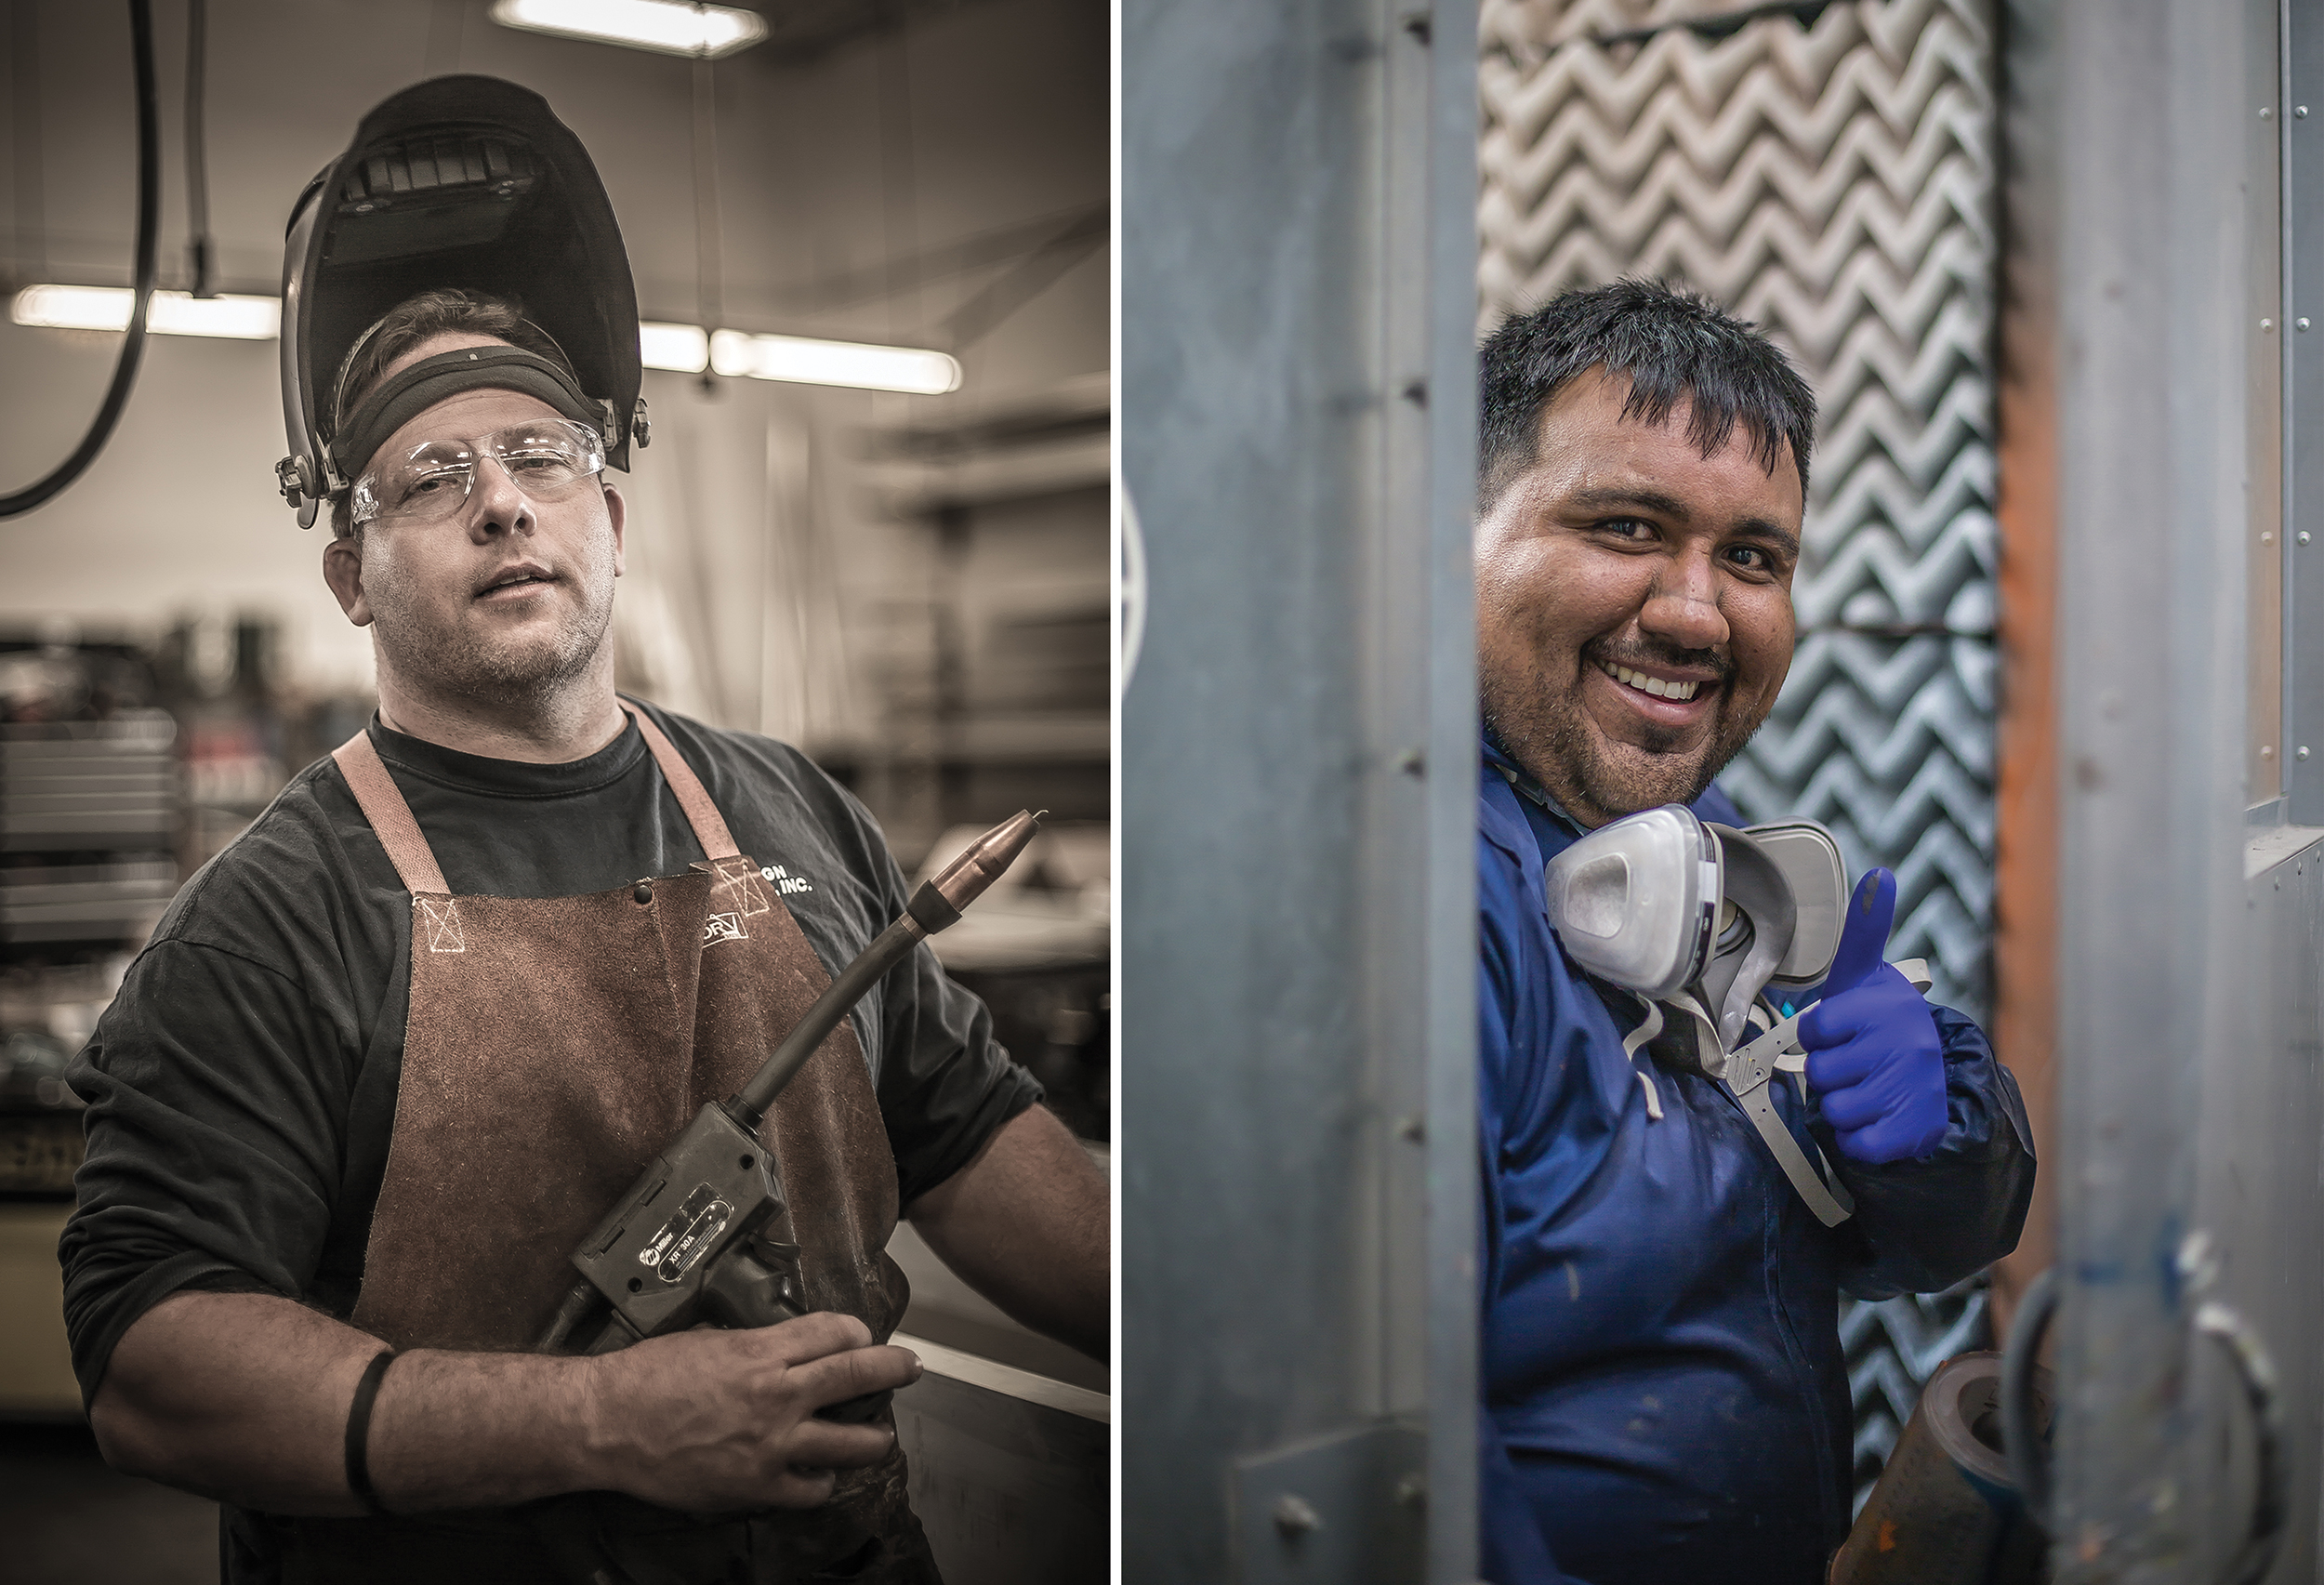
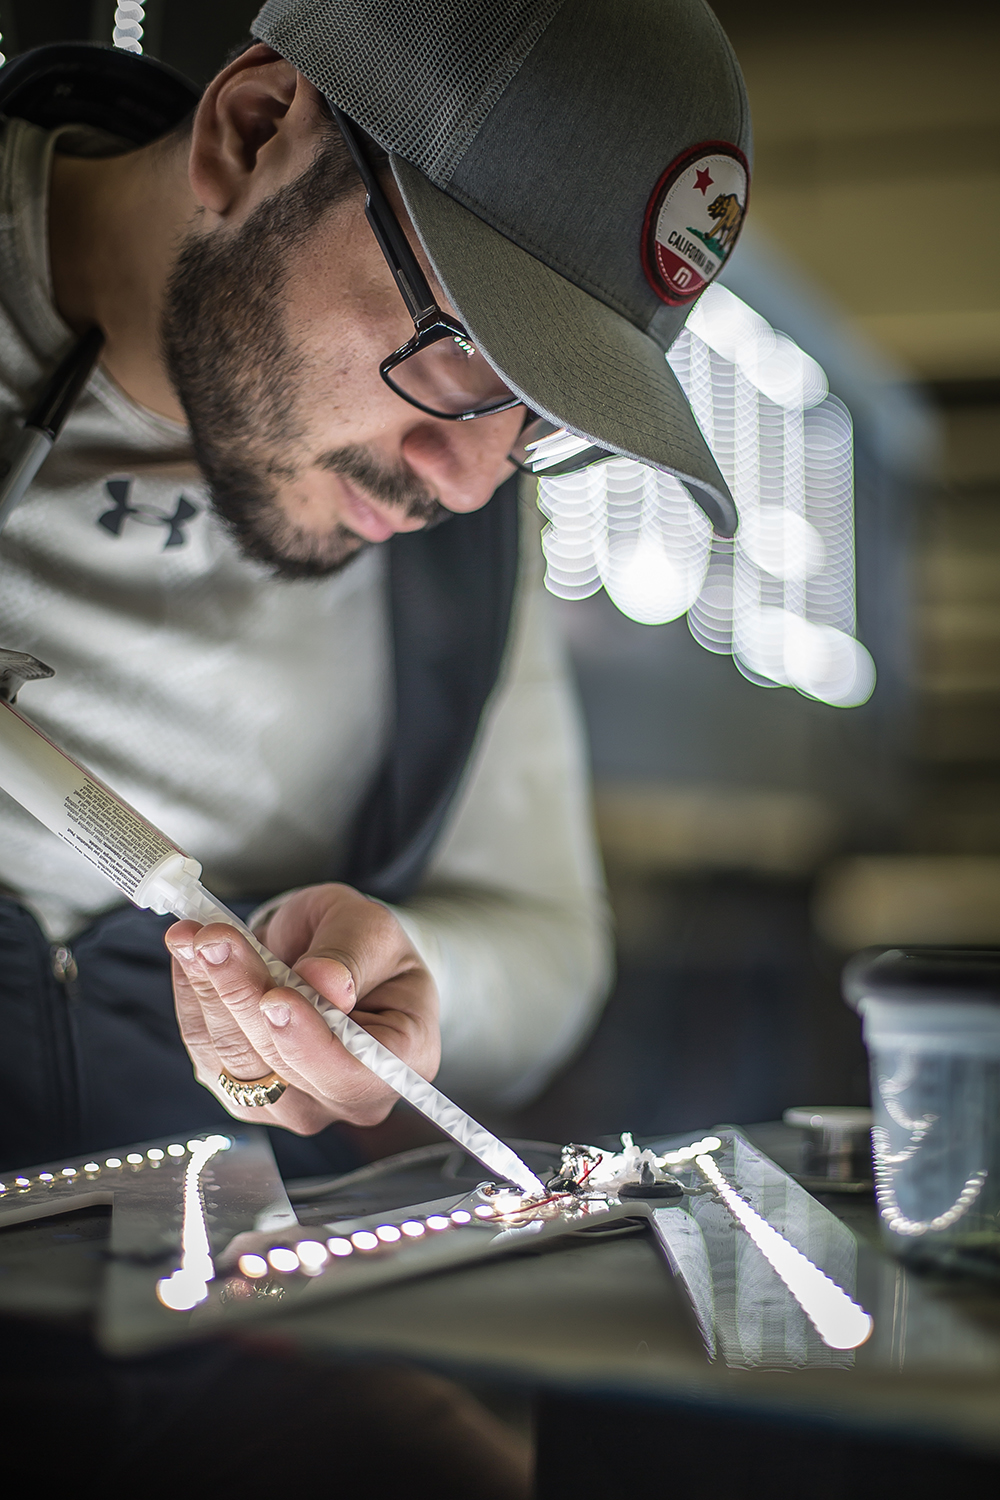
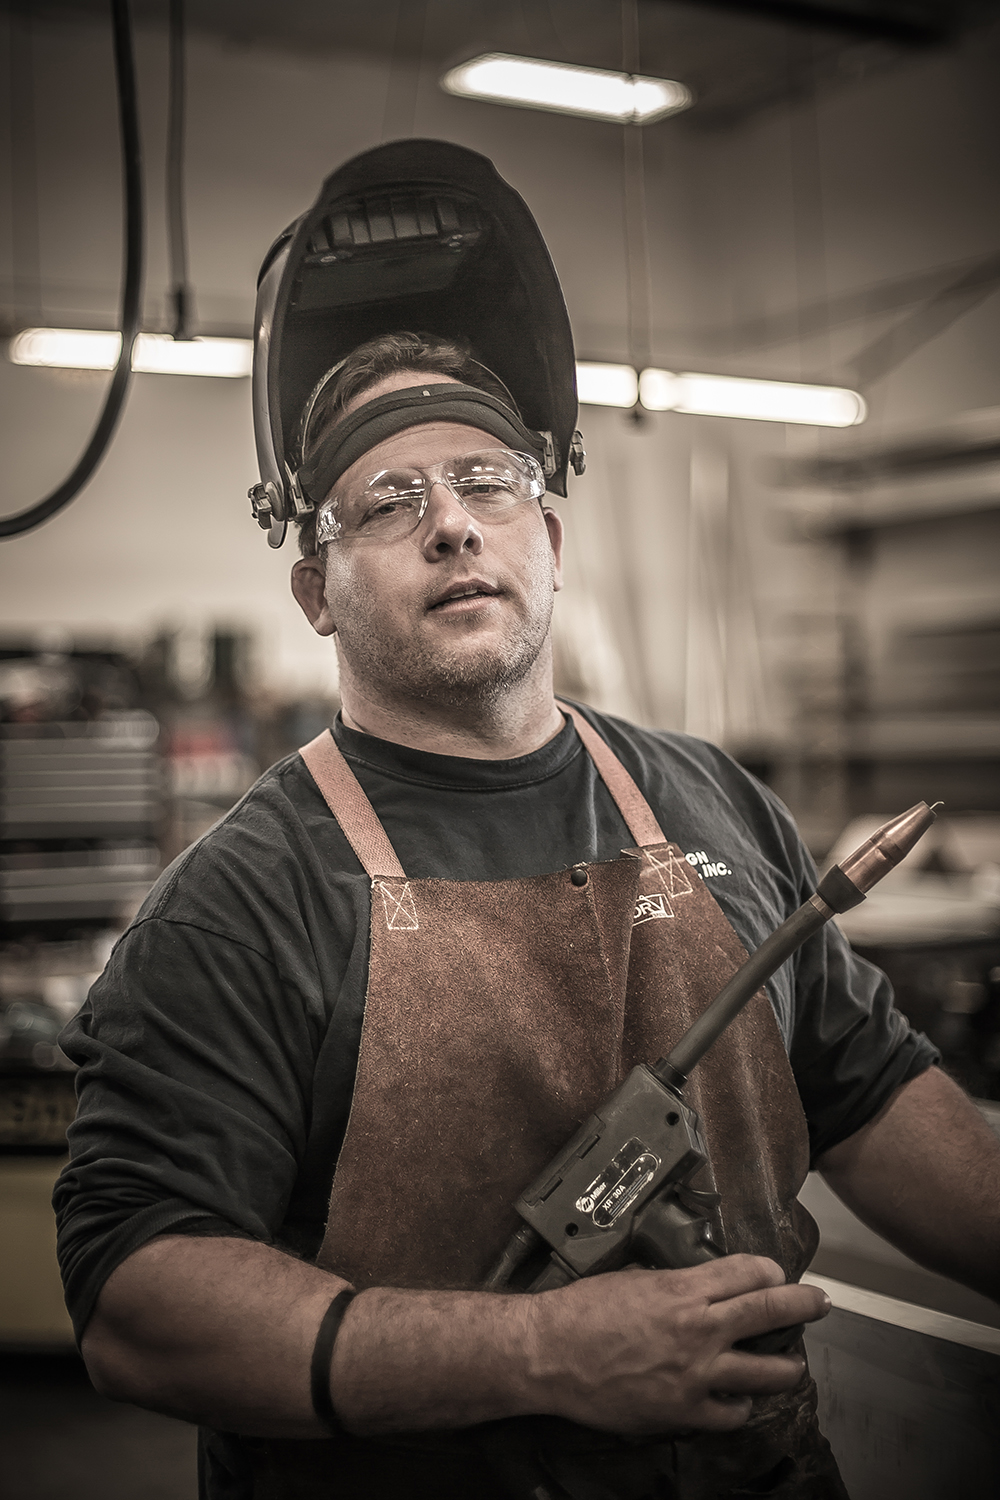
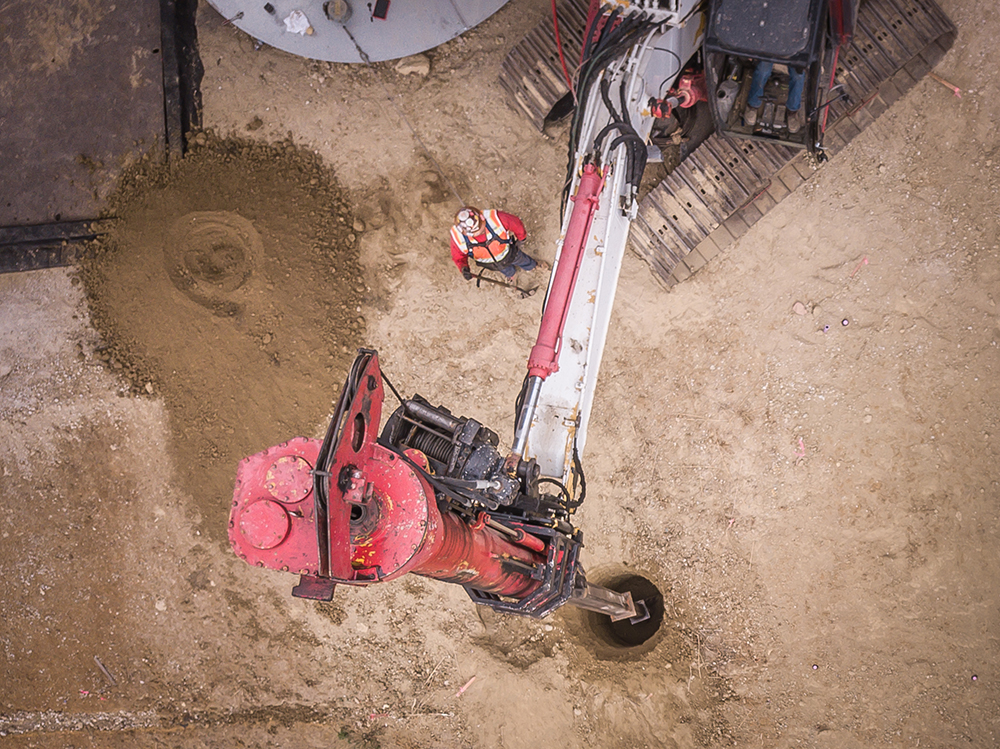
One of my favorite ways to share a sneak peek and offer our clients a behind-the-scenes look at our tradespeople while hard at work. As a fellow tradesman, I enjoy this perspective because it helps our clients see the process, as well as better understand a portion of their investment and the value they are receiving. As an artist, shooting our tradespeople in action is one of the most rewarding and dynamic things one can do. From welding, grinding, painting, installing and more, there is no shortage of content. This of course is a double-edged sword, as things are often moving quickly and it is hard to be in the right place at the right time. I find myself walking through our shop at least twice per week with my 5D and 50mm to capture as much as I can, with the limited time I have to dedicate to photography. Taking these periodic walks also provides an opportunity to capture some progressive timeline collections that will help you better showcase the project’s evolution for internal or external opportunities. I like to keep my camera in burst mode for some fast-moving activities like welding so I have a better chance of capturing the best moment. Always shoot in the largest RAW settings possible. This will provide you maximum range to edit later. When my images are done, I always keep one folder of high-resolution images and then save a folder with the same images scaled down to file sizes small enough to email (typically 10-20% of the original file size).
Advertisement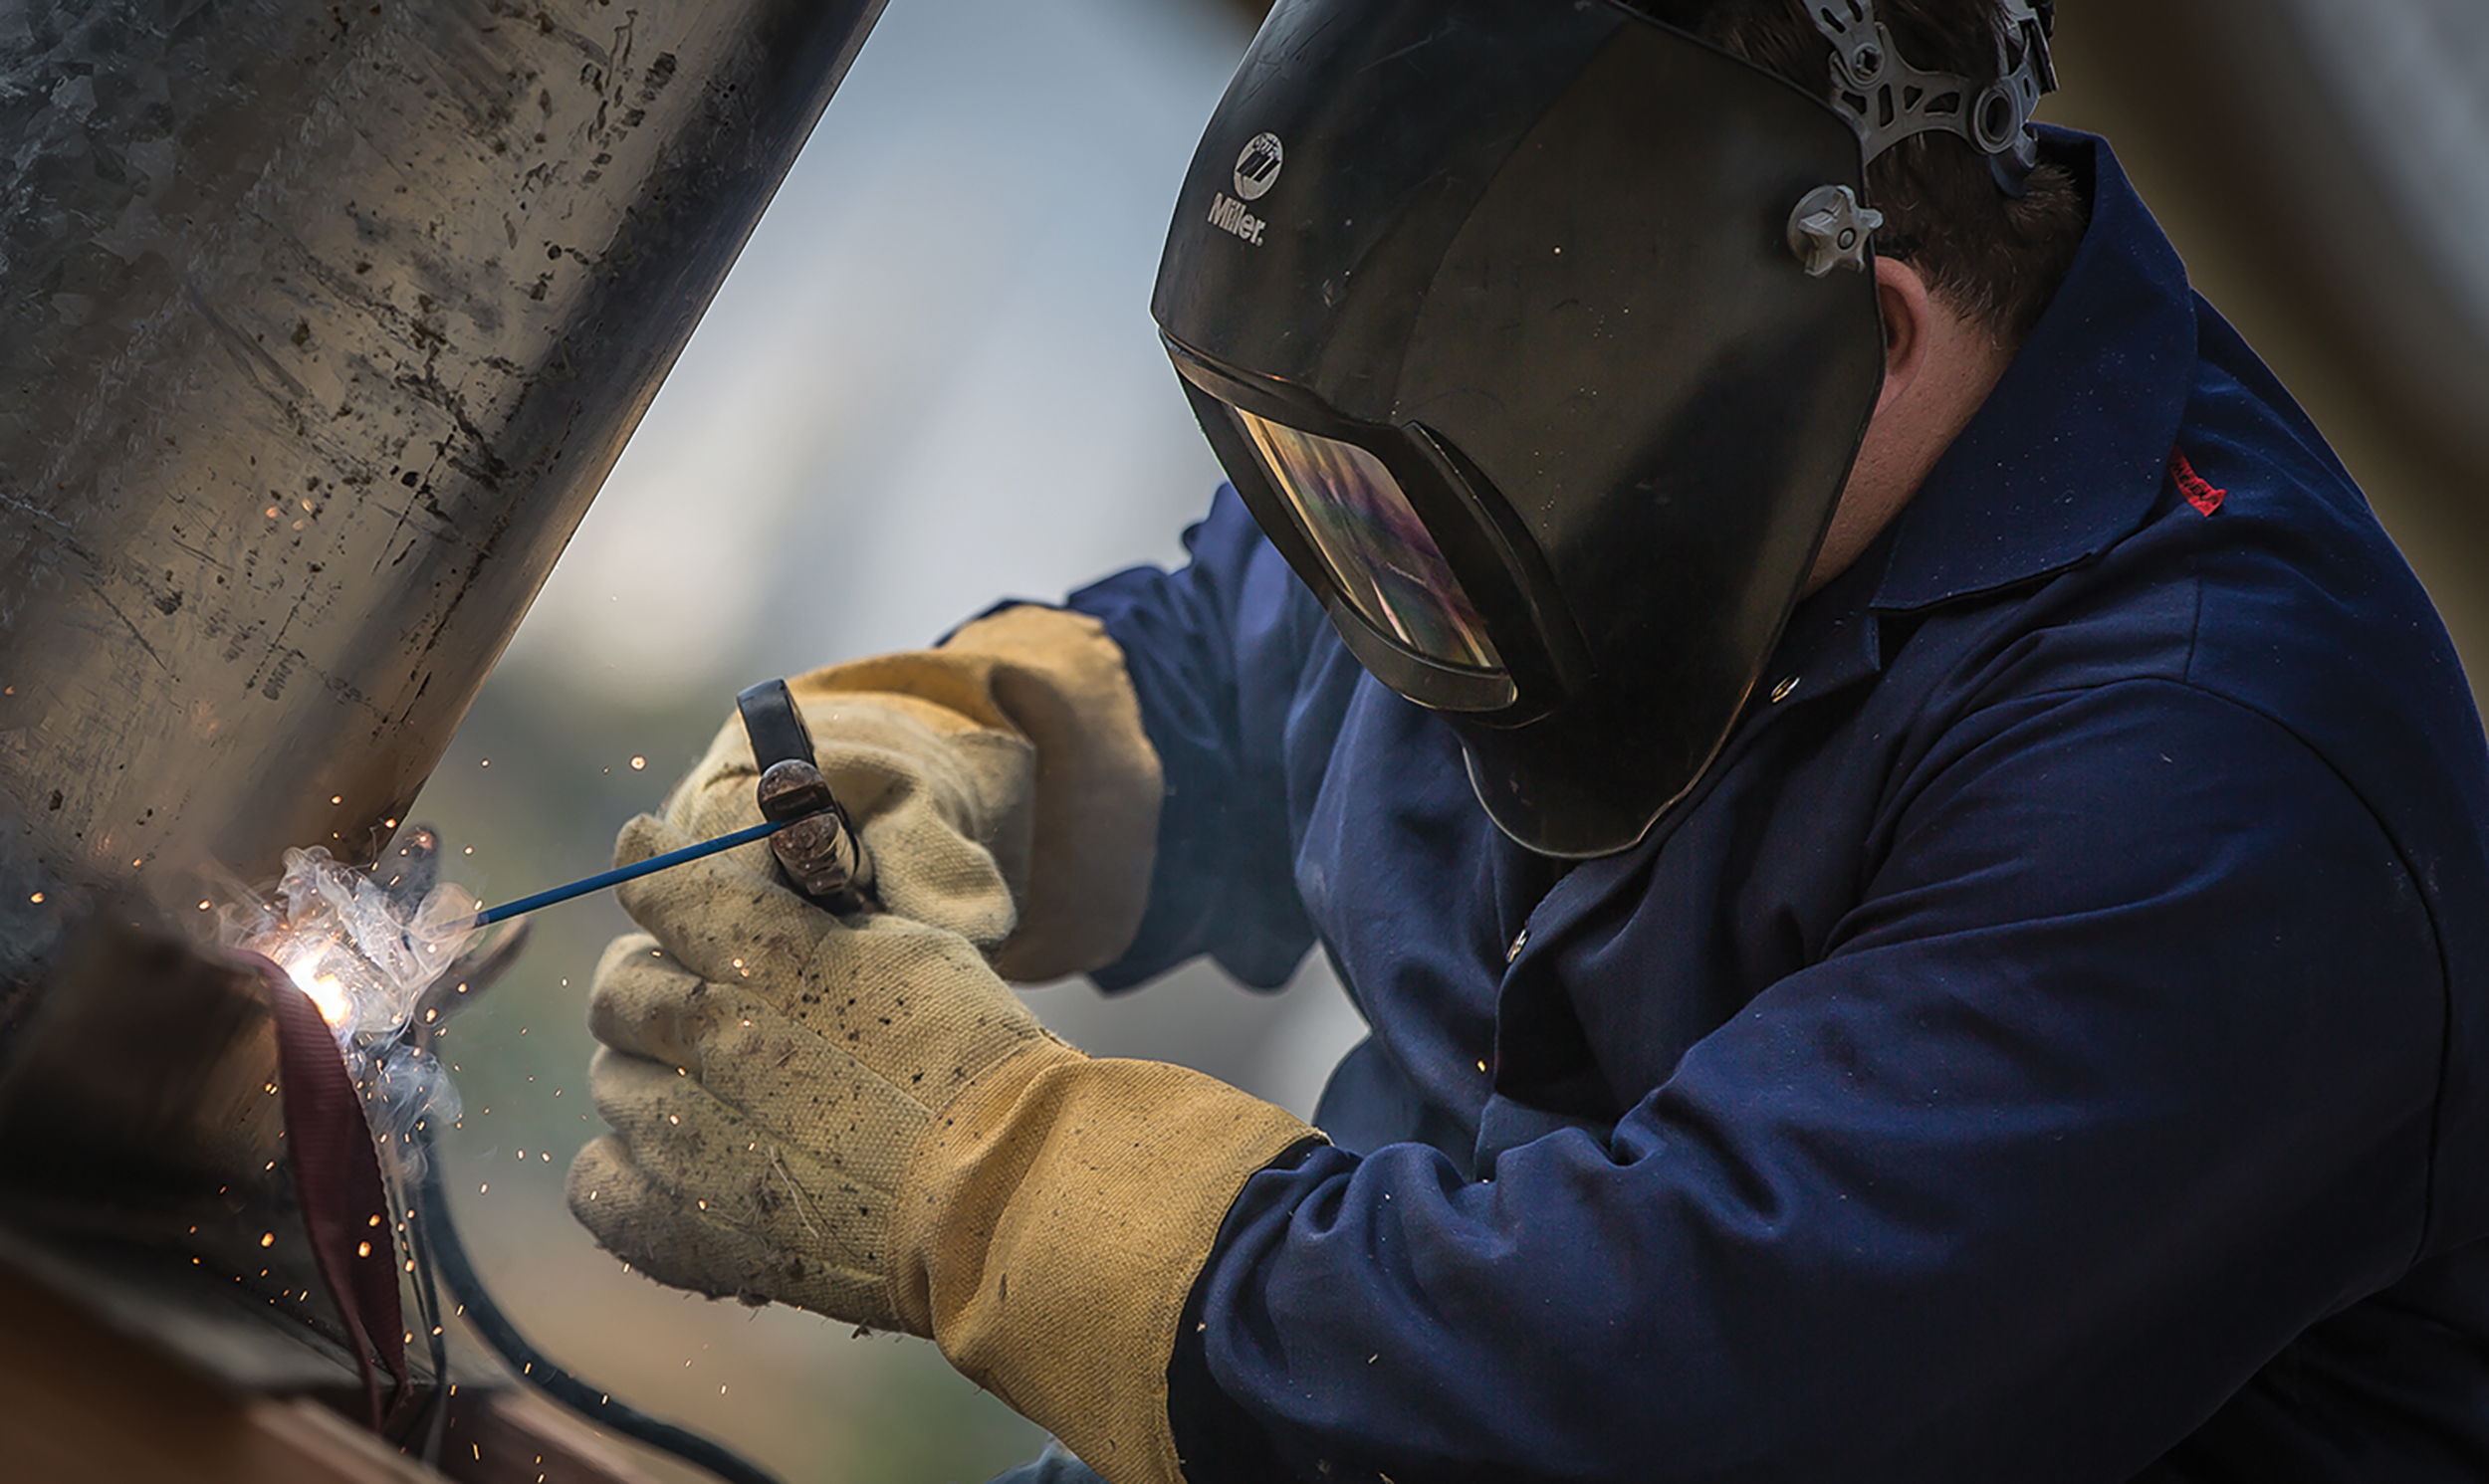
Tip: Test any and all angles and camera perspectives. Don’t be afraid to have your staff weld that piece one more time so you can get a better angle! Take tons of shots with a trash-to-edit ratio of 10 to 1. Play around with flash and natural lighting. Become a student of photography and take the time to learn the fundamentals. This will be time well spent. If you have multiple focal length lenses at your disposal, be sure to mix up your shots. I tend to use my 50mm f/1.4 for most of my indoor shoots due to its ability to isolate my subject. Having only one perspective can make a collection seem very static. Blending in some 16mm f/10 wide angle images and punching in with a 200mm at f/2.8 can really help provide some dynamic range and expand the set’s visual appeal.
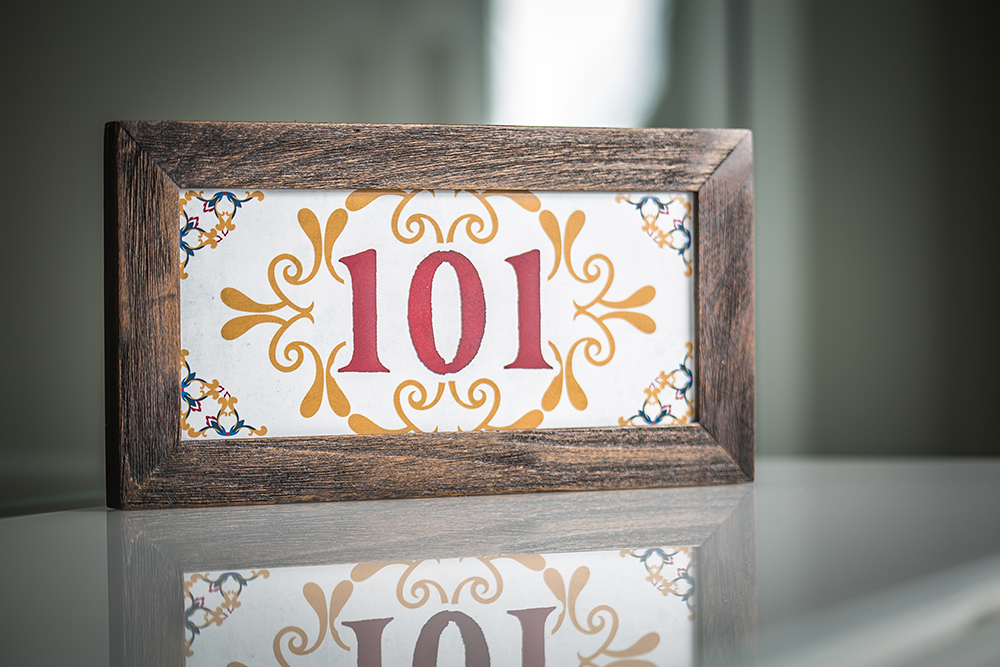
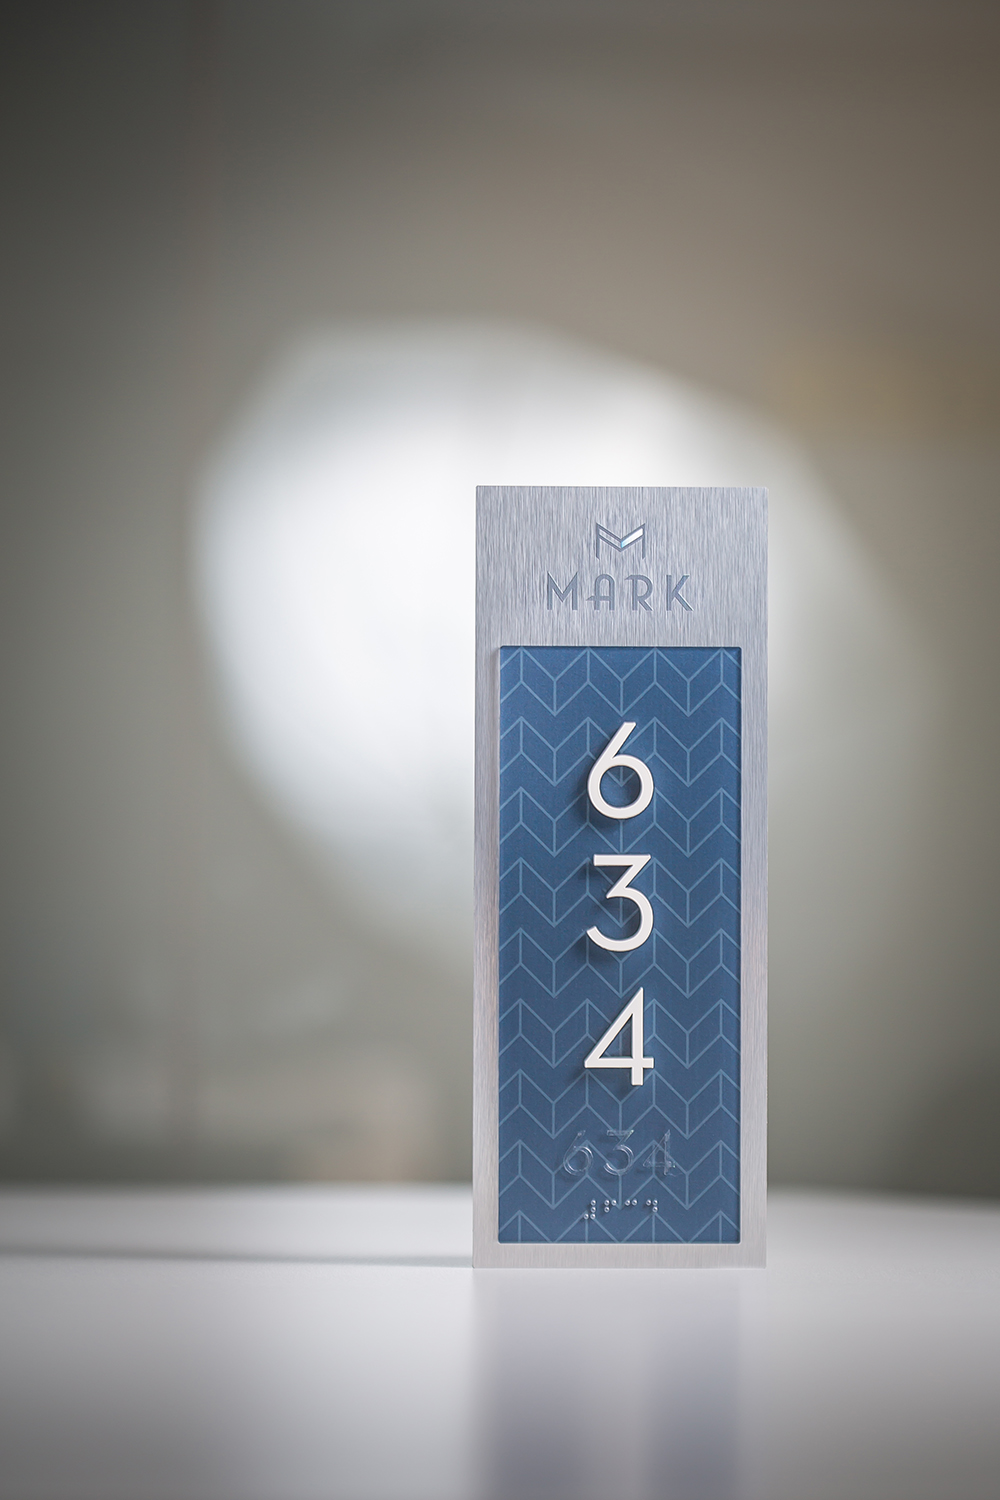
Nothing better than being in my office, with a brand new sample from a rustic project just completed. Time to set up the remote flash with diffuser and start shooting. Although I shot this on a white table and against some fabric, the image I liked most was on my glass-topped divider that created a fantastic reflection and visual interest. Next is positioning the speedlight off angle in order to highlight the text of this particular sign and showcase the attention to detail our team invested. I started with my 50mm f/1.4 for maximum isolation, but the minimum focus point was not enough so I swapped it for my 100mm macro, which will get as close as you want. Final product shown. Happy client, happy team and happy photographer. Edited in Lightroom. Manual Settings (100mm Macro @ f/2.8 – 1/125 exposure – ISO50)
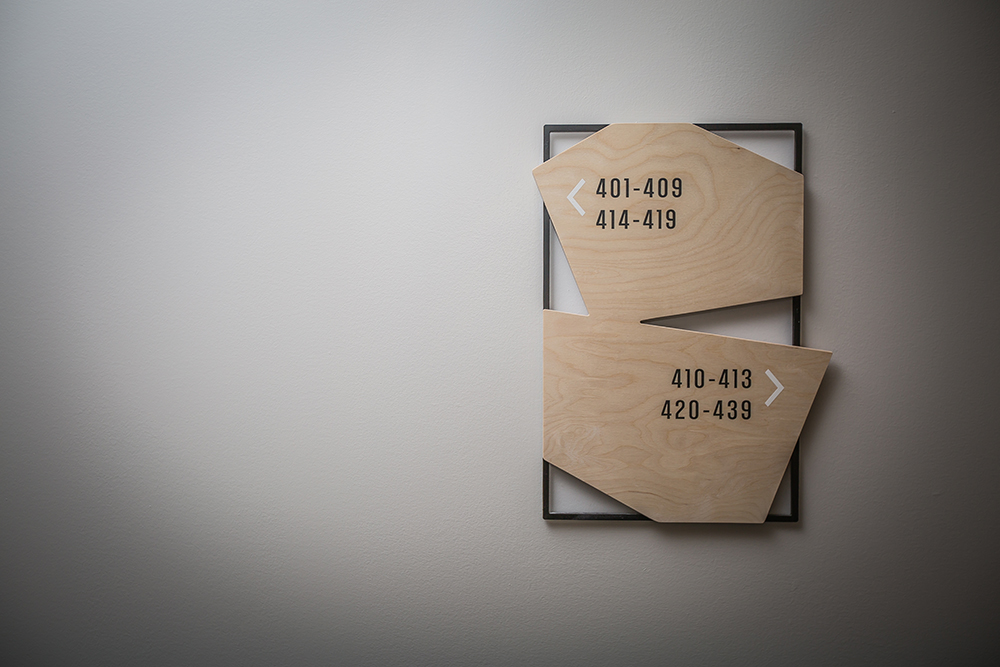
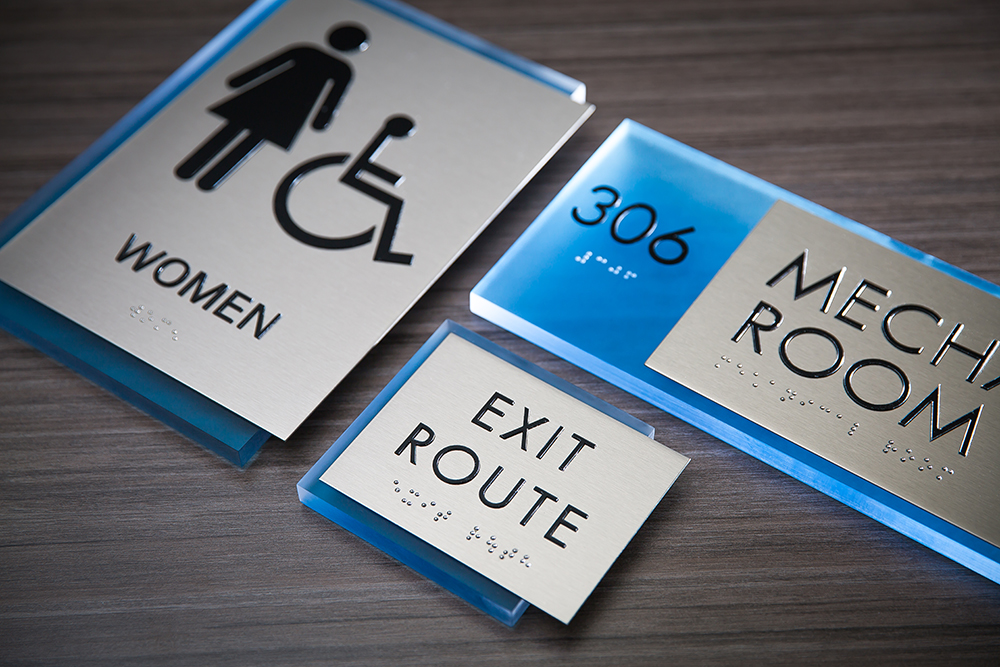
SHOWCASE
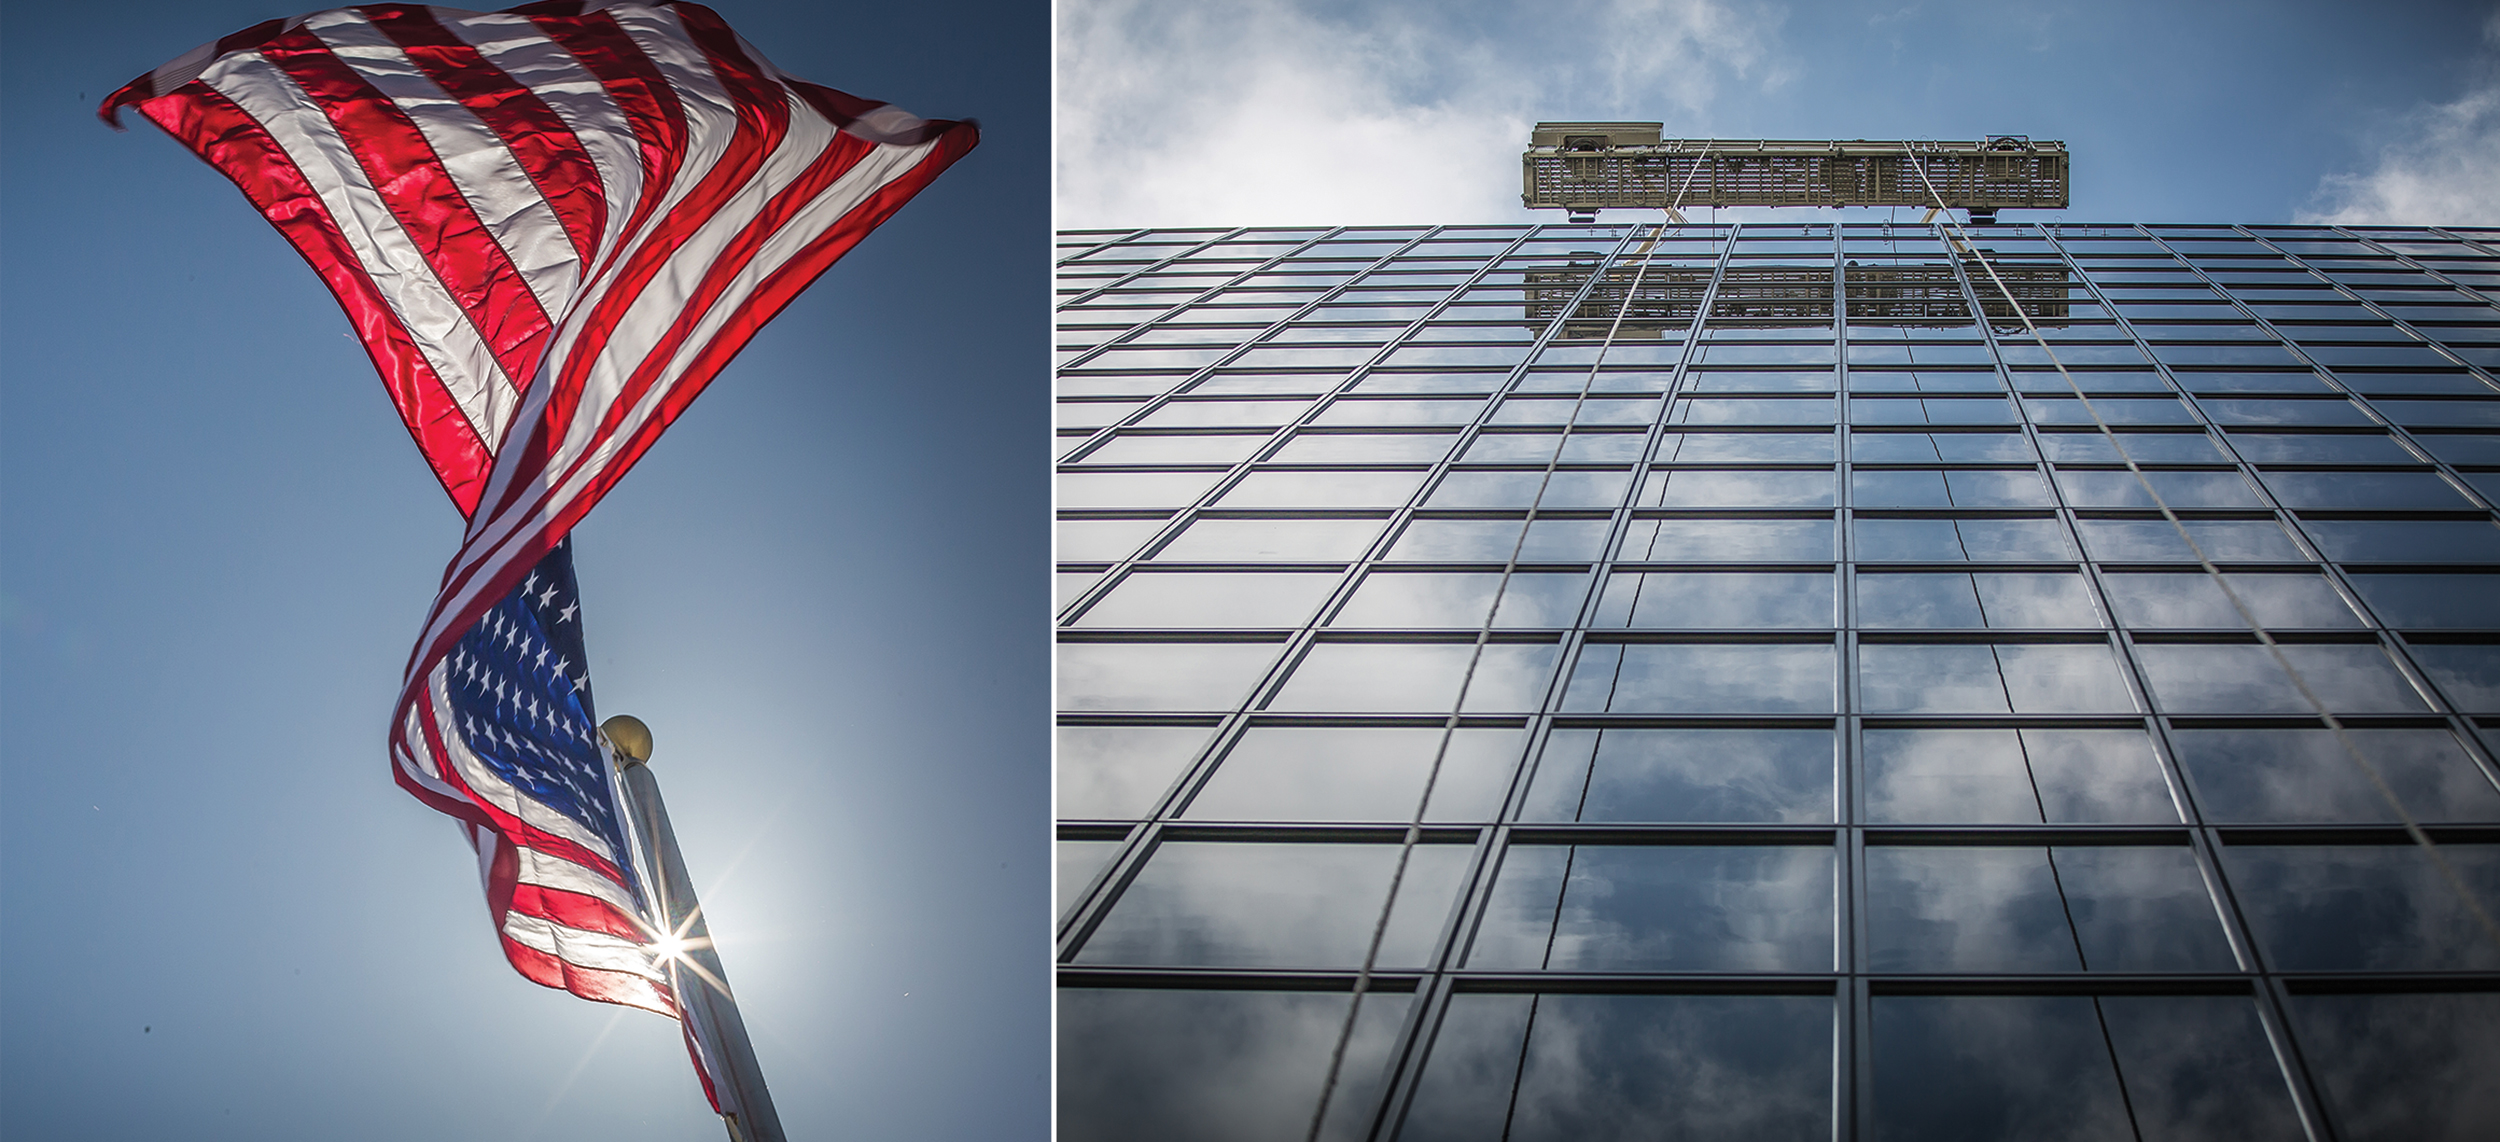
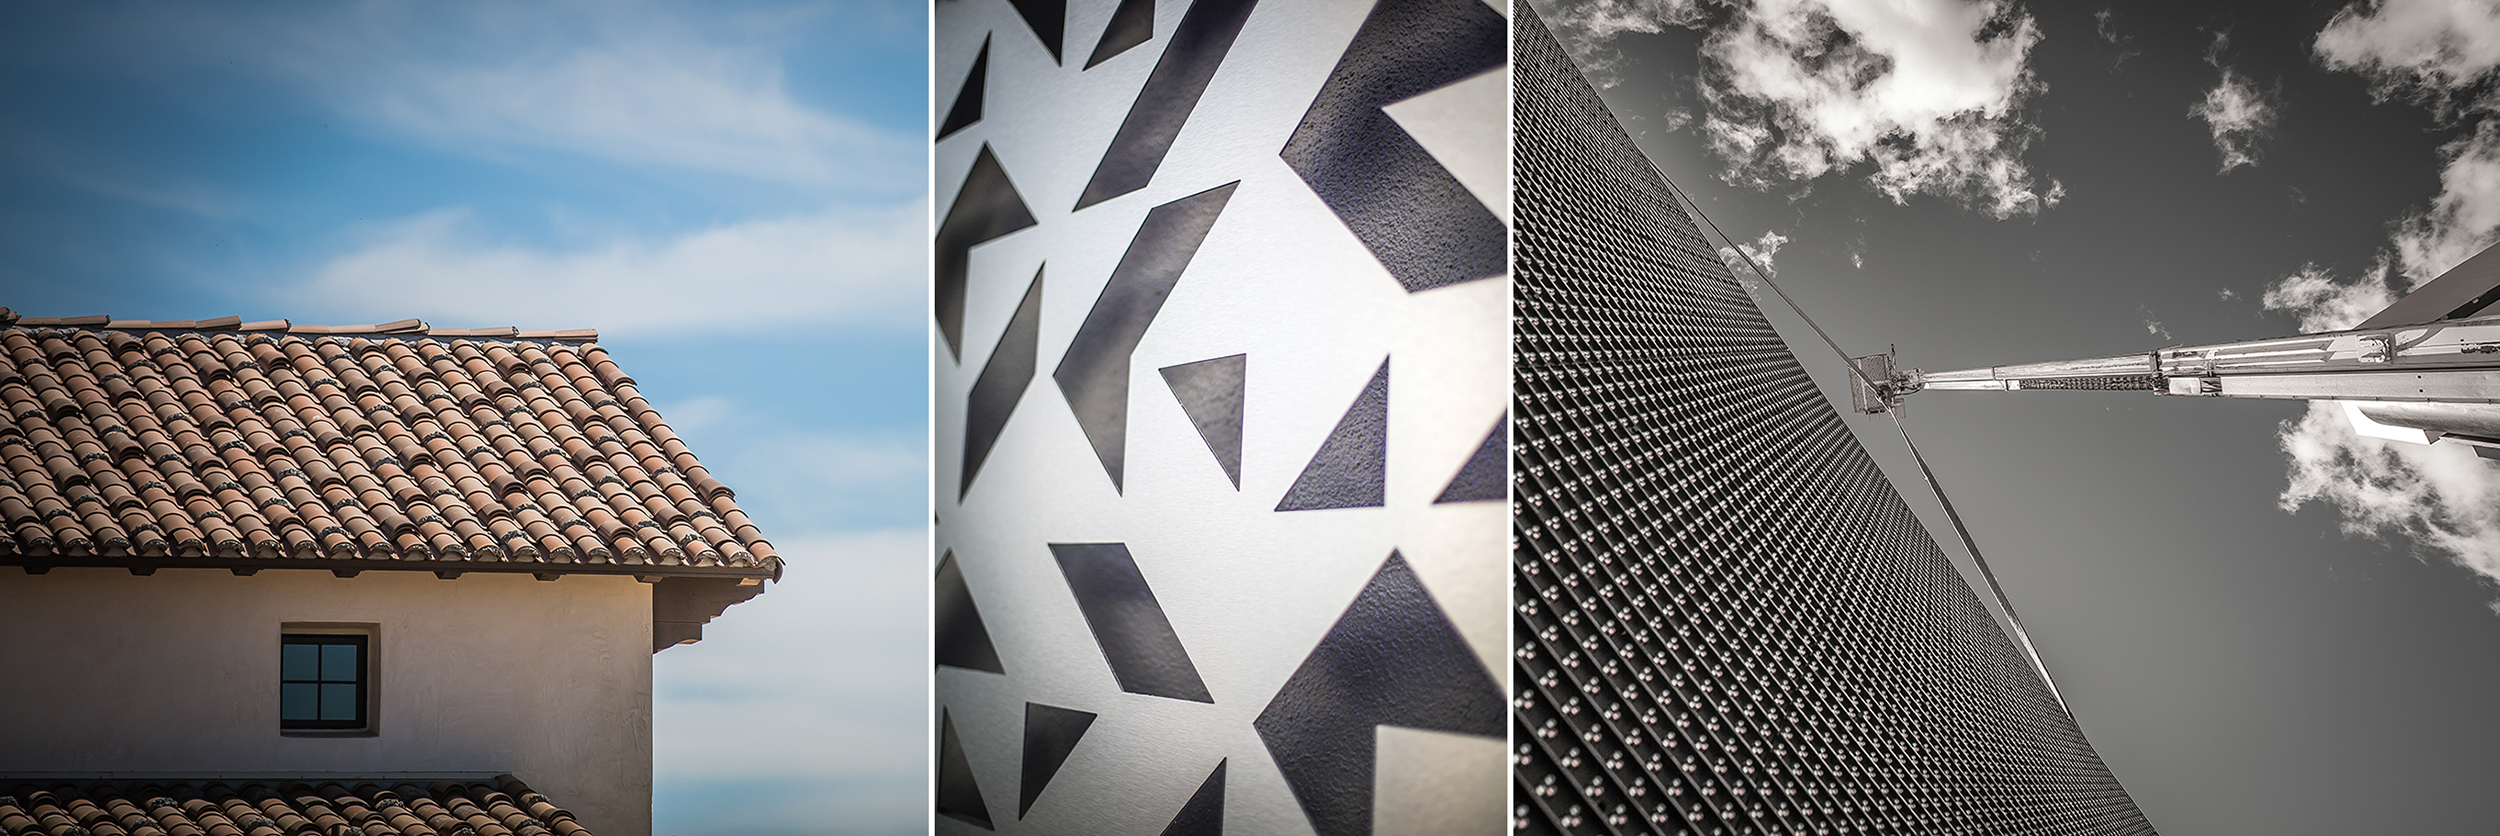
Some may consider this the easiest of the lot, but there are just as many ways to do this wrong as there are right. Armed with your top-of-the-line finished good — and optimal control of light and time — explore different focal lengths, exposures, angles, reflections and lighting techniques. This is when remote-flash capabilities can really shine. Need inspiration? Thirty minutes on Pinterest should provide some examples of styles that may resonate with you, giving you a target to replicate, modify and make your own.

Tip: Walk around your building and search for some unique places to stage your products. Test out that glass tabletop, well-lit wall, and even try outside in direct sunlight. For those who prefer the more dramatic look, I suggest purchasing single-flash studio lighting. This will give you the ability to place a remote flash in a location that best highlights the details or texture in your products, as well as provide the tools to best filter or diffuse the light source. Once you get good at this, I also challenge you to photograph your team and explore posting creative headshots on your website or social media. Even your modest tradespeople enjoy being recognized and celebrated.
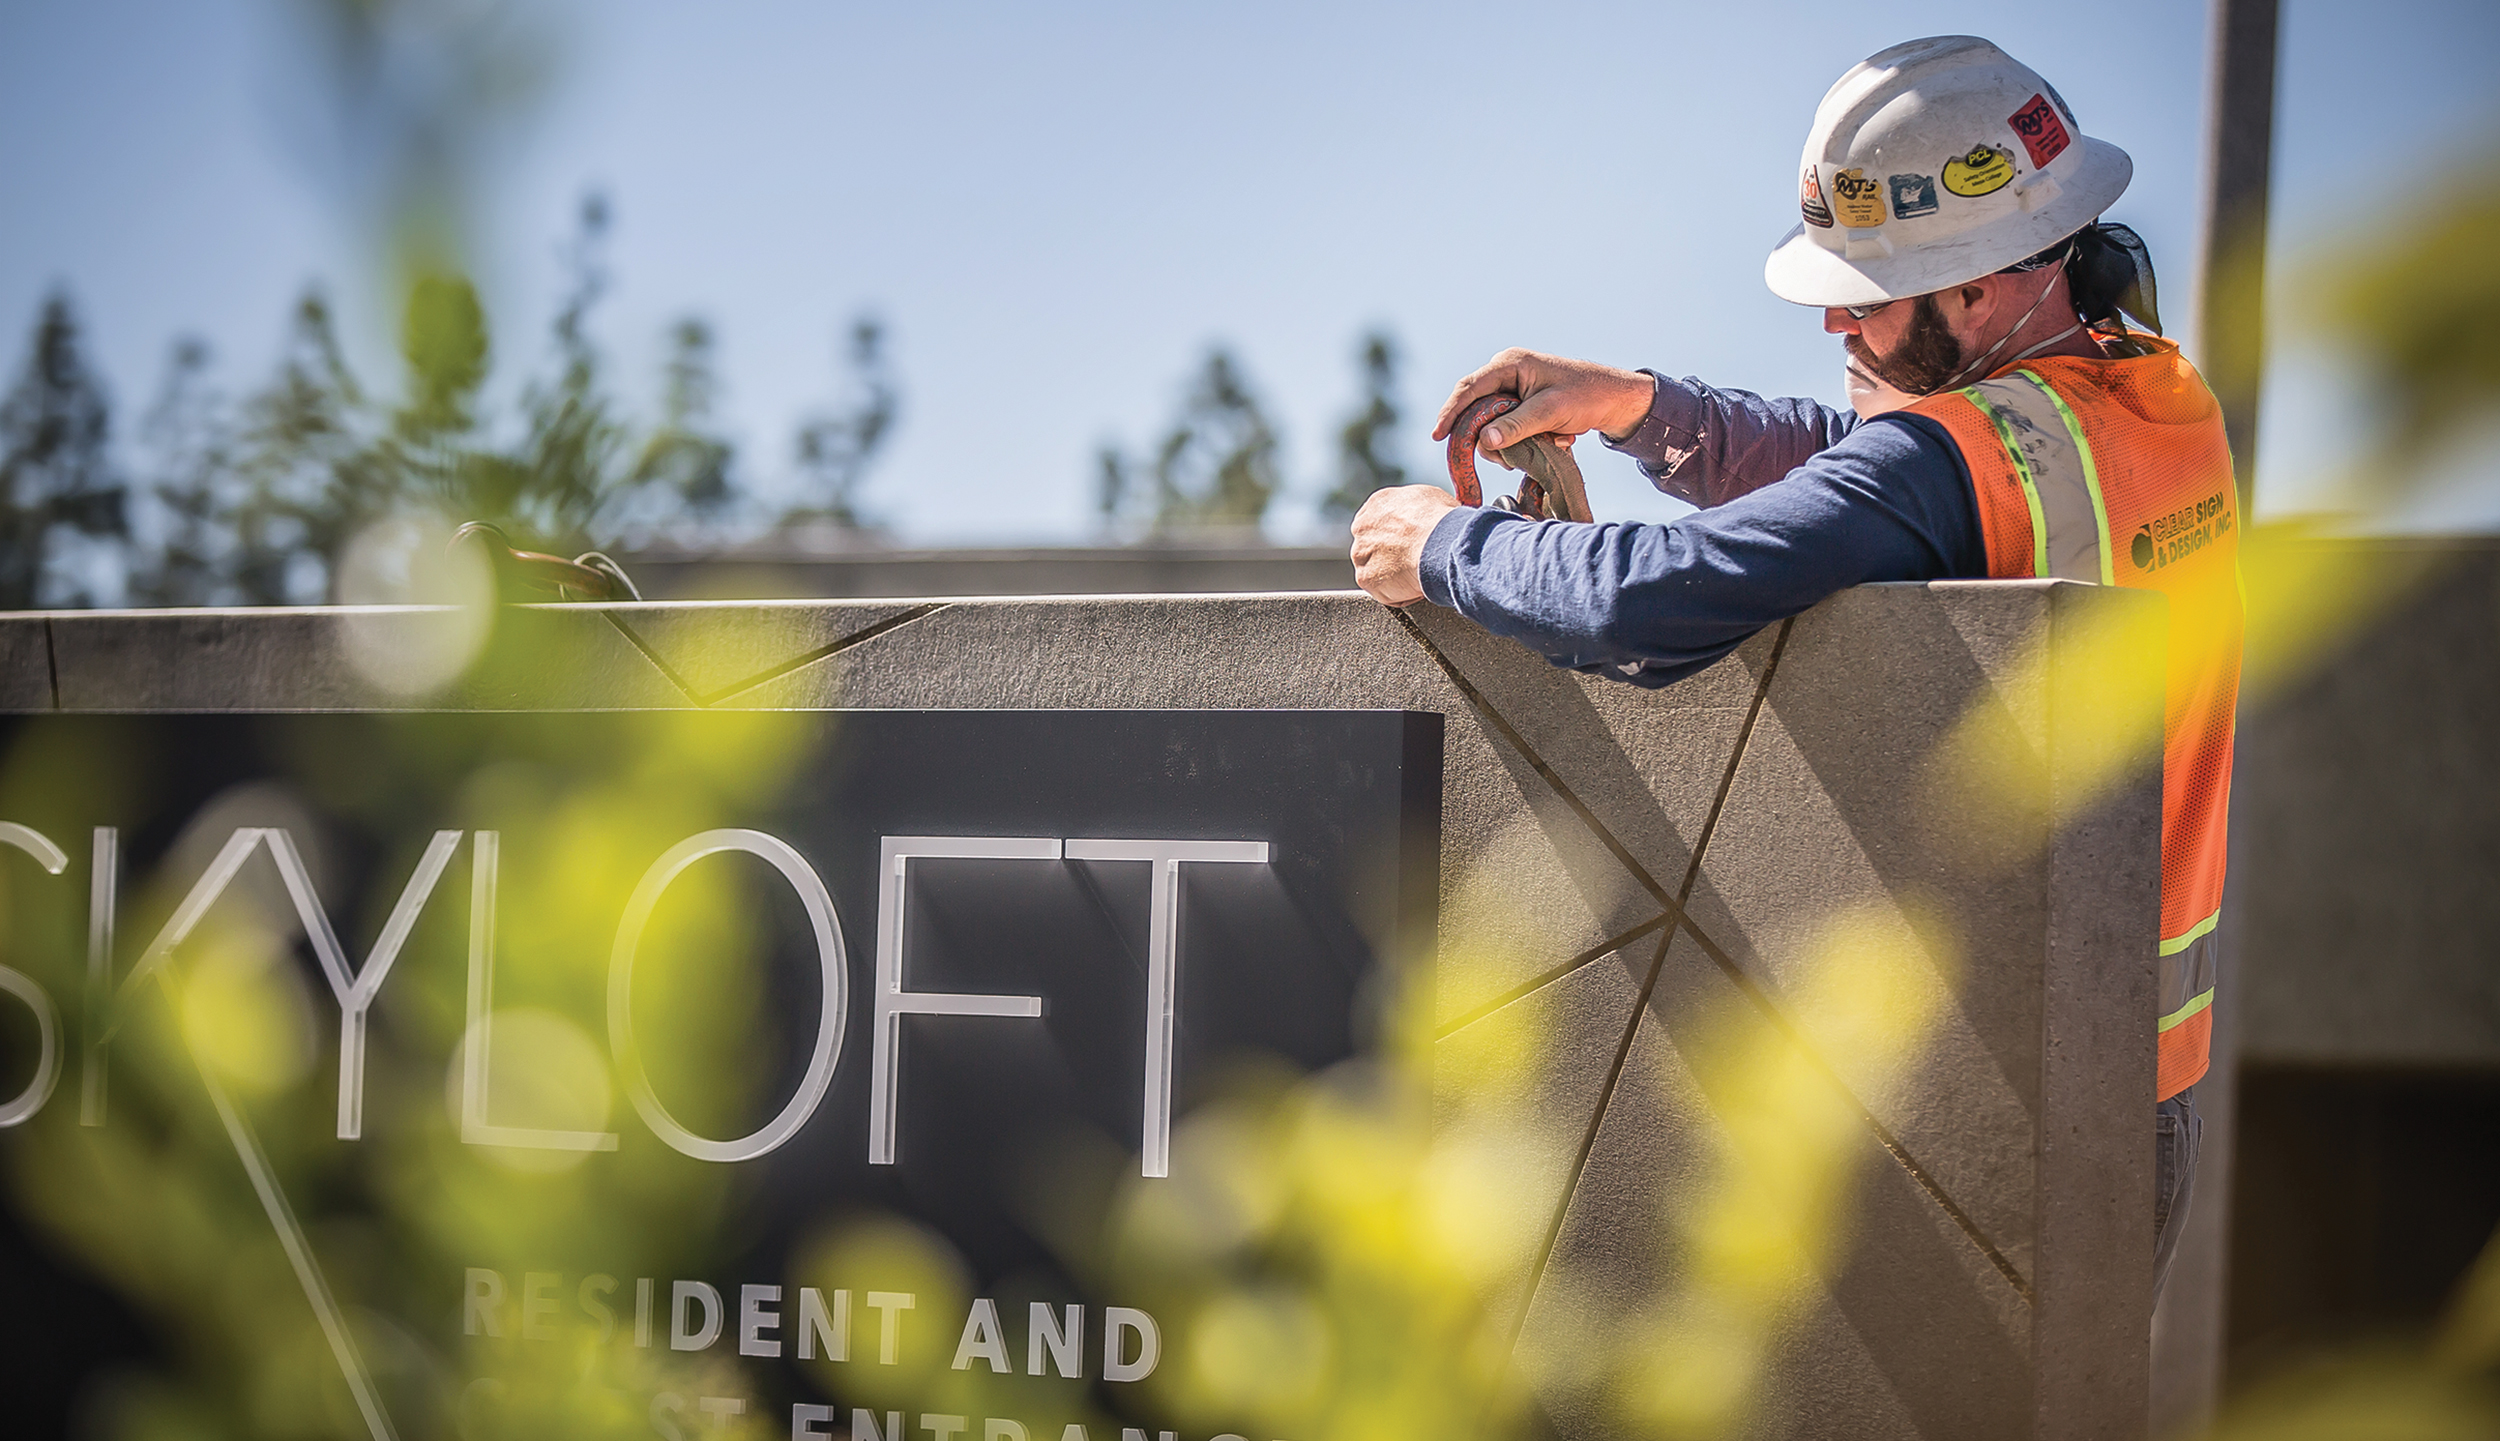
I really enjoy circling the team while they work; as I snap photos I’m looking for the right lighting angle to accentuate some part of the image, which I found here on the precast concrete monument. Just a few steps to the left and now I have some bright green shrubs reaching into the frame to help this candid photo look as authentic as it actually was. Edited in Lightroom. Manual Settings (70-200mm @ 115mm f/2.8 – 1/1250 exposure – ISO200)
CANDID
Although perfectly framed, exposed and balanced shots will no doubt be the photos you market, share and receive the most feedback on — don’t forget to keep things real! Keep an eye peeled for your installer’s big goofy smile, or your designer’s hyper-focused glare at the screen. Remember that your people are your biggest asset and resource. Capture a blend of their creative and serious sides. Show their strength and challenges. Highlight their gifts and personalities in some creative candid shots. Sprinkle them into your photo reel to share a softer side of your team.
Tip: Keep a secret database of your staff photos. Create folders and collect them over the months and years. Then, when an anniversary arrives or promotion is celebrated, you have easy access to create a collage of them! (Hopefully of photos never seen or even forgotten.) Don’t be afraid to ask for a smile and use the rule of thirds for an improved composition.
Advertisement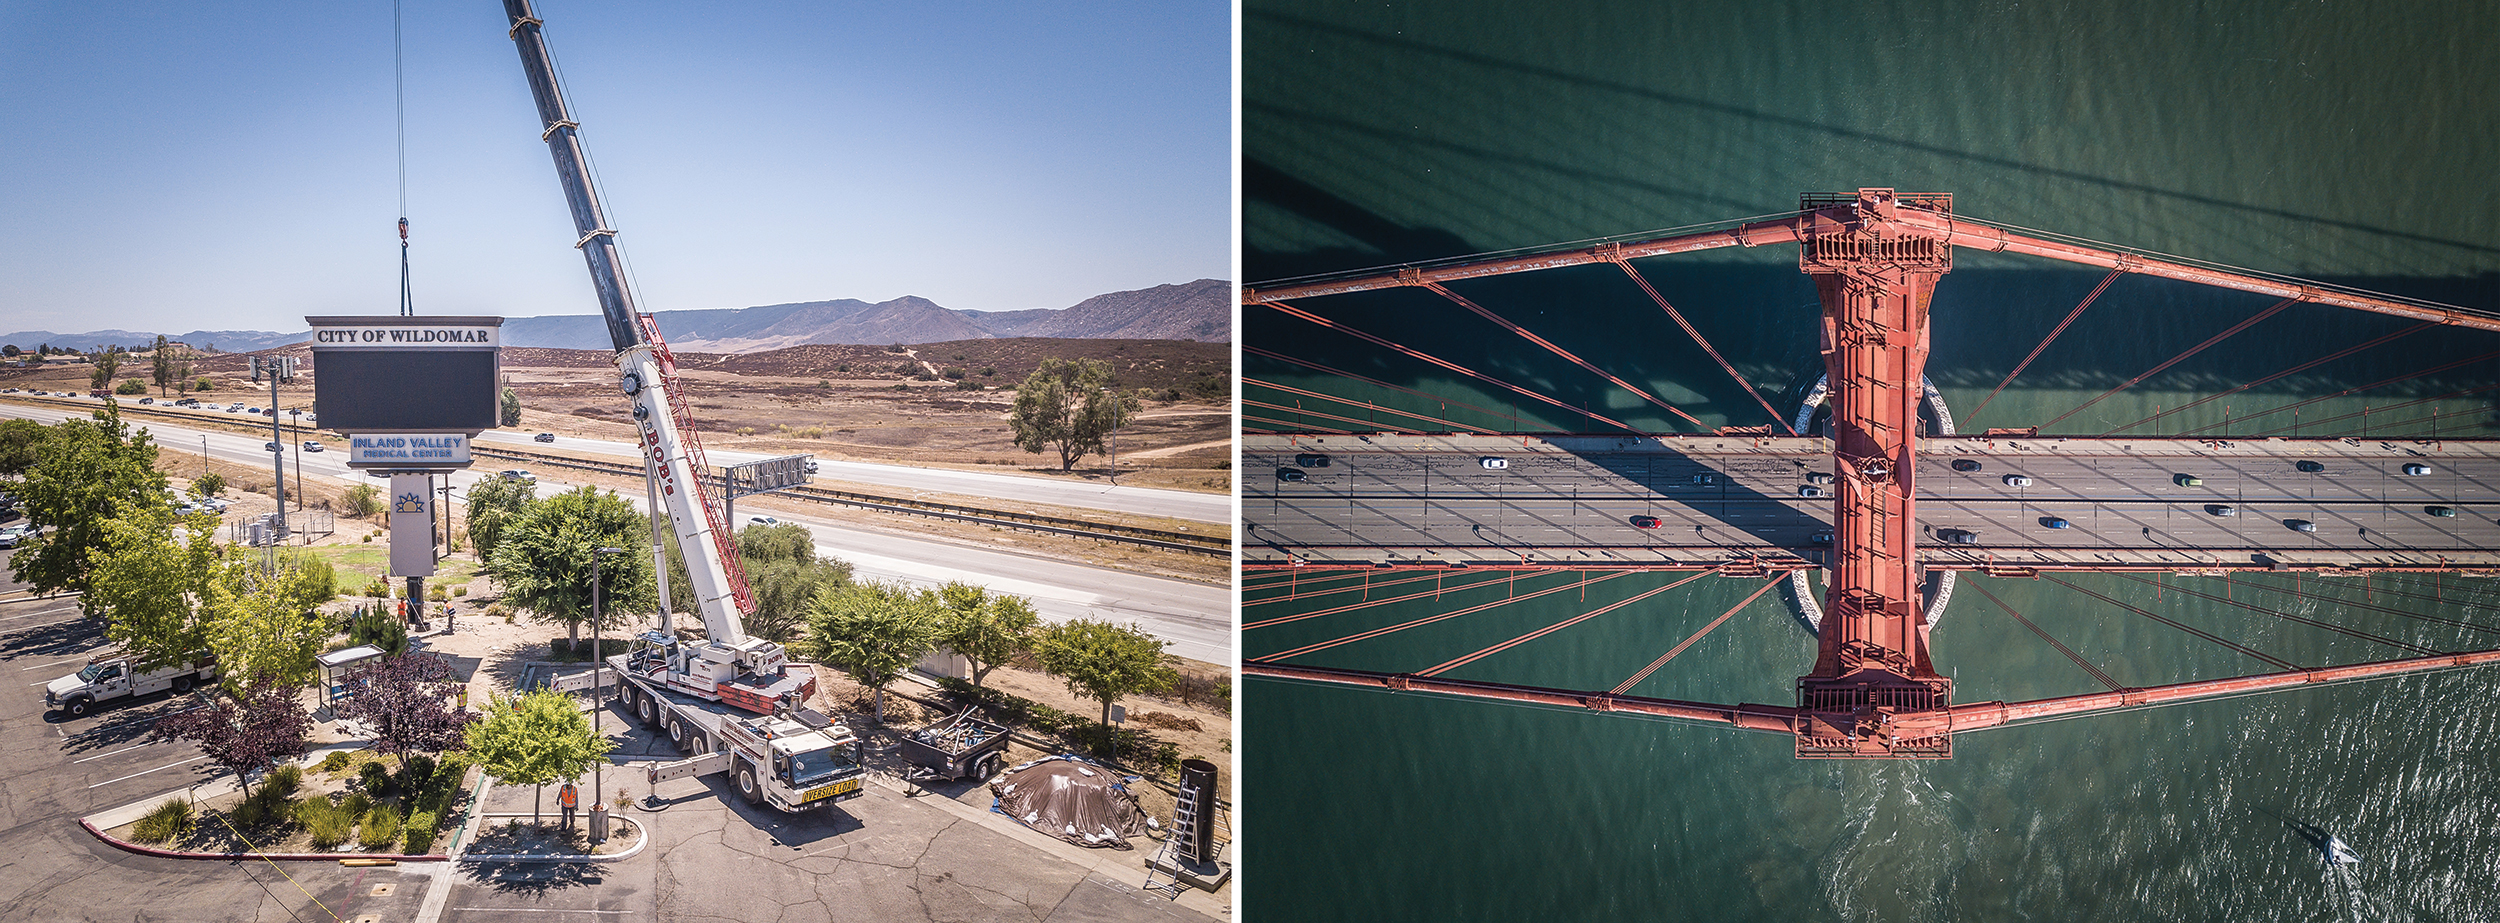
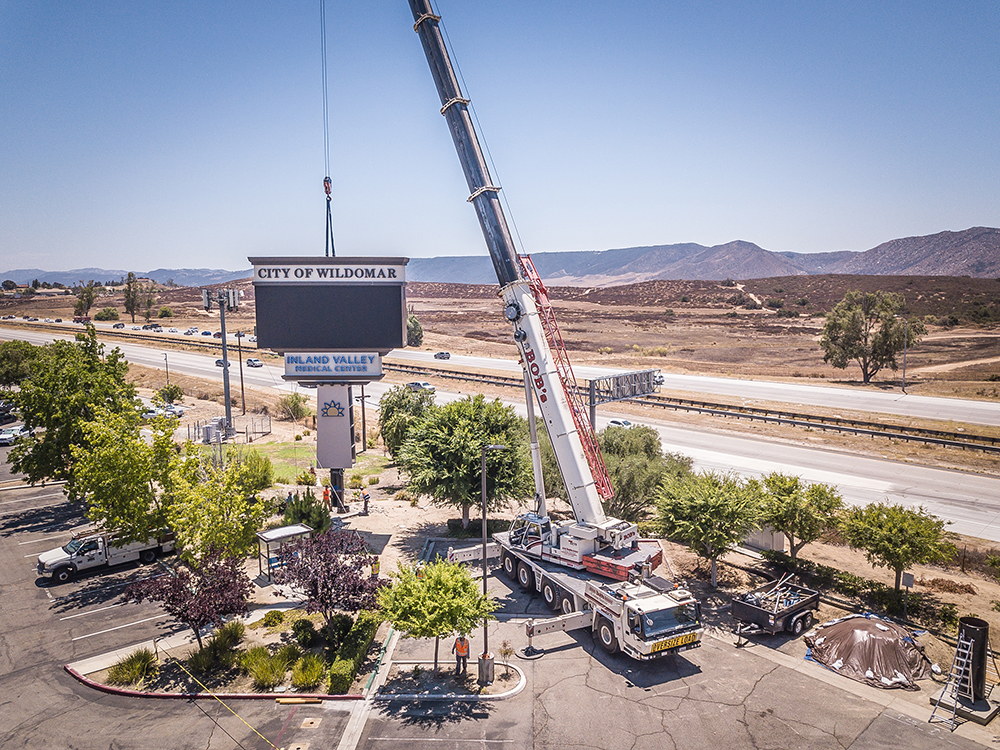
It’s not every day we have a 175-ton crane onsite to relocate an existing 30,000-lb. pylon sign. I was onsite for about five days straight and ended up using every lens I had to capture all of the steps involved for a variety of angles and perspectives. All of which I think tell an amazing story, but nothing helps capture the scale like putting a camera up in the air … wherever you want it. On a project like this, I will capture a few minutes of video and 30-40 images from various angles to help sprinkle some dynamic perspectives into the storyline. Just in case you were wondering … the project went smoothly and without issue!
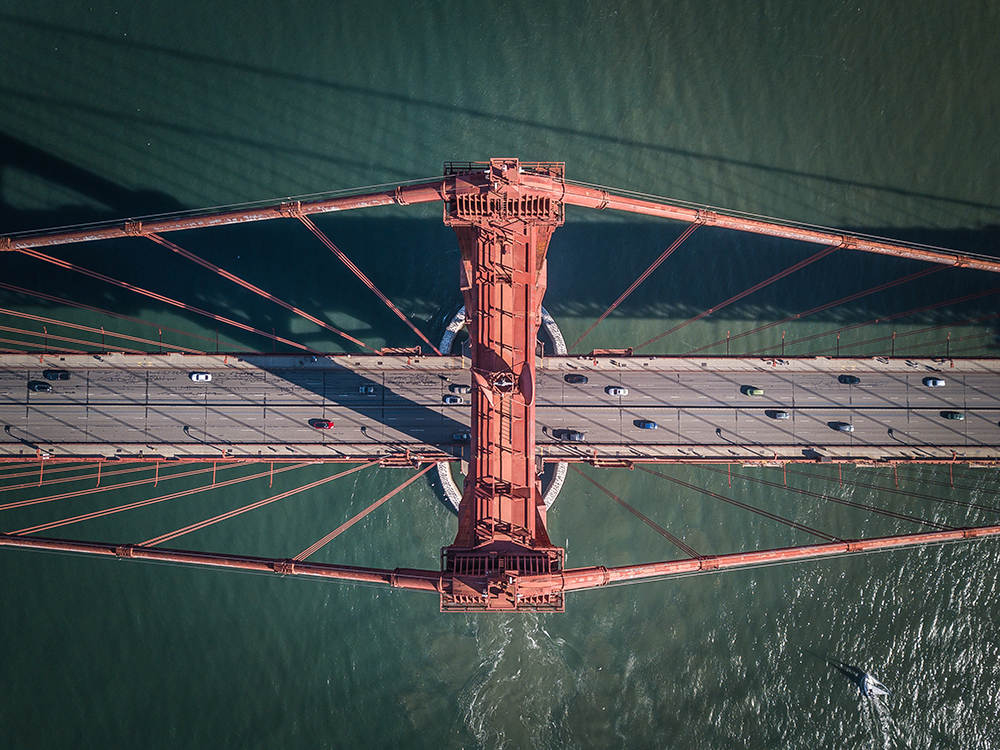
DRONE
Clearly not a requirement to marketing your capabilities, but what a great way to spice things up. Not only can this investment be great for video and large-project photography, but I have used our drone for several surveys to capture just the right perspective of a pylon and help make our designers’ job a little easier. Although there may be licensing and registration requirements and restrictions on where you can fly, I think it adds a very special perspective for your customers and potential clients to enjoy. Imagine your big crane lifts, pylon service, high-rise installations and wall murals captured at heights only a drone can provide. Although I don’t use ours often, when the right project demands, it is worth its weight in gold.
Tip: As you can imagine, flying a drone is a skill itself and perhaps not for everyone. If you do decide to take the plunge I strongly suggest enough batteries for two-plus hours of flight time and an extra memory card. Make it your new hobby, and really invest some time in basic drone operation so that you can easily whip it out and use all of its pre-programmed features to their maximum potential. This investment has the potential to take your marketing and product showcase to the next level!
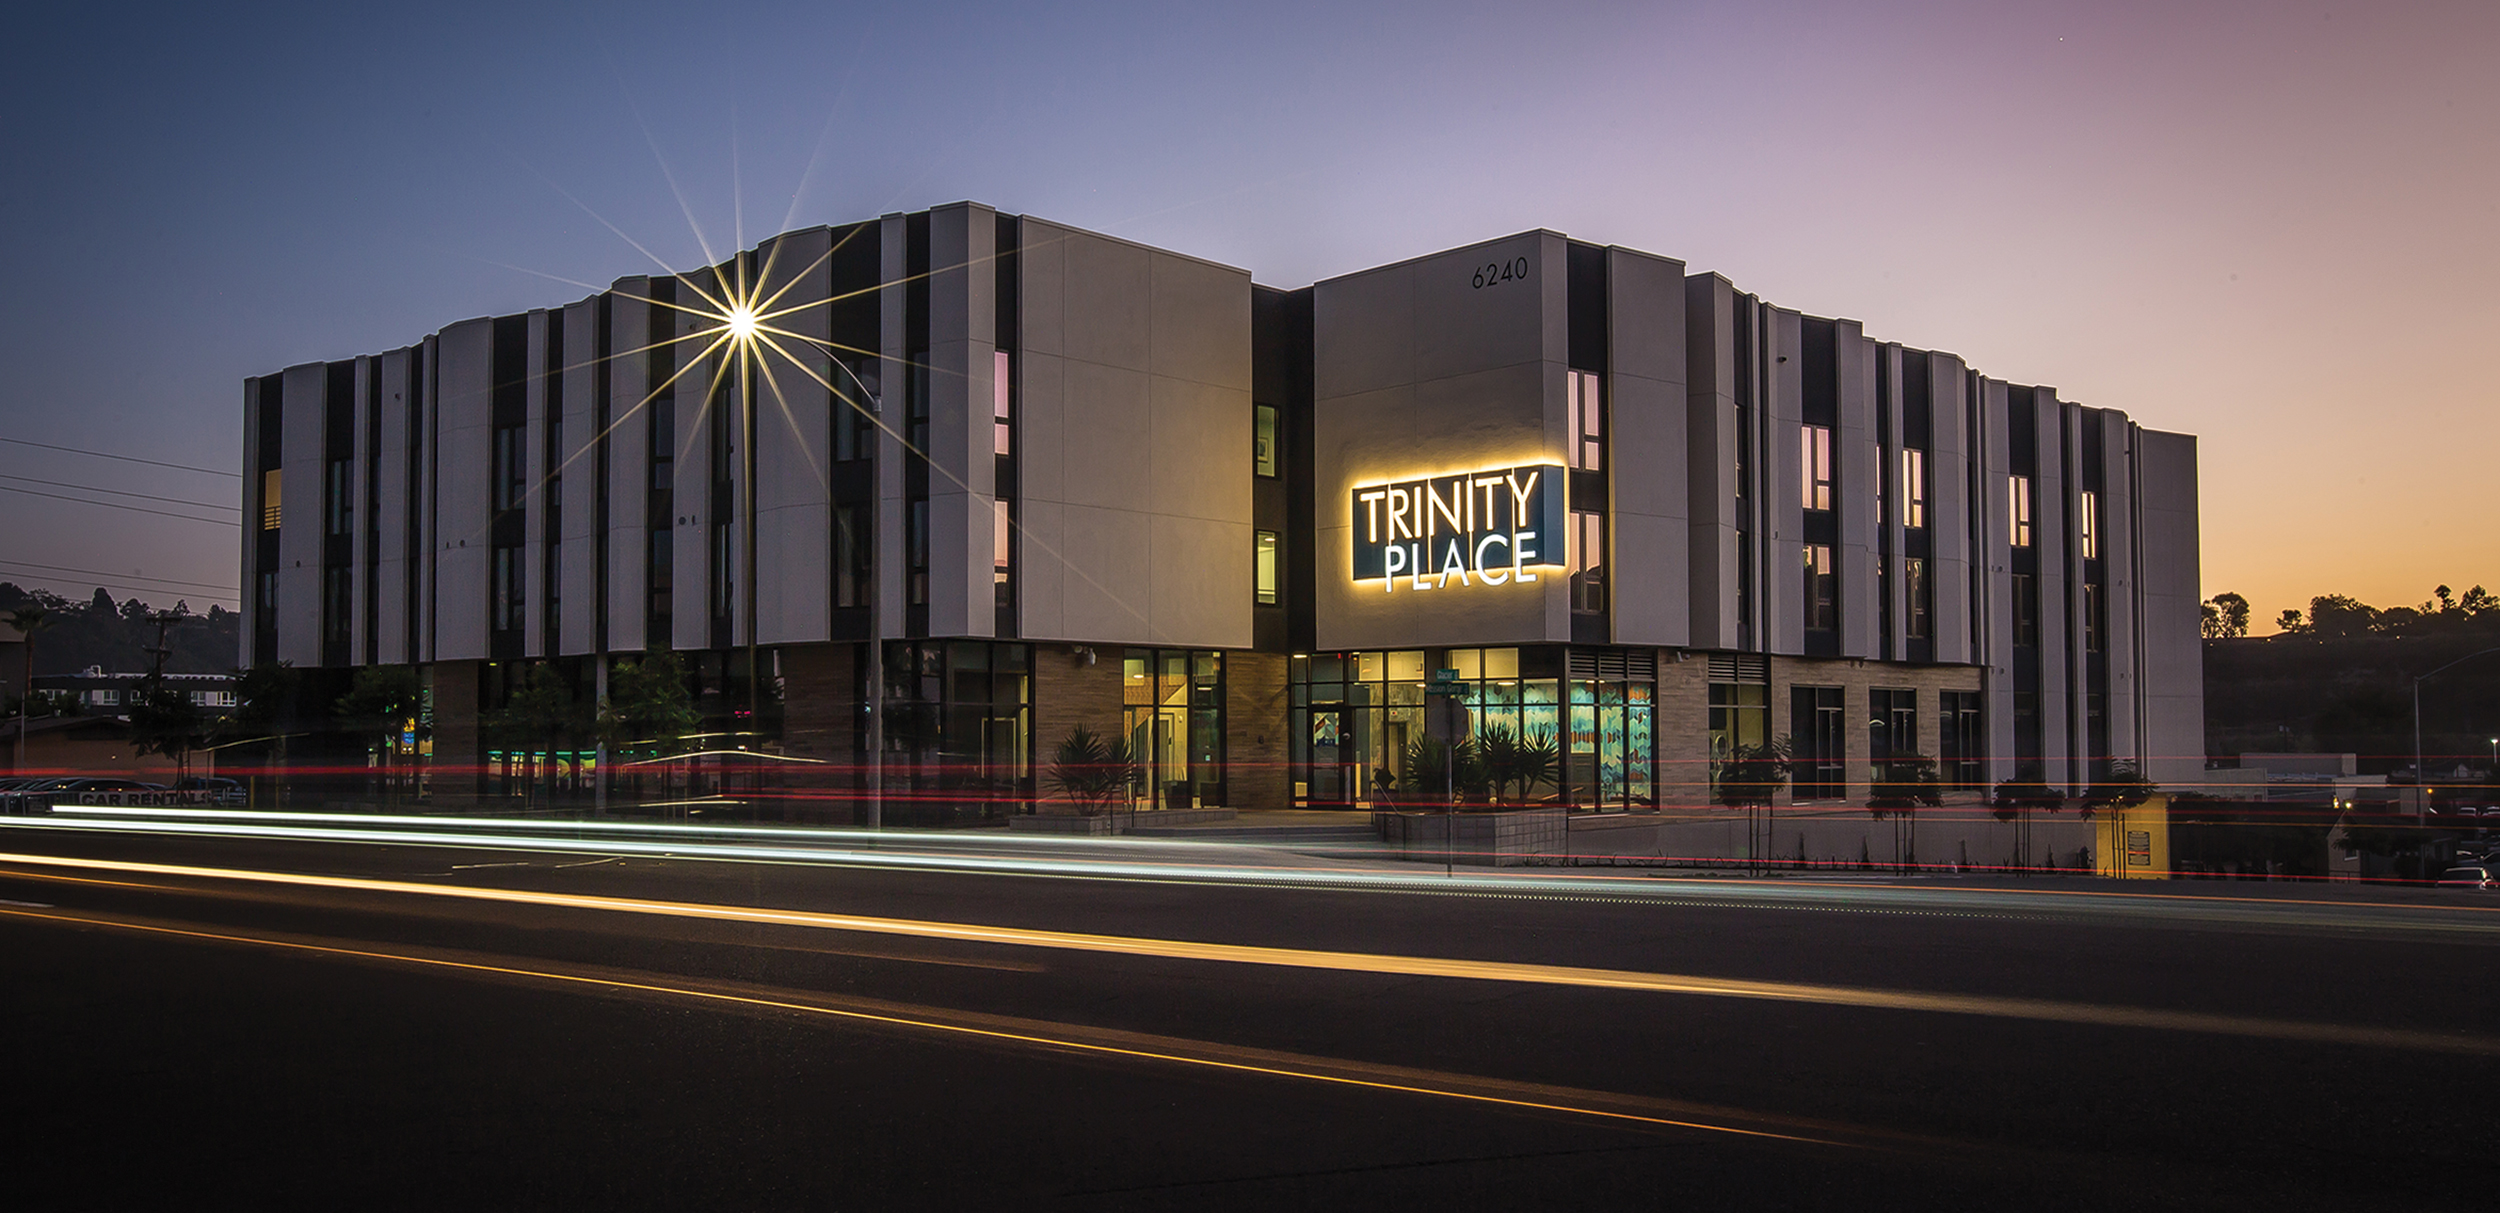
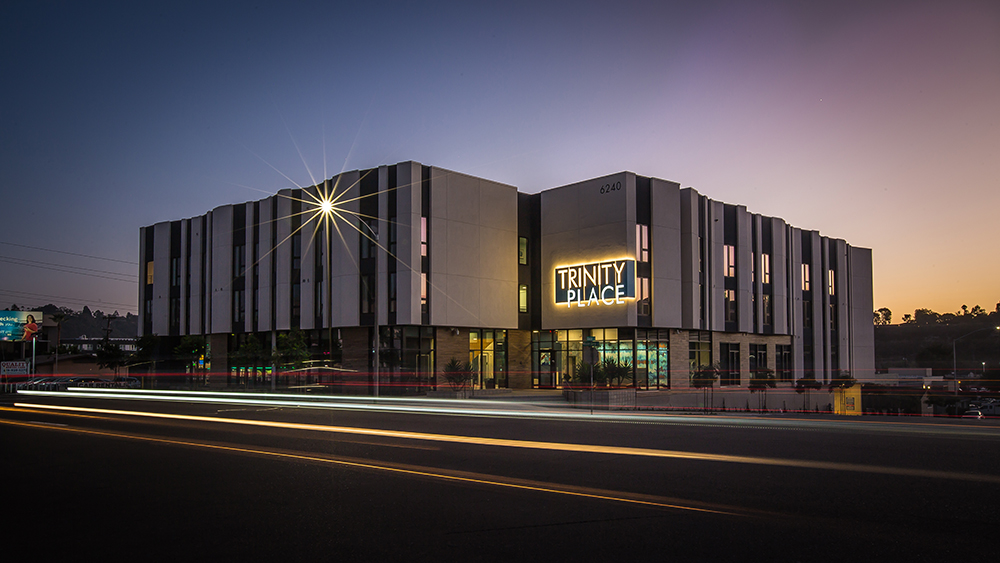
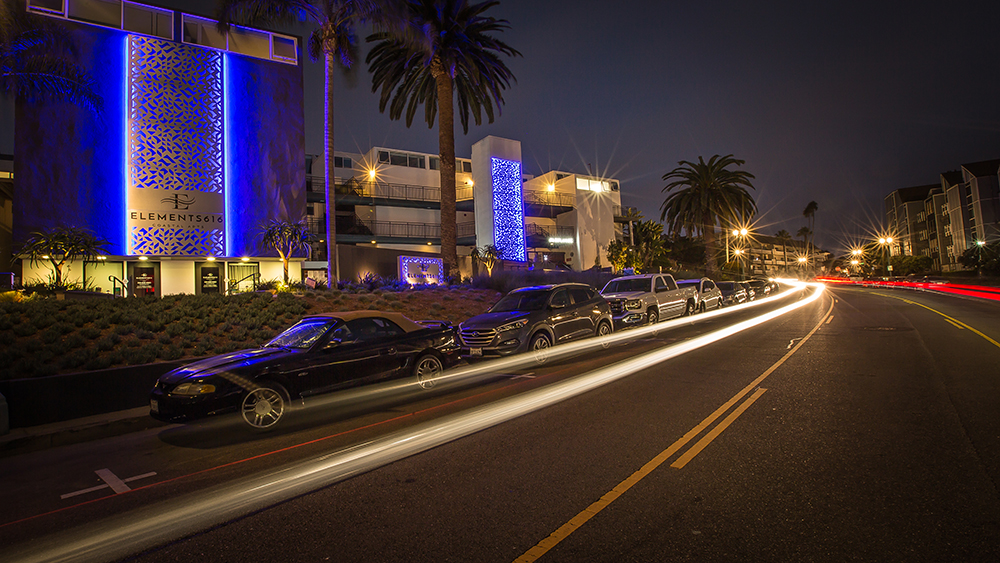
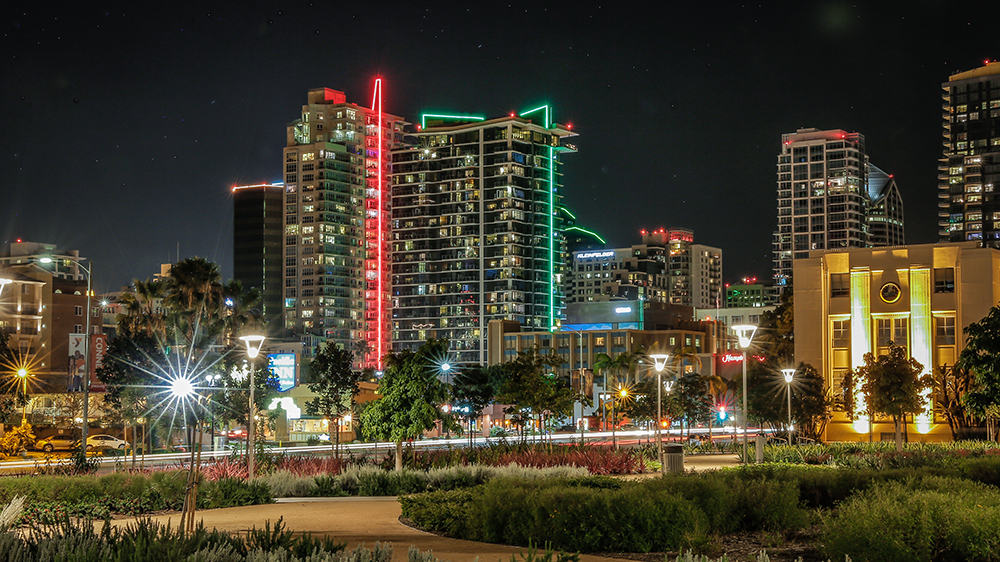
Sunsets are one of my favorite times to shoot, but also the most stressful. With an hour drive to the site on a Friday night after work, you sit and wait for the sun to set, and hope your sign turns on at the right time! There are a lot of variables here if you have not scouted the site in advance. In this case, my only frustration was that only one of the building lights was on, and I did not coordinate this shot in advance in order to ask. Regardless, I found my spot across the street. Began testing which exposure time would brighten the picture enough with a fully clinched aperture on my 16-30mm. Once you get it dialed in, make sure you have your shutter on a 3-second delay to avoid vibration and time your long exposures with traffic to create some light art in the foreground of what is hopefully a masterpiece of a sign project in the background! Edited in Lightroom. Manual Settings (16-35mm @ 30mm f/22 – 5-sec exposure – ISO100)
NIGHT
I have saved the best and most challenging for last: the dreaded night shot. Prior to our investment in a full-frame DSLR, I really struggled to capture even a C-grade image. Lack of resolution and proper exposure control make this task a challenge for your typical point-and-shoot or smartphone. This is when your investment in a tripod and knowledge of manual mode will pay dividends. A few YouTube tutorials will have you capturing professional images with light stars and headlight trails in no time.
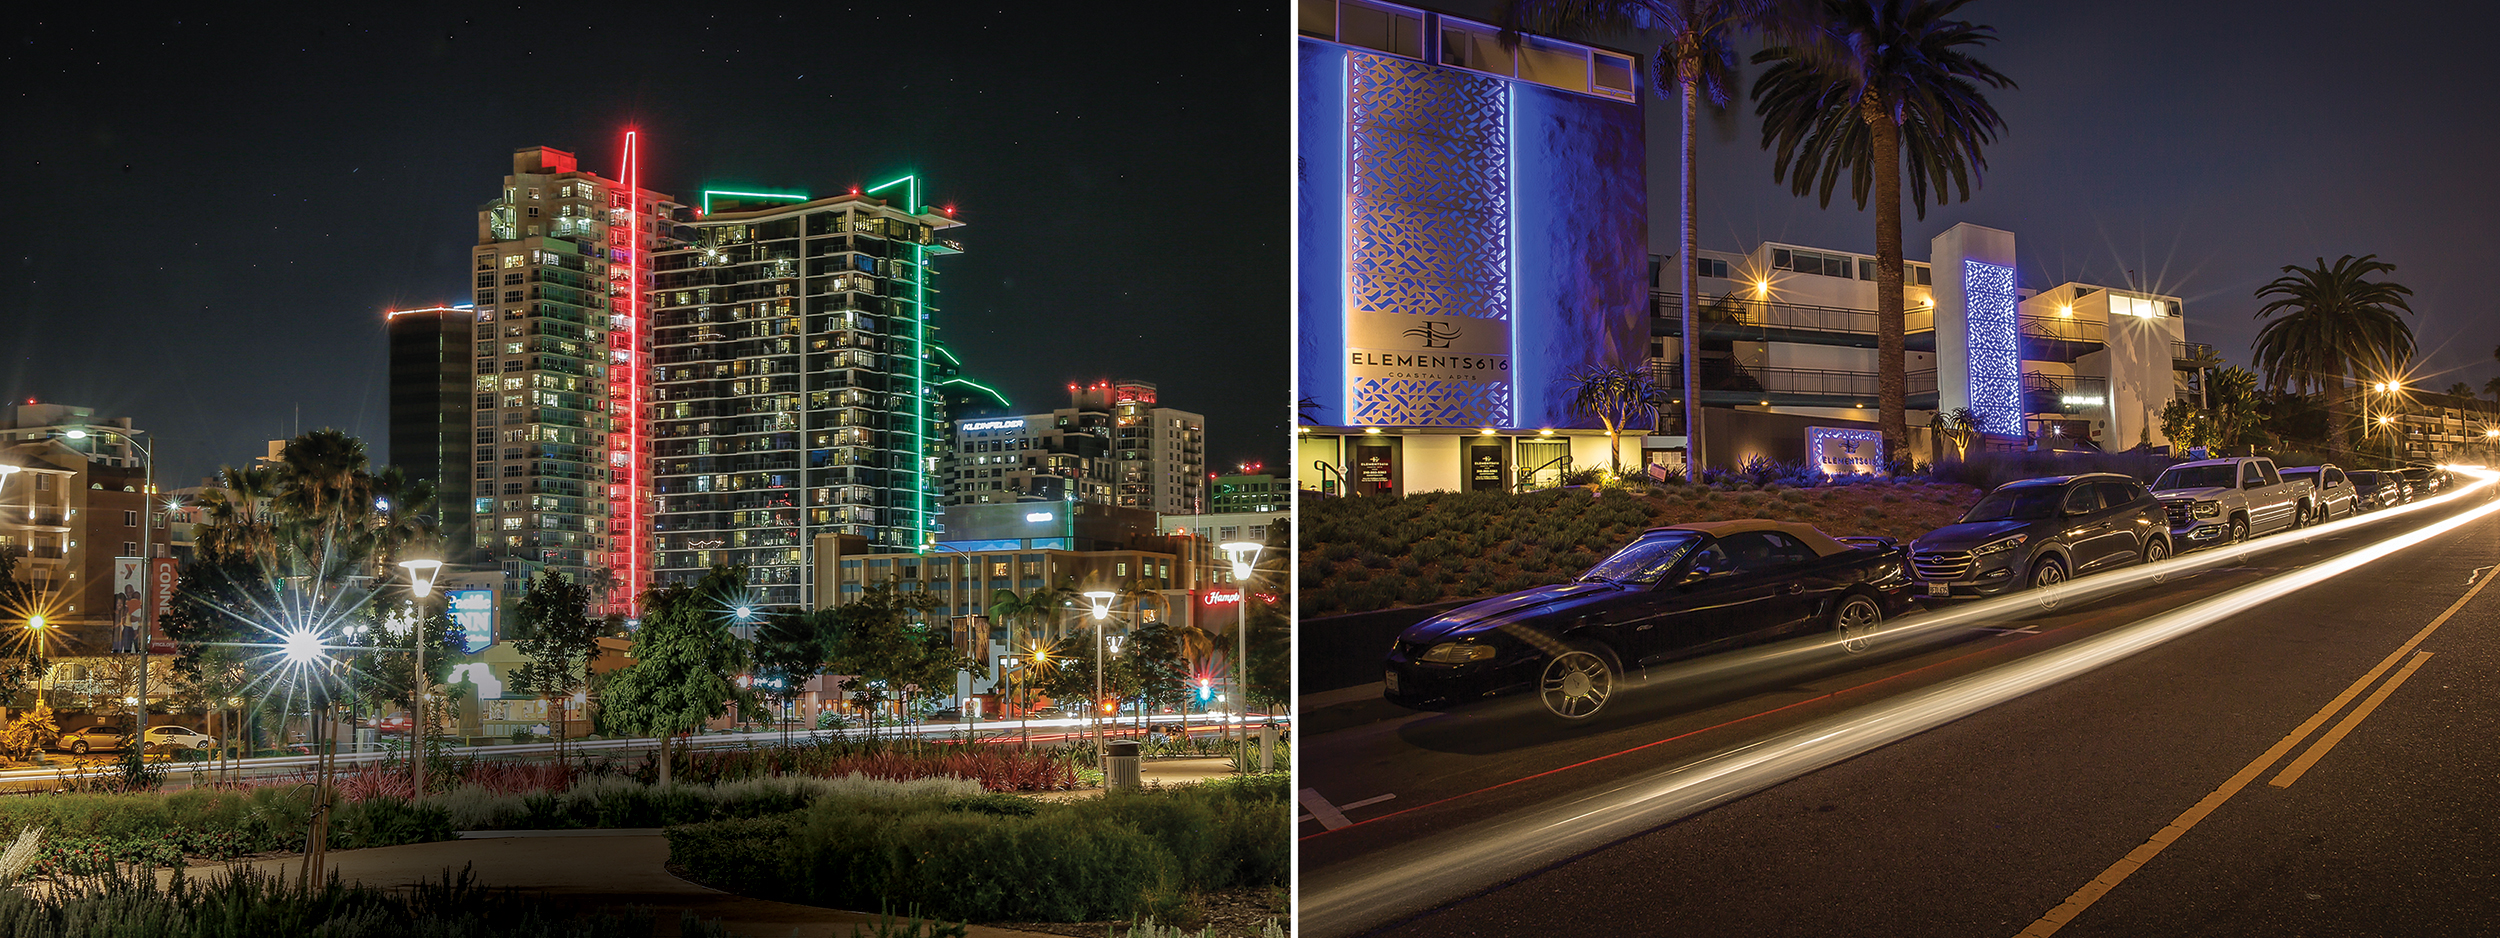
Tip: Practice at home or near a road at sunset, so as to not waste hours at a job site just to trash the images later. Set up your tripod, wait for a few minutes after sunset, adjust your focus to manual, set your ISO to 500 or less, slow your shutter to 30 seconds and adjust your aperture to balance your exposure. With your aperture close to f/20 you will get some great light stars, and if you time the shutter with passing cars you will add some interesting light art to your composition. Trust me when I say this will take some time and a lot of trial and error to perfect. But the reward is well worth the investment, and you will now be considered armed and dangerous enough to showcase your work in the best light possible. Once you have this down, consider attempting a long-exposure timelapse.
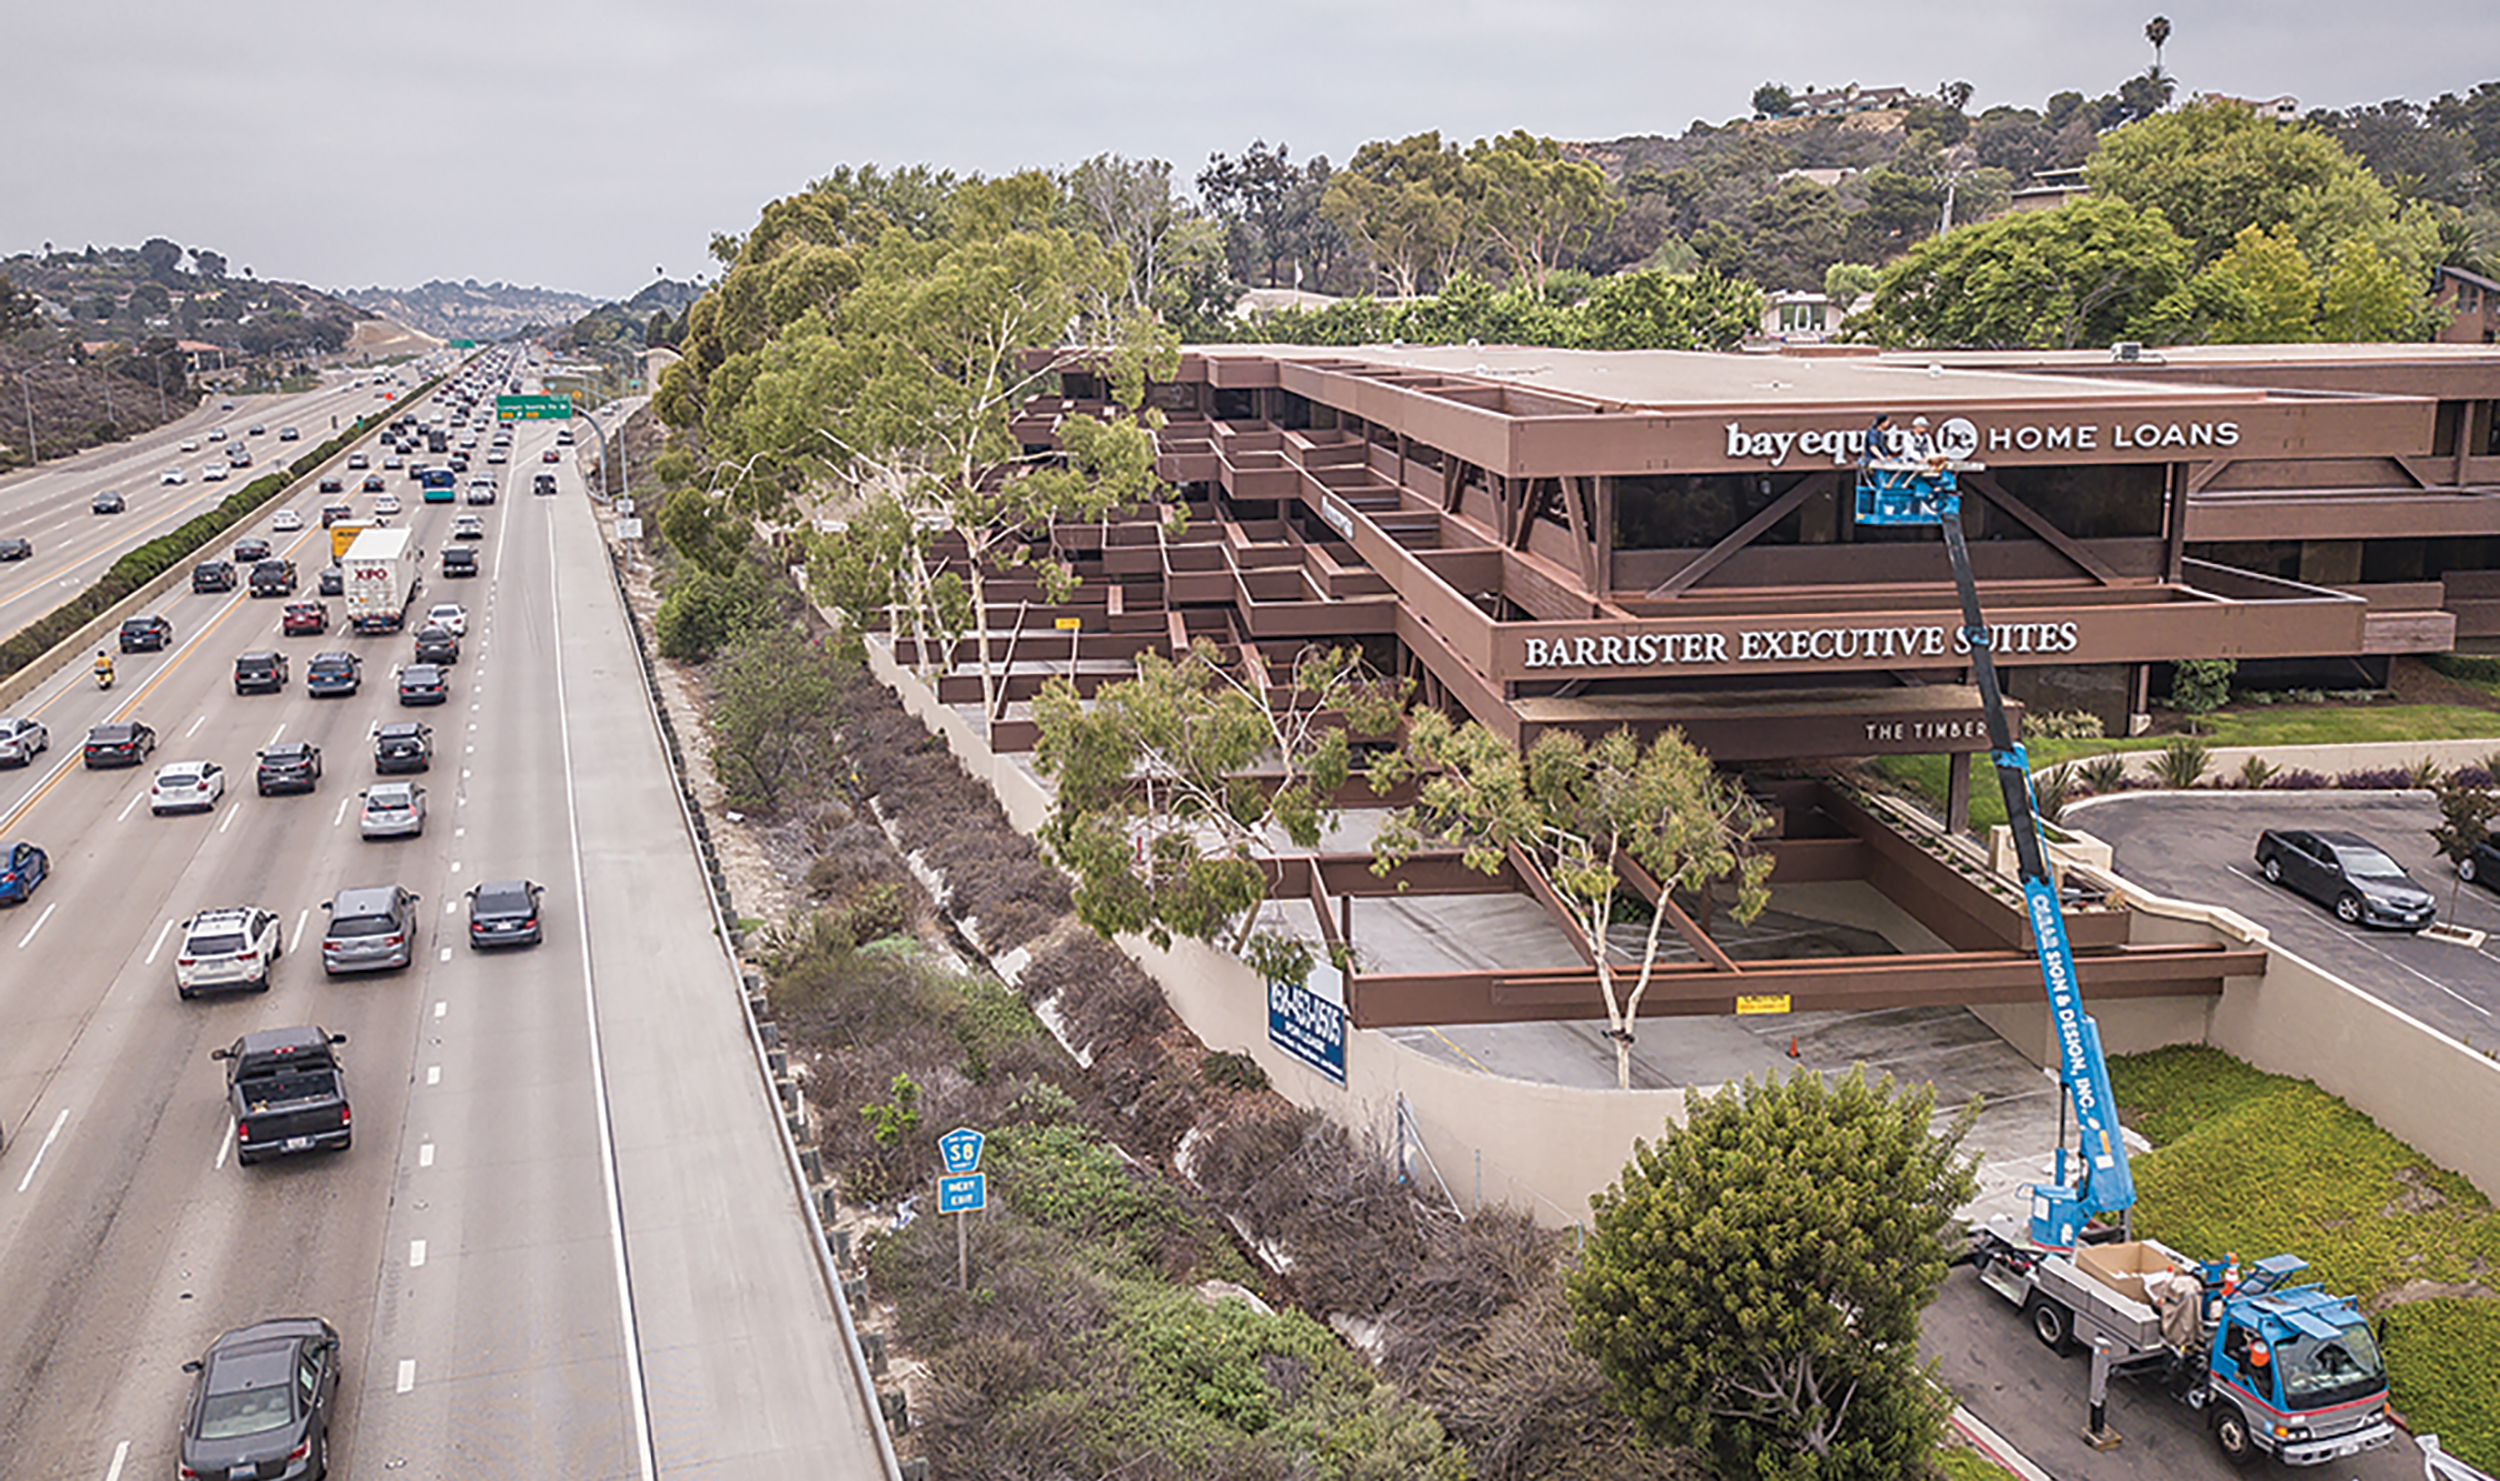
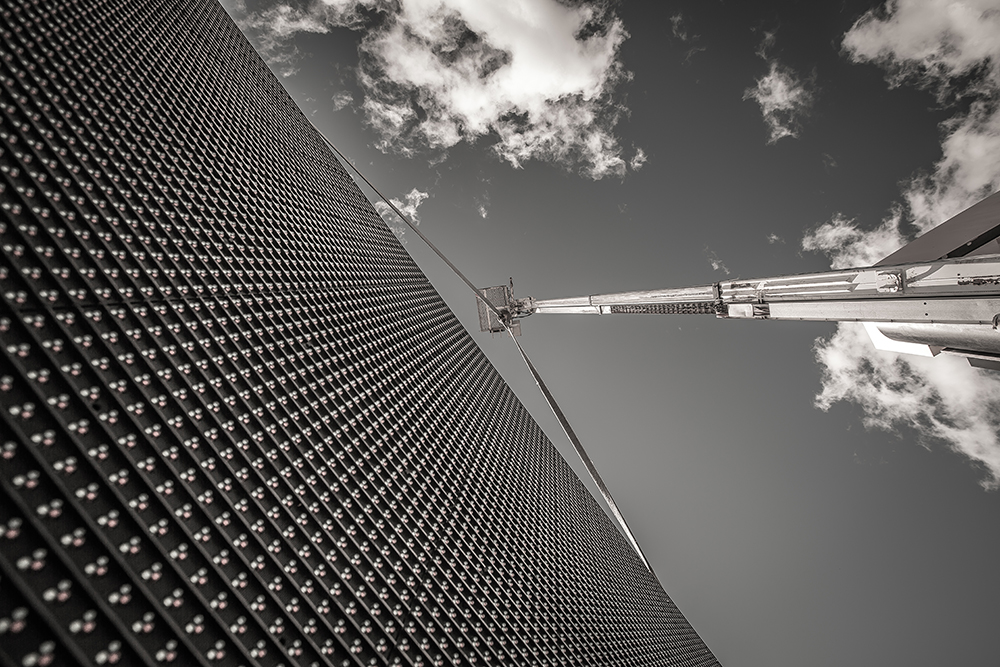
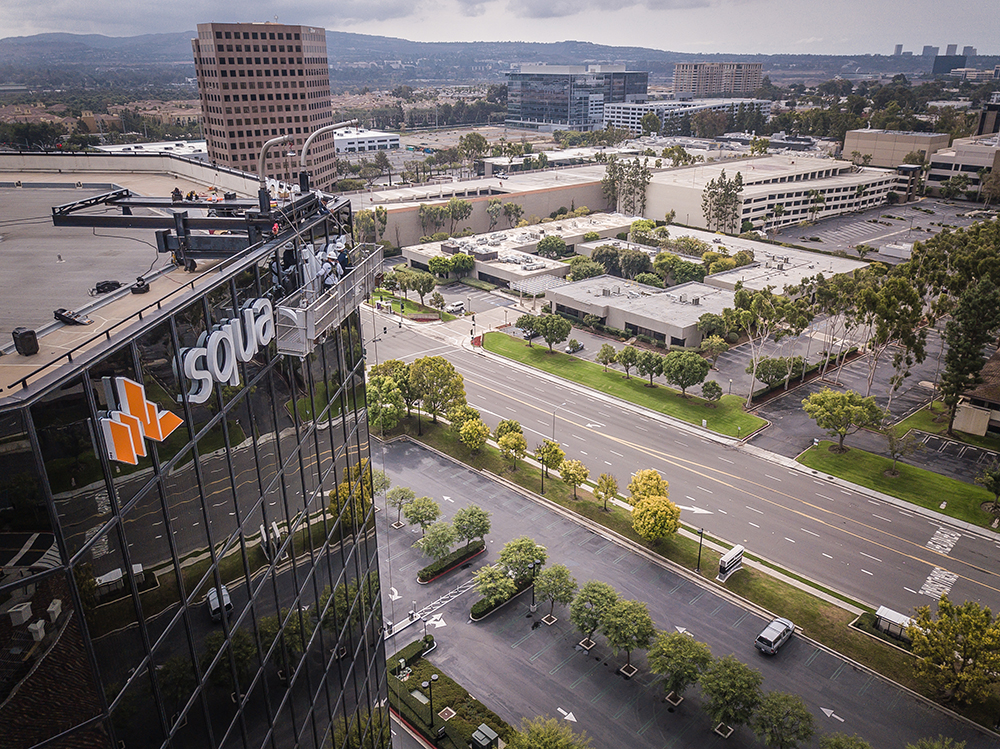
Having a stationary subject like two techs hanging out in a swing stage is a great opportunity to try to capture some interesting angles. I started at an adjacent parking garage to try and get a straight on, and even had time to put the drone in the air for some video. Just as I was leaving, I walked over to adjust a few cones, and looked up (with my hard hat on of course) and was captured by the geometric lines and reflection from the sky on the glass façade. I made a few adjustments, captured images in both portrait and landscape modes, and fell in love with this one. Edited in Lightroom. Manual Settings (70-200mm @ 70mm f/2.8 – 1/640 exposure – ISO100)
“Finding the art in all that you do…” Although this is our company motto which resonates in our offices and halls daily, I think it is also a great rule of thumb as you develop your skills as a photographer. As I walk various job sites, rooftops, production departments and offices, I can’t help but capture those obscure moments and perspectives so that I can sprinkle them into my storylines and showcases. Art is in the eye of the beholder, and I really enjoy creating art in geometric lines, background colors and patterns. As you continue to develop your craft, I hope this helps fuel your passion to improve and evolve as a photographer. If you have any questions, feel free to email me at gabe@clearsigns.com.
Gabe Griffin’s Photography Toolbox Core Components:
- Canon 5D Mark III
- Canon 70-200mm f/2.8 L
- Canon 16-35mm f/2.8 L
- Canon 24-70mm f/2.8 L
- Canon 100mm Macro
- Canon 50mm f/1.4
- Intervalometer
- Tripod
- DJI Mavic PRO
- Canon 430ex Speedlight
- Remote triggers
- Adobe Lightroom
- Lots of memory and battery backup
PHOTO GALLERY (35 IMAGES)


Introducing the Sign Industry Podcast
The Sign Industry Podcast is a platform for every sign person out there — from the old-timers who bent neon and hand-lettered boats to those venturing into new technologies — we want to get their stories out for everyone to hear. Come join us and listen to stories, learn tricks or techniques, and get insights of what’s to come. We are the world’s second oldest profession. The folks who started the world’s oldest profession needed a sign.


Avery Dennison Adopts Mimaki Printer for Traffic Sign Print System

Fiery Releases SignLab 11

21 Larry Albright Plasma Globes, Crackle Tubes and More


Bulletins
Get the most important news and business ideas from Signs of the Times magazine's news bulletin.
-

 Tip Sheet2 days ago
Always Brand Yourself and Wear Fewer Hats — Two of April’s Sign Tips
-

 Business Management1 week ago
When Should Sign Companies Hire Salespeople or Fire Customers?
-

 Women in Signs2 weeks ago
2024 Women in Signs Award Winners Excel in Diverse Roles
-

 Real Deal3 days ago
A Woman Sign Company Owner Confronts a Sexist Wholesaler
-

 Editor's Note1 week ago
Why We Still Need the Women in Signs Award
-

 Maggie Harlow2 weeks ago
The Surprising Value Complaints Bring to Your Sign Company
-

 Line Time2 weeks ago
One Less Thing to Do for Sign Customers
-

 Product Buying + Technology1 week ago
ADA Signs and More Uses for Engraving Machines